Blackfathom Deeps, usually called BFD, is a five-player WoW Forever dungeon located on the Zoram Strand in Ashenvale. The current Forever version is designed around levels 24–32 and normally takes an experienced group about 25–35 minutes to clear.
BFD is especially valuable as a quest-loaded run. Alliance and Horde have different quest packages, Warlocks need the dungeon for The Orb of Soran'ruk, Paladins can need it for their class weapon chains, and Horde players can summon the additional Baron Aquanis encounter through Amongst the Ruins.
Quick answer: prepare your faction quests before travelling, collect Aku'Mai Sapphires and other outside objectives on the approach, kill the six primary dungeon bosses, complete Blackfathom Villainy at Twilight Lord Kelris, activate the four Fire of Aku'mai braziers one at a time, and finish with Aku'mai. Horde groups with Amongst the Ruins should also summon Baron Aquanis.
| Blackfathom Deeps | Details |
|---|---|
| Level range | 24–32 |
| At-level target | About level 25 |
| Location | Zoram Strand, Ashenvale |
| Group size | 5 players |
| Primary bosses | 6 |
| Quest encounters | Lorgus Jett, Baron Aquanis |
| Final boss | Aku'mai |
| Estimated full run | 25–35 minutes |
| Important class quests | Warlock and Paladin |
Blackfathom Deeps Location and Entrance
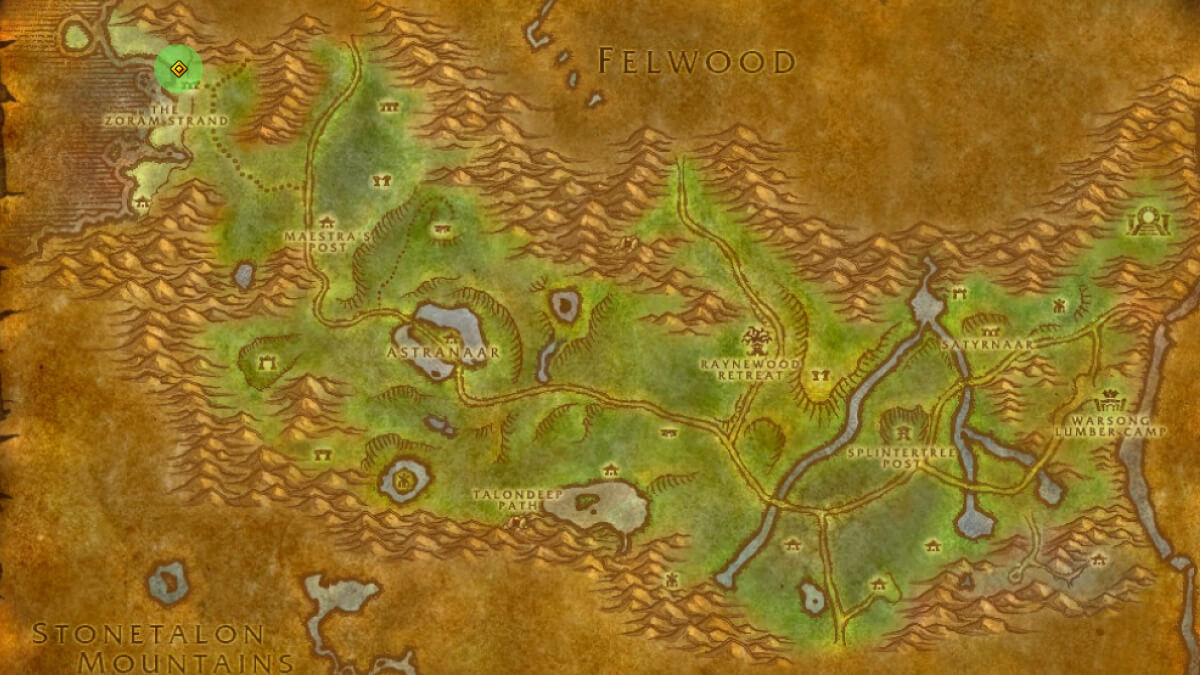
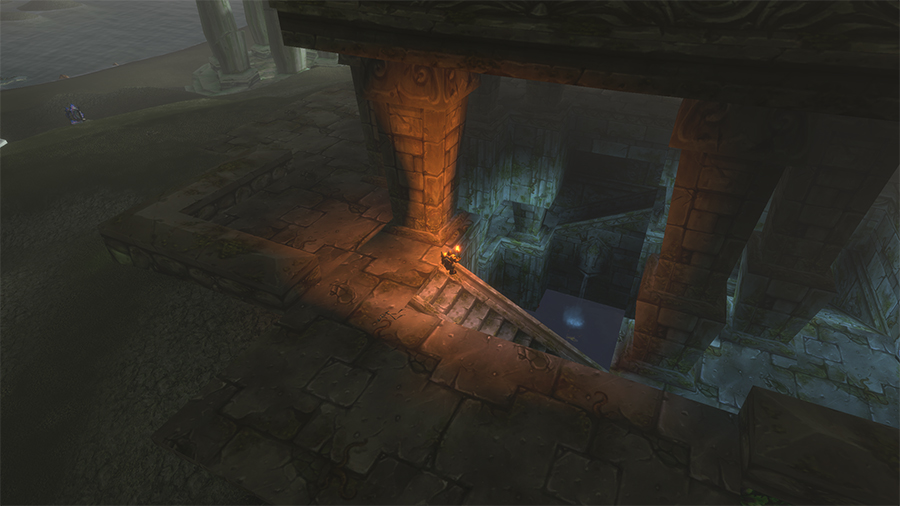
Blackfathom Deeps is in the northwestern part of Ashenvale at Zoram Strand. The exterior ruins lead into a stair-lined shaft, followed by an underwater passage that reaches the dungeon portal.
Alliance Route
Alliance players can travel through Darkshore and move south from Auberdine toward Ashenvale. WoW Forever also makes this route easier through the Stormwind Harbor connection to Auberdine.
Astranaar is another useful Alliance staging point. From there, travel northwest toward Zoram Strand.
Horde Route
Horde has a convenient flight path at Zoram'gar Outpost. If you have not unlocked it yet, do so before the dungeon because several Horde BFD quests are turned in there.
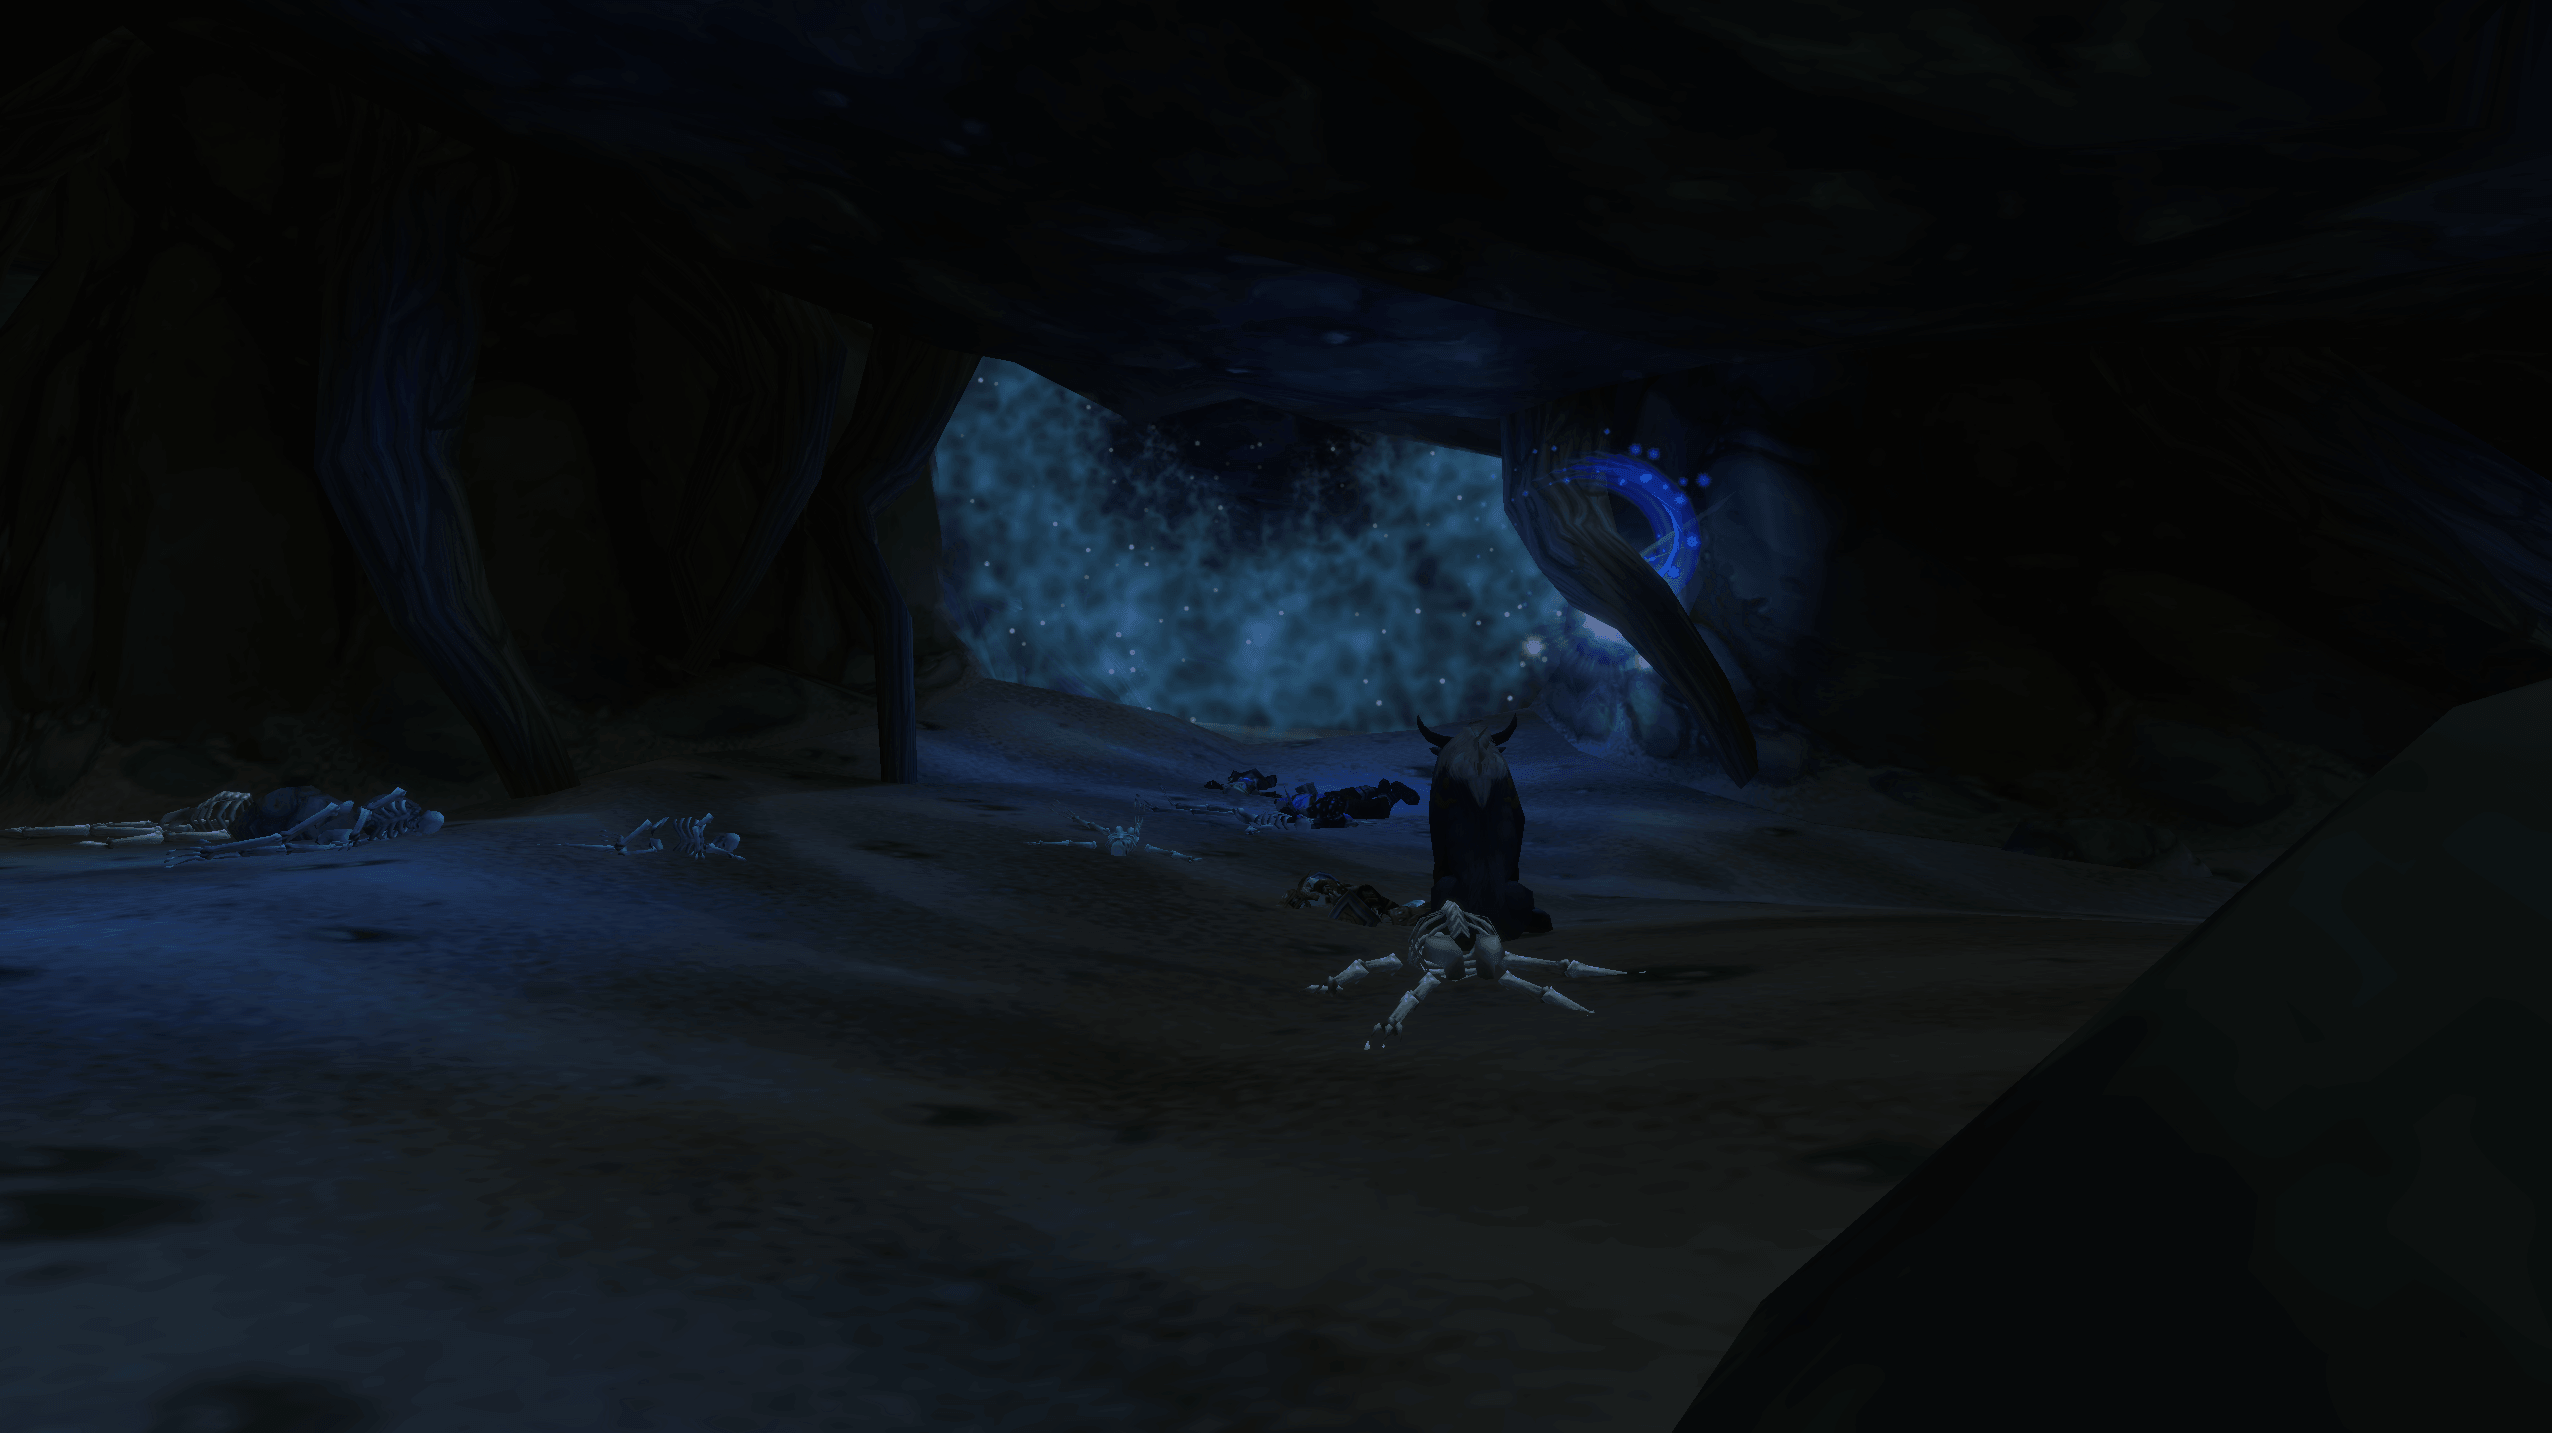
All Blackfathom Deeps Quests
Quest preparation matters more in BFD than in many early dungeons because Alliance and Horde have very different quest packages and several objectives begin outside the instance.
Alliance Quests
| Quest | Level | Start | Objective |
|---|---|---|---|
| Knowledge in the Deeps | 10 | Gerrig Bonegrip, Ironforge | Recover the Lorgalis Manuscript from an underwater lockbox after Ghamoo-Ra. |
| Researching the Corruption | 18 | Gershala Nightwhisper, Auberdine | Collect 8 Corrupted Brain Stems from creatures in and around BFD. |
| Twilight Falls | 20 | Argent Guard Manados, Darnassus | Collect 10 Twilight Pendants from Twilight's Hammer enemies. |
| In Search of Thaelrid | 18 | Dawnwatcher Shaedlass, Darnassus | Find Argent Guard Thaelrid inside BFD and unlock Blackfathom Villainy. |
| Blackfathom Villainy | 18 | Argent Guard Thaelrid inside BFD | Kill Twilight Lord Kelris and recover the Head of Kelris. |
Horde Quests
| Quest | Level | Start | Objective |
|---|---|---|---|
| The Essence of Aku'Mai | 17 | Je'neu Sancrea, Zoram'gar Outpost | Collect 20 Sapphires of Aku'Mai from the outer ruins and approach. |
| Allegiance to the Old Gods | 17 | Damp Note → Je'neu Sancrea | Kill Lorgus Jett inside Blackfathom Deeps. |
| Blackfathom Villainy | 18 | Head of Kelris / Thaelrid progression | Kill Twilight Lord Kelris and complete the faction version of the quest. |
| Amongst the Ruins | 21 | Je'neu Sancrea | Loot the Fathom Core; doing so summons Baron Aquanis. |
| Baron Aquanis | 21 | Strange Water Globe from Baron Aquanis | Return the globe to Je'neu Sancrea. |
Blackfathom Deeps Class Quests
Warlock — The Orb of Soran'ruk
Both factions can complete The Orb of Soran'ruk. Doan Karhan near Camp Taurajo sends Warlocks to gather components from Blackfathom Deeps and Shadowfang Keep.
Make sure the quest is active before running BFD if you are progressing the Warlock class chain.
Alliance Paladin — The Test of Righteousness
The Verigan's Fist chain requires Paladins to collect materials from several dungeons. Blackfathom Deeps provides the Purified Kor Gem portion of the progression.
Horde Paladin — A Moon-Kissed Blade
A Moon-Kissed Blade is the Horde counterpart in Forever. Its weapon chain also sends Paladins through multiple early dungeons, including Blackfathom Deeps for the Purified Kor Gem.
If you are following the full weapon chain, The Deadmines supplies Whitestone Oak Lumber, Shadowfang Keep is tied to the enchanted silver component, and BFD provides the Kor Gem objective.
Explore services related to this guide, selected from our Dungeons catalog.
View All Dungeons Services
Blackfathom Villainy: Where Is Thaelrid?
Blackfathom Villainy is one of the strongest search intents around this dungeon. Alliance players first take In Search of Thaelrid in Darnassus.
Argent Guard Thaelrid is found in an alcove in the early section of BFD, southwest of Ghamoo-Ra's area. Speak with him to receive Blackfathom Villainy.
The quest then requires the Head of Kelris from Twilight Lord Kelris near the end of the dungeon.
Current quest rewards include:
- Arctic Buckler;
- Gravestone Scepter.
Amongst the Ruins and Baron Aquanis
Baron Aquanis is a Horde quest encounter, not one of Method's six primary BFD bosses.
With Amongst the Ruins active, interact with the Fathom Stone in the large underwater chamber beneath the walkway leading toward the later section of BFD. Looting the Fathom Core summons Baron Aquanis.
After killing him, loot the Strange Water Globe. It starts the Baron Aquanis quest, which rewards a choice between:
- Outlaw Sabre;
- Witch's Finger.
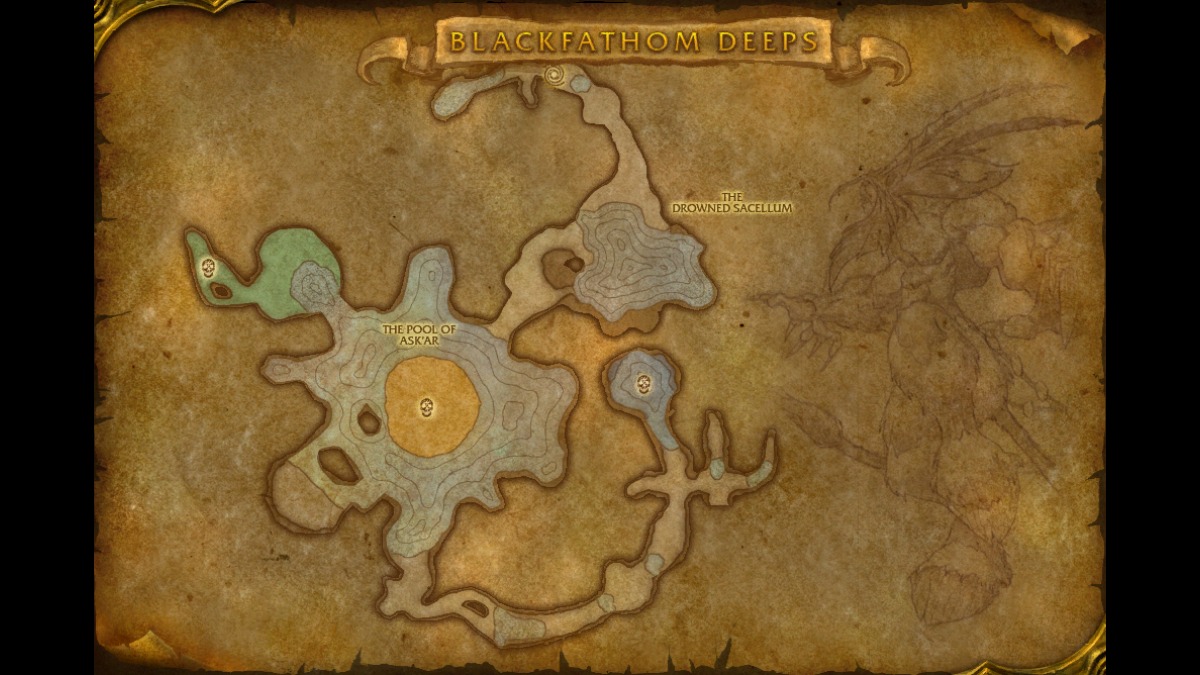
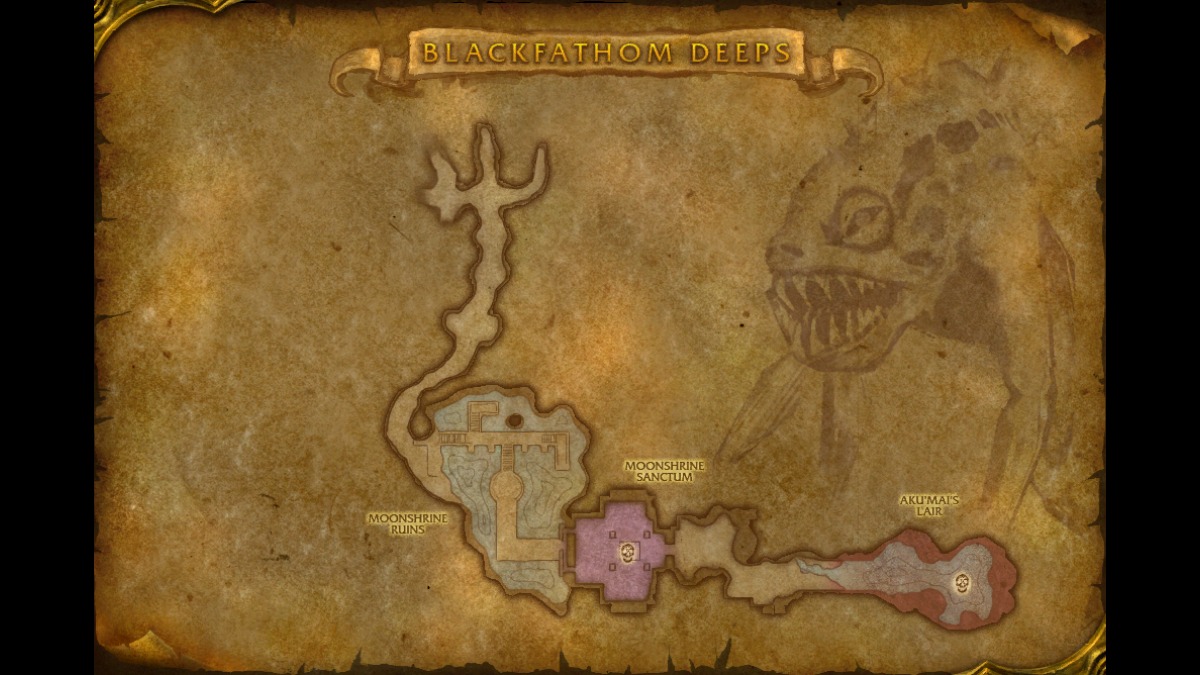
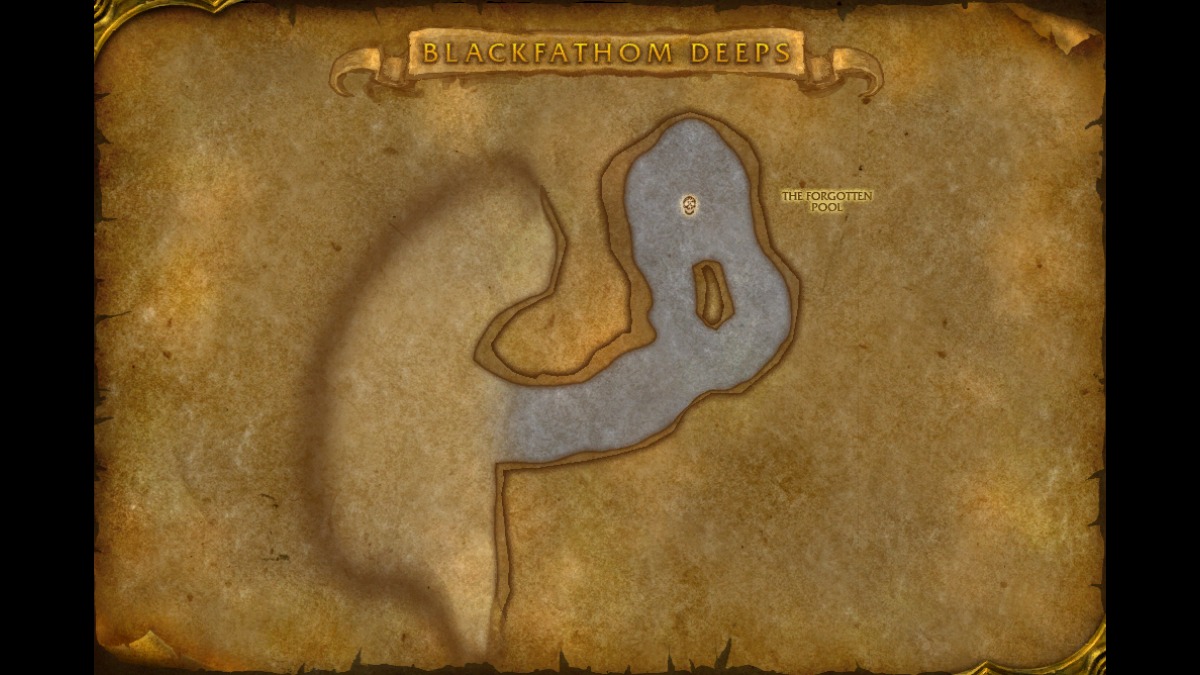
Blackfathom Deeps Maps
BFD is broadly linear, but underwater side areas, Lady Sarevess, Old Serra'kis and the Fathom Core make navigation less obvious than it first appears.
Opening Section
Middle Section
Kelris and Aku'mai Section
Recommended Full-Clear Route
- Collect outside quest objects such as Sapphires of Aku'Mai before entering.
- Kill Ghamoo-Ra.
- Find Thaelrid and pick up Blackfathom Villainy if required.
- Loot the Lorgalis Manuscript for Knowledge in the Deeps.
- Take the underwater side route to Lady Sarevess.
- Continue to Gelihast.
- Kill or complete Lorgus Jett if your Horde quest requires him.
- Kill Old Serra'kis if you want his loot.
- Horde groups with Amongst the Ruins should collect the Fathom Core and kill Baron Aquanis.
- Clear Twilight cultists while collecting Twilight Pendants.
- Kill Twilight Lord Kelris and loot the Head of Kelris.
- Activate the four Fire of Aku'mai braziers one at a time.
- Kill each summoned wave.
- Enter the final chamber and kill Aku'mai.
Blackfathom Deeps Bosses
| Encounter | Type | Main Mechanics |
|---|---|---|
| Ghamoo-Ra | Primary boss | Very high armor, Trample |
| Lady Sarevess | Primary boss | Forked Lightning, Frost Nova, Shoot, Slow |
| Gelihast | Primary boss | Net, dangerous surrounding Murloc packs |
| Old Serra'kis | Primary/optional side boss | Underwater fight, breath management |
| Twilight Lord Kelris | Primary boss | Mind Blast, Sleep |
| Aku'mai | Final boss | Poison Cloud, Frenzied Rage |
| Lorgus Jett | Quest encounter | Horde Allegiance to the Old Gods target |
| Baron Aquanis | Horde summoned quest encounter | Spawned by Fathom Core objective |
Ghamoo-Ra Strategy
Ghamoo-Ra has extremely high armor, so physical groups can experience a much slower fight than caster-heavy groups.
Use armor-reduction effects such as Sunder Armor and Faerie Fire where available. Trample deals AoE damage around the boss, so ranged players should keep their distance.
Ghamoo-Ra Loot
- Tortoise Armor — Mail Chest;
- Ghamoo-Ra's Bind — Cloth Waist;
- Spiked Shell Band — new Forever ring with Stamina and a Nature damage-shield effect.
Lady Sarevess Strategy
Lady Sarevess is reached through an underwater side passage and patrols with two Naga bodyguards.
Control at least one add and kill the other before focusing Sarevess. The tank should face her away from the group because Forked Lightning hits targets in front.
Frost Nova can root nearby players, after which Sarevess may step away and Shoot the tank. She can also apply Slow to a random target.
Lady Sarevess Loot
- Naga Battle Gloves — Leather Hands;
- Darkwater Talwar — Main-Hand Sword;
- Naga Heartpiercer — Bow.
Gelihast Strategy
The main danger is not Gelihast himself but the large number of Murlocs around his room. Pull them back in small packs before engaging the boss.
Gelihast uses Net, immobilizing a target for 10 seconds. A rooted tank near uncleared enemies can accidentally chain-pull the room.
Gelihast Loot
- Algae Fists — Mail Hands;
- Reef Axe — Two-Hand Axe;
- Cursed Murloc Eye — new Forever trinket that adds Shadow damage and deals increased damage to Murlocs;
- Blueprint: Fishing Rack — Fishing 140 camping blueprint.
Lorgus Jett
Lorgus Jett is required for the Horde quest Allegiance to the Old Gods. Even though Method does not count him among its six primary boss encounters, the Forever database records a dedicated new loot table for him.
Lorgus Jett Loot
- Twilight Maul — Two-Hand Mace;
- Treacherous Treads — Mail Feet;
- Fallenroot Longbow — Bow.
Old Serra'kis Strategy
Old Serra'kis is hidden underwater. The boss has no meaningful combat mechanic; the danger is your breath timer.
Clear nearby underwater enemies first and begin the encounter with a full breath bar. Warlock Unending Breath makes this section much easier.
Old Serra'kis Loot
- Glowing Thresher Cape;
- Bands of Serra'kis — Leather Wrist;
- Bite of Serra'kis — One-Hand Dagger.
Twilight Lord Kelris Strategy
Clear the room before pulling Kelris and use line-of-sight to bring caster trash into your group.
Kelris repeatedly casts Mind Blast and can put a random player to Sleep, including the healer. Keep the tank healthy enough to survive a temporary healer disable.
Twilight Lord Kelris Loot
- Rod of the Sleepwalker — Two-Hand Staff;
- Gaze Dreamer Pants — Leather Legs;
- Twilight Lord Girdle — new Forever Mail Waist;
- Head of Kelris — Blackfathom Villainy quest item.
Fire of Aku'mai Event: Which Braziers to Click?
After Kelris dies, the door to Aku'mai remains closed. Four braziers around the statue activate four separate enemy waves.
Do not click all four braziers at once. Activate one, kill its entire wave, recover Health and Mana if needed, then activate the next.
The current documented waves are:
- 3 Aku'mai Snapjaws on each side;
- 2 Aku'mai Servants on each side;
- 4 Barbed Crustaceans on each side;
- 10 Murkshallow Softshell on each side.
The turtle/crustacean-style wave is the most dangerous for the tank. Kiting, pets and defensive cooldowns can reduce pressure.
Aku'mai Strategy
Aku'mai is the final boss and deals heavy sustained physical and Nature damage.
Poison Cloud creates dangerous Nature-damage areas. Move out immediately instead of forcing the healer to compensate.
Frenzied Rage increases Aku'mai's attack speed by 75%, making the later portion of the fight much more dangerous for the tank.
Save tank defensives, healing cooldowns and Health consumables for Frenzied Rage. Slightly underleveled groups can also use slows and kiting to reduce melee uptime.
Aku'mai Loot
- Leech Pants — Leather Legs;
- Moss Cinch — Leather Waist;
- Strike of the Hydra — Two-Hand Sword.
Blackfathom Deeps Full Loot Table
| Encounter | Major Loot |
|---|---|
| Ghamoo-Ra | Tortoise Armor; Ghamoo-Ra's Bind; Spiked Shell Band |
| Lady Sarevess | Naga Battle Gloves; Darkwater Talwar; Naga Heartpiercer |
| Gelihast | Algae Fists; Reef Axe; Cursed Murloc Eye; Blueprint: Fishing Rack |
| Lorgus Jett | Twilight Maul; Treacherous Treads; Fallenroot Longbow |
| Old Serra'kis | Glowing Thresher Cape; Bands of Serra'kis; Bite of Serra'kis |
| Twilight Lord Kelris | Rod of the Sleepwalker; Gaze Dreamer Pants; Twilight Lord Girdle; Head of Kelris |
| Aku'mai | Leech Pants; Moss Cinch; Strike of the Hydra |
| Baron Aquanis | Strange Water Globe → Outlaw Sabre or Witch's Finger quest reward |
Notable BFD World Drops
Blackfathom Deeps also has a valuable Bind-on-Equip pool. Notable drops include:
- Staff of the Blessed Seer;
- Axe of the Enforcer;
- Grimclaw;
- Doomspike;
- Evocator's Blade;
- Crested Scepter;
- Staff of the Friar;
- Onyx Claymore;
- Ring of Precision;
- Tree Bark Jacket;
- Martyr's Chain.
Staff of the Blessed Seer is particularly noteworthy as an early healing weapon.
Best Blackfathom Deeps Quest Rewards
| Reward | Quest | Use |
|---|---|---|
| Arctic Buckler | Blackfathom Villainy | Shield option |
| Gravestone Scepter | Blackfathom Villainy | Caster wand |
| Sustaining Ring | Knowledge in the Deeps | Alliance ring |
| Band of the Fist | Allegiance to the Old Gods | Horde melee-oriented ring |
| Chestnut Mantle | Allegiance to the Old Gods | Alternative Horde reward |
| Outlaw Sabre | Baron Aquanis | Horde weapon reward |
| Witch's Finger | Baron Aquanis | Alternative caster-oriented reward |
Best BFD Loot by Role
Physical melee: Darkwater Talwar, Reef Axe, Strike of the Hydra, Twilight Maul and several BoE weapons are the strongest targets to compare.
Hunter: Naga Heartpiercer and Fallenroot Longbow provide direct ranged options, while Cursed Murloc Eye has situational value against Murlocs.
Caster DPS: Rod of the Sleepwalker, Gravestone Scepter and several BoE staffs and caster items are useful targets.
Healers: Staff of the Blessed Seer is an especially notable world drop, while Rod of the Sleepwalker and quest rewards can also be useful depending on class.
Tanks: Tortoise Armor, Spiked Shell Band and appropriate mail or shield quest rewards provide defensive early-game value.
Fishing: Gelihast can drop Blueprint: Fishing Rack, requiring Fishing 140.
Important Blackfathom Deeps Trash
Fallenroot Hellcaller
Mana Burn is the priority interrupt. Letting several casts through can leave your healer without enough resources for the next pack.
Twilight Shadowmage
Uses Dominate Mind. Focus or control these enemies quickly and use line-of-sight to pull them into safer positions.
Twilight Acolyte
Uses Heal and Renew. Interrupt direct heals and remove enemies before healing effects accumulate.
Blackfathom Sea Witch
Frost Nova can lock the tank or melee group in place and create awkward pulls.
Blackfathom Myrmidon
Can Disarm the tank for several seconds.
Twilight Loreseeker
Slow reduces attack speed, increases cast time and reduces movement speed. It can also use Enlarge.
Recommended Group and Preparation
A standard one tank, one healer and three DPS composition works well.
Useful tools include interrupts for Mana Burn and healing casts, crowd control for Sarevess adds and Twilight casters, Poison handling for Aku'mai, and underwater utility such as Unending Breath.
Before entering:
- collect all faction quests you intend to complete;
- Warlocks and Paladins should verify their class quest stage;
- Horde should unlock Zoram'gar flight path;
- leave bag space for quest items and loot;
- bring food, Mana drinks and a Health potion;
- repair before travelling to the Zoram Strand.
BFD Mistakes to Avoid
- Creating a group before collecting faction-specific quests.
- Missing Thaelrid and having to return for Blackfathom Villainy.
- Forgetting the underwater Lorgalis Manuscript.
- Skipping the Fathom Core when a Horde player has Amongst the Ruins.
- Pulling Lady Sarevess with both adds and surrounding trash.
- Pulling Gelihast before clearing the Murlocs.
- Allowing Mana Burn and Dominate Mind casts through repeatedly.
- Clicking all four Aku'mai braziers at once.
- Standing in Aku'mai's Poison Cloud.
- Forgetting the Head of Kelris after the boss dies.
Is Blackfathom Deeps Worth Repeating?
The first quest-loaded full clear provides the highest guaranteed value. Repeat runs make sense if you are targeting Cursed Murloc Eye, Spiked Shell Band, Blueprint: Fishing Rack, a specific weapon, or valuable BFD world drops.
Players completing Warlock or Paladin class progression may also need BFD even when the normal dungeon loot is no longer a major upgrade.
Blackfathom Deeps Carry
Players who want Blackfathom Deeps completed for quests, Aku'mai, Blackfathom Villainy, Paladin or Warlock objectives, Baron Aquanis, profession blueprints or specific loot can use our WoW Forever Dungeon Carry.