
Wailing Caverns is a level 15–24 five-player WoW Forever dungeon in Lushwater Oasis, The Barrens. It is one of the first large non-linear dungeons players encounter and combines seven core dungeon quests, four mandatory Druids of the Fang, several optional bosses, a rare Deviate Faerie Dragon and the Naralex finale against Mutanus the Devourer.
A full first run is best around level 17–21, with level 19 representing a good at-level target. The dungeon can take around 30–40 minutes for an experienced group, but a first quest-complete run can take longer because of its branching layout and the Naralex escort.
Quick answer: collect your quests before entering, kill Lady Anacondra, Lord Cobrahn, Lord Pythas and Lord Serpentis, then return to the Disciple of Naralex to start the Mutanus event. Kresh, Skum, Verdan and the rare Deviate Faerie Dragon are not required to unlock Mutanus, but they are worth killing for loot.
| Wailing Caverns | Details |
|---|---|
| Level range | 15–24 |
| Comfortable first run | 17–21 |
| At-level target | About level 19 |
| Location | Lushwater Oasis, The Barrens |
| Group size | 5 players |
| Boss encounters | 8 standard + Deviate Faerie Dragon rare = 9 recorded encounters |
| Mandatory Fanglords | Lady Anacondra, Lord Cobrahn, Lord Pythas, Lord Serpentis |
| Final event | Disciple of Naralex escort → Mutanus the Devourer |
| Core dungeon quests | 7 |
| Estimated full clear | 30–40 minutes for an experienced group |
Wailing Caverns Location and Entrance
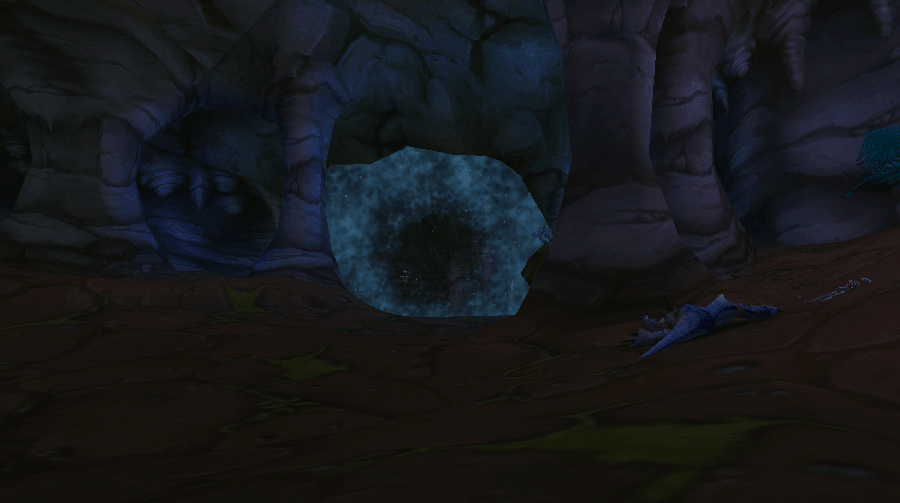
Wailing Caverns is inside the large skull-shaped cave at Lushwater Oasis, southwest of the Crossroads. The outside cave entrance is around /way The Barrens 46.0 36.4. The instance portal is deeper inside the cave.
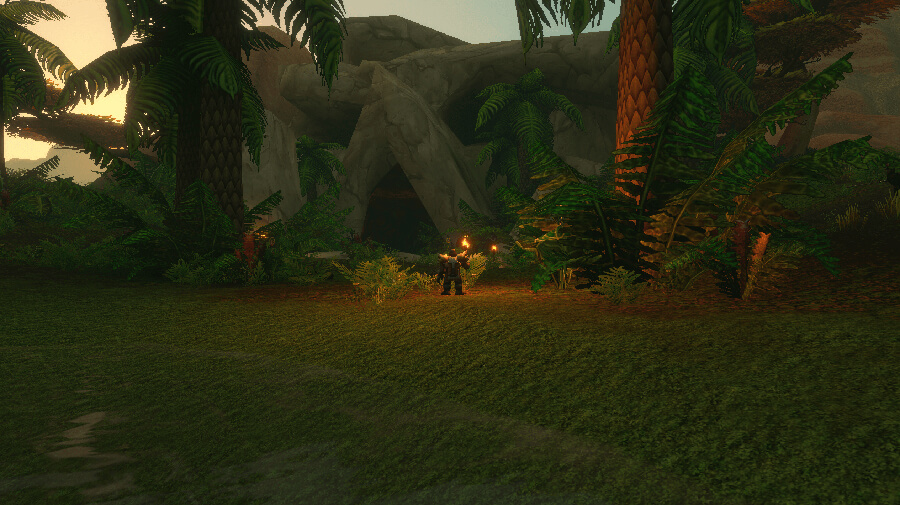
After entering the outer cave, follow the path down and toward the instance portal.
Horde Route
Horde characters naturally reach Wailing Caverns while leveling through The Barrens. From the Crossroads, travel southwest toward Lushwater Oasis.
Undead characters can reach Kalimdor by Zeppelin and continue through Durotar into The Barrens.
Alliance Route
Alliance has a longer journey. The easiest routes are generally through Ashenvale into northern Barrens or by using the available boat network and travelling toward Ratchet before heading west to Lushwater Oasis.
Alliance can complete the neutral dungeon quests, but Serpentbloom and Leaders of the Fang are Horde-only.
All Wailing Caverns Quests
There are seven core Wailing Caverns dungeon-facing quests. Five are neutral and two are Horde-specific. Wowhead can show additional entries under the dungeon because follow-up chain steps are also categorized as Wailing Caverns quests.
| Quest | Required Level | Faction | Pickup | Objective / Preparation |
|---|---|---|---|---|
| Serpentbloom | 14 | Horde | Apothecary Zamah, Thunder Bluff | Collect 10 Serpentbloom inside and around the cavern. |
| Smart Drinks | 13 | Both | Mebok Mizzyrix, Ratchet | Complete Raptor Horns first, then collect 6 Wailing Essence. |
| Trouble at the Docks | 14 | Both | Crane Operator Bigglefuzz, Ratchet | Kill Mad Magglish in the outer cave and recover the 99-Year-Old Port. |
| Deviate Hides | 13 | Both | Nalpak, cave above the entrance | Collect 20 Deviate Hides. |
| Deviate Eradication | 15 | Both | Ebru, cave above the entrance | Kill the required Deviate creature types inside the instance. |
| The Glowing Shard | 15 | Both | Glowing Shard dropped after Mutanus | Complete the Naralex event, loot the shard and follow its quest chain. |
| Leaders of the Fang | 15 recommended | Horde | Nara Wildmane, Thunder Bluff | Complete the Barrens oasis prerequisite chain and collect the four Fanglord gems. |
Best Quest Preparation Before Your First Run
Most wasted Wailing Caverns time comes from reaching the instance without the prerequisites for Smart Drinks or Leaders of the Fang.
Horde Preparation
- Complete the Barrens oasis chain beginning with The Forgotten Pools.
- Continue through the chain that eventually sends you to Nara Wildmane for Leaders of the Fang.
- Complete Raptor Horns in Ratchet to unlock Smart Drinks.
- Pick up Smart Drinks and Trouble at the Docks in Ratchet.
- Pick up Serpentbloom in Thunder Bluff.
- At the outer cave, pick up Deviate Hides and Deviate Eradication.
- Kill Mad Magglish before zoning in if you need Trouble at the Docks.
Alliance Preparation
Alliance can prepare Smart Drinks, Trouble at the Docks, Deviate Hides and Deviate Eradication before entering. The Glowing Shard becomes available after Mutanus.
Explore services related to this guide, selected from our Dungeons catalog.
View All Dungeons Services
Best Wailing Caverns Quest Rewards
Forever changes several quest rewards compared with old Classic lists, so check the Forever versions before choosing.
Leaders of the Fang
The Horde-only quest now offers three weapon choices:
- Hammerbone — new Forever two-handed mace;
- Crescent Staff;
- Wingblade.
Hammerbone is particularly attractive for Strength-based melee and Feral builds, while Crescent Staff remains useful for several caster, healer and hybrid setups.
Deviate Eradication
- Sizzle Stick;
- Dagmire Gauntlets;
- Pattern: Deviate Scale Belt.
Deviate Hides
- Deviate Hide Pack — 10-slot bag;
- Slick Deviate Leggings.
The Glowing Shard
After Mutanus, loot the Glowing Shard and start its follow-up chain. It eventually leads through Sputtervalve and Falla Sagewind toward the final In Nightmares reward choice, including:
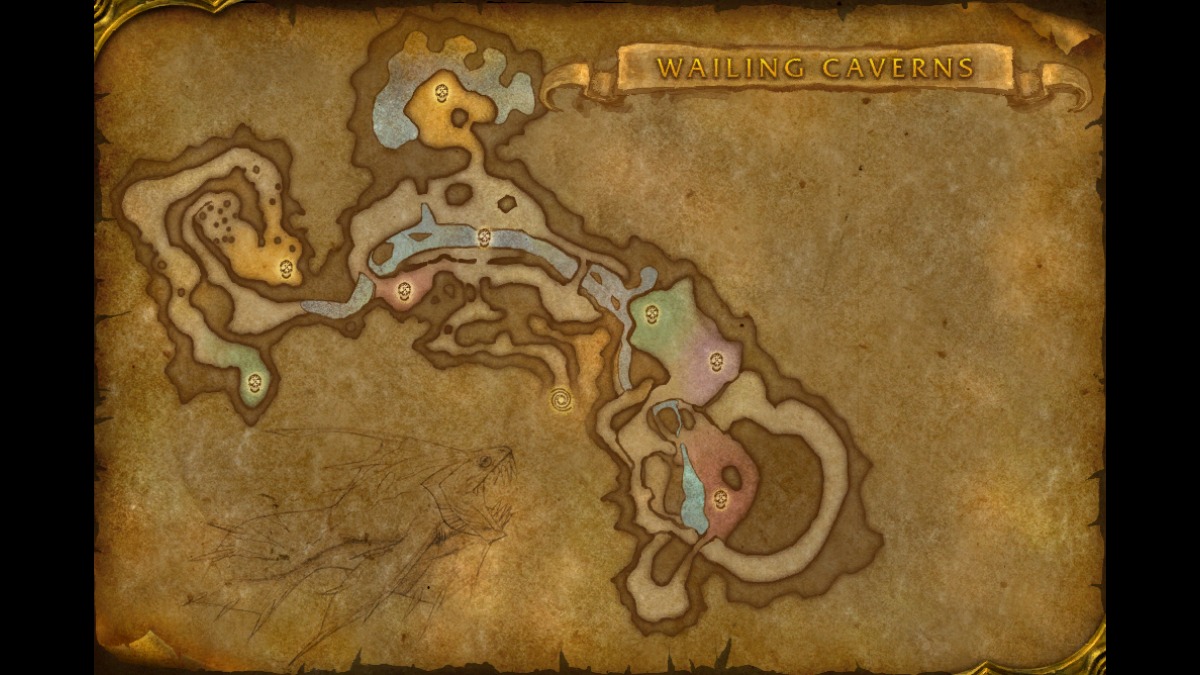
Wailing Caverns Dungeon Map
Wailing Caverns is non-linear. Knowing the route matters more here than in most early dungeons because missing one Fanglord means you cannot start the Naralex finale.
Recommended Full-Clear Route
A practical route that covers all major bosses is:
- Lady Anacondra
- Kresh
- Lord Cobrahn
- Deviate Faerie Dragon if it spawned
- Lord Pythas
- Skum
- Lord Serpentis
- Verdan the Everliving
- Use the waterfall shortcut back toward the entrance
- Speak with the Disciple of Naralex
- Complete the escort and ritual waves
- Kill Mutanus the Devourer
The exact order of Kresh, Cobrahn and Anacondra can vary depending on your route. What matters for the final event is that Anacondra, Cobrahn, Pythas and Serpentis are all dead in the current instance.
Wailing Caverns Bosses
| Encounter | Status | Main Mechanics |
|---|---|---|
| Lady Anacondra | Fanglord — required | Sleep, Healing Touch, Lightning Bolt, Thorns Aura |
| Kresh | Optional | Bite, high armor |
| Lord Cobrahn | Fanglord — required | Druid's Slumber, Healing Touch, Serpent Form |
| Deviate Faerie Dragon | Rare | Low armor; dangerous accompanying Druids of the Fang |
| Lord Pythas | Fanglord — required | Sleep, Healing Touch, Lightning Bolt, Thunderclap |
| Skum | Optional | Chained Bolt |
| Lord Serpentis | Fanglord — required | Sleep, Healing Touch, Lightning Bolt |
| Verdan the Everliving | Optional but recommended | Heavy melee, Grasping Vines |
| Mutanus the Devourer | Naralex event | Thundercrack, Terrify, Naralex's Nightmare |
Lady Anacondra Strategy
Lady Anacondra patrols the early section of the dungeon. Clear nearby Druids of the Fang and raptors before engaging her.
Sleep is the most dangerous cast because it can remove the tank or healer from the fight. Interrupt it when possible. Healing Touch should also be interrupted, while Thorns Aura punishes physical attackers with reflected damage.
Lady Anacondra Loot
- Belt of the Fang
- Serpent's Shoulders
- Snakeskin Bag
- Snake Eye Kaleidoscope — new Forever neck
- Blueprint: Field Guide — new Forever profession/camping-related drop
- Gem of Anacondra — Leaders of the Fang quest item
Kresh Strategy
Kresh is a heavily armored turtle and one of the simplest encounters. Tank it normally and expect the fight to take longer for physical-heavy groups because of its armor.
Kresh Loot
- Worn Turtle Shell Shield
- Kresh's Back
- Cloak of Hermitic Bliss — new Forever cloak with unusual movement/swim effects
Lord Cobrahn Strategy
Kill the Deviate Pythons around Cobrahn first. Interrupt Druid's Slumber as the top priority, particularly if it targets the healer, then stop Healing Touch.
At lower health Cobrahn enters Serpent Form, increasing his melee pressure.
Lord Cobrahn Loot
- Robe of the Moccasin
- Cobrahn's Grasp
- Leggings of the Fang
- Gem of Cobrahn
Deviate Faerie Dragon Rare
The Deviate Faerie Dragon is a rare encounter, so it will not appear in every run. The dragon itself has few major mechanics, but its accompanying Druids of the Fang make the pull dangerous because multiple Sleep casts can overlap.
Control or kill the Druids first, then finish the rare.
Rare Loot
- Feyscale Cloak
- Firebelcher — Wand
Lord Pythas Strategy
Lord Pythas uses the familiar Fanglord toolkit of Lightning Bolt, Healing Touch and Druid's Slumber, plus Thunderclap.
Kill his accompanying Druid of the Fang and Deviate Shambler first. The Shambler can heal with Wild Regeneration, so control or interrupt it.
Lord Pythas Loot
- Armor of the Fang
- Stinging Viper
- Slither Cord — new Forever cloth waist
- Gem of Pythas
Skum Strategy
Skum is an optional beast boss whose main ability is Chained Bolt. Spread the group enough to avoid unnecessary chained damage.
Skum Loot
- Glowing Lizardscale Cloak
- Tail Spike
- Skum's Bucket — new Forever caster/healer off-hand with a reusable Mana-restoration effect
Lord Serpentis Strategy
Lord Serpentis is the final Fanglord and is accompanied by two Druids of the Fang. Kill or control the adds before focusing the boss.
Interrupt Druid's Slumber and Healing Touch. If the other three Fanglords are already dead, killing Serpentis completes the requirement for the Naralex event.
Lord Serpentis Loot
- Footpads of the Fang
- Savage Trodders
- Serpent Gloves
- Venomstrike
- Blueprint: Journeyman Campfire — new Forever Cooking/camping blueprint
- Gem of Serpentis
Verdan the Everliving Strategy
Verdan hits substantially harder than most earlier bosses. Keep the tank topped up and have ranged characters stay outside the short-range Grasping Vines effect whenever possible.
Verdan is not required to unlock Mutanus, but killing it opens the useful waterfall shortcut back toward the beginning of the instance.
Verdan Loot
- Living Root
- Seedcloud Buckler
- Sporid Cape
- Night Watch Shortsword — additional recorded Forever drop
How to Start the Naralex Event
The final event becomes available only after all four Druids of the Fang leaders are dead:
- Lady Anacondra;
- Lord Cobrahn;
- Lord Pythas;
- Lord Serpentis.
Return to the Disciple of Naralex near the beginning of the dungeon and start the escort.
Clear the route before starting if you left trash alive. At Naralex's chamber, protect the Disciple during the ritual. Two waves of enemies appear before Mutanus.
Do not wipe during the event. If the Disciple dies or the group wipes, the encounter fails and cannot simply be restarted immediately. The instance must be reset and the Fanglord requirement completed again.
Mutanus the Devourer Strategy
Mutanus is a level 22 Elite in current Forever data and is the most disruptive encounter in Wailing Caverns.
- Naralex's Nightmare: disables a player through Sleep/control.
- Terrify: fears a player for several seconds.
- Thundercrack: deals heavy Nature damage and stuns nearby players.
Ranged DPS and the healer should remain outside Thundercrack range whenever possible. Enter the fight with Health and Mana recovered after the ritual waves because Sleep and Fear can temporarily remove critical players.
Mutanus Loot
- Deep Fathom Ring
- Slime-encrusted Pads
- Mutant Scale Breastplate
- Glowing Shard — quest starter
Wailing Caverns Full Loot Table
| Boss | Loot |
|---|---|
| Lady Anacondra | Belt of the Fang; Serpent's Shoulders; Snakeskin Bag; Snake Eye Kaleidoscope; Blueprint: Field Guide; Gem of Anacondra |
| Kresh | Worn Turtle Shell Shield; Kresh's Back; Cloak of Hermitic Bliss |
| Lord Cobrahn | Robe of the Moccasin; Cobrahn's Grasp; Leggings of the Fang; Gem of Cobrahn |
| Deviate Faerie Dragon | Feyscale Cloak; Firebelcher |
| Lord Pythas | Armor of the Fang; Stinging Viper; Slither Cord; Gem of Pythas |
| Skum | Glowing Lizardscale Cloak; Tail Spike; Skum's Bucket |
| Lord Serpentis | Savage Trodders; Footpads of the Fang; Serpent Gloves; Venomstrike; Blueprint: Journeyman Campfire; Gem of Serpentis |
| Verdan the Everliving | Living Root; Seedcloud Buckler; Sporid Cape; Night Watch Shortsword |
| Mutanus the Devourer | Deep Fathom Ring; Slime-encrusted Pads; Mutant Scale Breastplate; Glowing Shard |
Embrace of the Viper Set and Druid Snake Form
The Embrace of the Viper set is much more interesting in Forever than it was in original Classic.
| Piece | Source |
|---|---|
| Belt of the Fang | Lady Anacondra |
| Footpads of the Fang | Lord Serpentis |
| Gloves of the Fang | Druid of the Fang trash |
| Leggings of the Fang | Lord Cobrahn |
| Armor of the Fang | Lord Pythas |
Current Forever set bonuses:
- 2 pieces: +10 Intellect.
- 3 pieces: +10 Attack Power.
- 4 pieces: taking damage at or below 25% Health restores 100 Health and Mana over 5 seconds, with a 5-minute cooldown.
- 5 pieces: melee attacks can inflict Dream Venom, stunning the target for 1 second.
Druid secret: equipping all five pieces changes Cat Form into a unique cosmetic Snake Form. Each Druid race has its own color. The transformation is cosmetic; Druid abilities still function as Cat Form abilities.
Best Wailing Caverns Loot by Role
Hunter / Rogue / Feral: Venomstrike, Serpent's Shoulders, Fang-set pieces, Tail Spike and the new Snake Eye Kaleidoscope are strong targets.
Warrior / Paladin / Shaman: Cobrahn's Grasp, Savage Trodders, Mutant Scale Breastplate and the Horde-only Hammerbone reward are worth comparing against current gear.
Caster DPS: Robe of the Moccasin, Sizzle Stick, Living Root, Firebelcher and several caster-oriented new Forever items can be substantial early upgrades.
Healers: Living Root, Seedcloud Buckler, Skum's Bucket and appropriate quest rewards can provide useful early healing or Mana value.
Druid: Wailing Caverns is uniquely important because the full Fang set also unlocks the Snake Form cosmetic.
Important Trash Mechanics
Druid of the Fang
- Lightning Bolt when not in melee range;
- Healing Touch;
- Serpent Form at lower Health;
- Druid's Slumber, which can disable the healer.
Interrupt Sleep first, then Healing Touch.
Deviate Viper
Uses Localized Toxin on its primary target. Cleanse the Poison when possible.
Deviate Shambler
Uses Wild Regeneration to heal itself or another enemy. Interrupt it.
Deviate Dreadfang
Uses Terrify, Bite and Lightning Breath. Fear can make dense packs especially dangerous.
Recommended Group and Preparation
A normal one tank, one healer and three DPS composition works well.
The most valuable utility is reliable interrupts for Druid's Slumber and Healing Touch, Poison cleansing, Fear recovery, ranged damage for Mutanus and enough Mana recovery for the long run.
Repair before entering, bring food and drinks, and leave enough bag space for quest items, Deviate Hides, Serpentbloom and boss loot.
Wailing Caverns Mistakes to Avoid
- Entering without the Smart Drinks prerequisite.
- Horde entering without Leaders of the Fang.
- Skipping one of the four Fanglords and discovering that Naralex cannot be started.
- Assuming Verdan is mandatory for Mutanus — it is not.
- Skipping Verdan without realizing you lose the convenient waterfall shortcut.
- Starting the Naralex escort with uncleared trash.
- Standing in melee range on Mutanus without a reason.
- Leaving after Mutanus without looting the Glowing Shard.
- Using old Classic reward lists instead of Forever item versions.
Is Wailing Caverns Worth Repeating?
The highest guaranteed value comes from the first quest-loaded full clear. Repeating Wailing Caverns makes sense when you are targeting Venomstrike, Fang-set pieces, Deep Fathom Ring, a profession blueprint or the Druid Snake Form.
If your quests are finished and your current equipment is already comparable to the dungeon loot, continuing open-world leveling will often be more efficient than repeatedly clearing every branch.
Wailing Caverns Carry
Players who want to complete Wailing Caverns for quests, Mutanus, Fang-set pieces or specific loot without assembling their own party can use our WoW Forever Dungeon Carry.