
WoW Midnight - Voidspire - Full Raid Guide is a fast but complete raid guide for Voidspire in Midnight Season 1. It is built for weekly clears, pugs, and guild groups that want reliable execution without reading a full encyclopedia. It is built for weekly clears, pugs, and guild groups that want reliable execution without reading a full encyclopedia. For more World of Warcraft content, use the main hub. Each boss section gives a practical overview, the mechanics that actually cause wipes, and direct role callouts so tanks, healers, and DPS know what to watch every pull.
What This Voidspire Full Raid Guide Covers
This is a boss-by-boss raid guide that still reads like a quick guide. Every boss block is written as a pull script: a practical overview of how the fight actually plays, the mechanics that most often cause wipes, and direct role callouts so tanks, healers, and DPS know what to prioritize without over-talking. It is built for weekly clears and pug stability, so the goal is repeatable execution rather than encyclopedic detail.
Voidspire progression becomes simple when the raid treats it as one consistent ruleset instead of six separate fights. Most wipes fall into the same three categories across the instance: space control collapsing because hazards are placed or dragged badly, required swaps or objective swaps happening late because players tunnel, and predictable damage ramps overlapping with no cooldown plan. The guide follows the raid in official order from Imperator Averzian to Crown of the Cosmos, because pacing matters: the opener teaches board control, the early bosses punish sloppy movement and objective timing, and the end bosses punish overlap discipline more than raw DPS.
Voidspire boss guides
Use this section as a pull script. Every boss follows the same pattern so your raid can brief in under a minute: a short overview of how the fight works, a compact ability table focused on wipe causes, and a final role confirmation paragraph so tanks, healers, and DPS know exactly what to prioritize. Read the overview once, call the one or two wipe mechanics out loud, confirm assignments, then pull.
Imperator Averzian
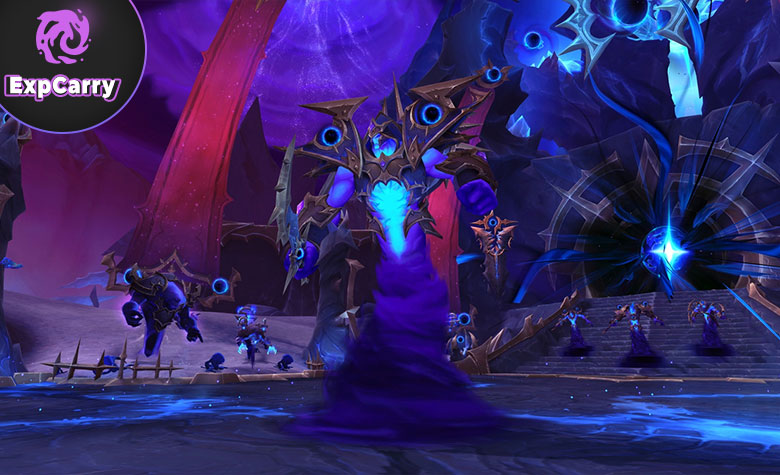
Imperator Averzian is a territory-control opener built around a 3x3 arena grid. Each cycle forces your raid to decide which spaces you save and which space you sacrifice. The wipe condition is not subtle: if Averzian secures three adjacent territories in a line, March of the Endless triggers and the pull collapses. Your win condition is to run a repeatable soak plan, keep add priority clean, and make grid decisions that preserve flexibility instead of accidentally building Averzian a three-in-a-row.
| Mechanic | What wipes groups | Practical execution rule |
|---|---|---|
| Shadow's Advance and Void Claimed grid | Raid ignores the board and loses three-in-a-row alignment control | Track the grid every cycle and choose your saved spaces to prevent any straight line of three |
| Umbral Collapse soaks | Soaks are late, wrong, or freelanced, and the wrong tile becomes permanently lost | Pre-assign soakers and send them instantly; the raid does not negotiate in the moment |
| Dark Tears and adds | Empowered tears and dangerous add casts snowball while the raid is already space-limited | Interrupt or kill priority casters first, then clean up the rest without letting the board decision stall |
| Blackening Wounds | Tank damage spikes out of control near tears or at high stacks | Tanks rotate mitigation early and reposition away from tear pressure when possible |
| March of the Endless | Triggers when the raid allows three adjacent claimed spaces | This is not healable; prevent the alignment or the pull ends |
Tanks: keep Averzian away from the worst tear pressure when possible and manage Blackening Wounds with proactive cooldown timing, not panic. Healers: the fight gets harder as the grid tightens, so keep the raid stable and do not spend everything early if your board plan leaves you with a small endgame space. DPS: the board and add priority are the fight; if you tunnel boss and lose the grid, you wipe regardless of damage.
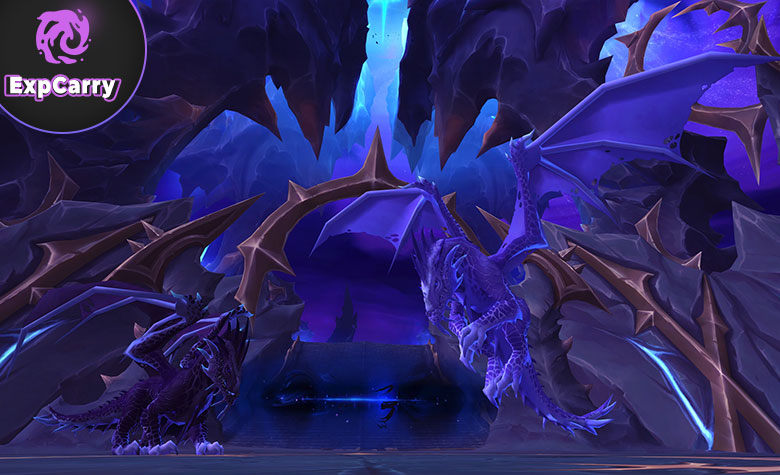
Vorasius

Vorasius is the early benchmark boss: mostly stationary, heavy raid throughput, and repeated movement checks that punish sloppy positioning. The fight's defining failure is wall and lane control around Void Breath. Tanks create crystal walls through tank mechanics, and your raid must break the correct walls at the correct times using add explosions, or the safe lane disappears and the breath sequence ends the pull. Primordial Roar ramps over time, so your healing plan must scale instead of treating every roar as equal.
| Mechanic | What wipes groups | Practical execution rule |
|---|---|---|
| Crystal walls and Void Breath lane | Wrong walls remain up and the raid has no safe lane for the breath | Tanks place walls predictably, raid detonates adds at the correct walls to open the lane on time |
| Blistercreeps and detonation control | Adds die in the raid or detonate randomly, breaking the wrong wall or killing players | Route and kill them intentionally at the planned wall location, not wherever they happen to be |
| Primordial Roar ramp | Healers treat early roars like emergencies and have nothing later | Plan cooldown pacing so later roars have coverage, and stabilize knockback recoveries cleanly |
| Nearest-target pressure | Random drifting makes targets unpredictable and deaths look "random" | Keep formation stable so nearest-target rules stay consistent and healers can predict damage |
Tanks: wall placement is your main job; keep it readable and keep the boss facing consistent so movement does not become chaos. Healers: roars ramp, so pace cooldowns and do not let knockbacks break healing coverage. DPS: your job is execution, not meters; detonate adds correctly, keep spacing clean, and never let lane control fail right before the breath.
Fallen-King Salhadaar

Fallen-King Salhadaar is a priority and timing fight built around orb control, add casts, and short high-pressure windows. The most common wipe pattern is letting orbs reach the boss or killing them in a way that creates an unmanageable overlap. The clean approach is simple: treat orbs as the main objective, stagger orb deaths when your healing plan requires it, and do not allow add casts to free-fire while the raid is moving and executing orb lanes.
| Mechanic | What wipes groups | Practical execution rule |
|---|---|---|
| Concentrated Void orbs | Orbs reach the boss or are ignored while players tunnel | Orbs are always top priority until dead; assign who handles them and do it every time |
| Galactic Miasma timing | Orb deaths overlap with no plan and healing collapses | Stagger orb kills unless your raid has explicitly committed cooldowns to the overlap |
| Add casts and interrupts | Interrupts are late and the raid dies during movement and orb pressure | Assign an interrupt order and treat missed kicks as a wipe-level mistake |
| Tank reposition moments | Tanks stand in the raid during spike patterns and block orb lanes with danger | Tanks step clear during the dangerous pattern and preserve clean lanes for orb handling |
Tanks: keep the boss positioned so orb lanes and movement remain usable, and step clear during the dangerous pattern so you do not force the raid to choose between safety and objective execution. Healers: plan cooldowns around the orb sequence and the overlap risk, because that is where pulls are won or lost. DPS: orbs first, then adds, then boss; if you invert that order, the pull snowballs.
Vaelgor & Ezzorak
Vaelgor and Ezzorak is the two-target execution check: keep their health close, manage tethers and zone control, and survive overlap moments without losing the room. The usual wipe causes are predictable: the bosses get too far apart in health, the raid mismanages tethers and soaks, or the transition damage forces panic movement that destroys positioning. Your best results come from assigning one balance caller and running fixed soak teams so the fight never becomes a messy debate.
| Mechanic | What wipes groups | Practical execution rule |
|---|---|---|
| Health balance requirement | HP gap grows until the end becomes a panic race | Assign one caller and force target swaps early, not when it is already too late |
| Tethers and zone control | Tethers snap or zones stack and remove safe space instantly | Respect tether distance rules, keep zones in planned lanes, and never drag them through the raid |
| Soak sequences | Soaks are late or overlapped and the room becomes unplayable | Use alternating soak teams and a fixed rotation so every soak has an owner |
| Phase / transition survival window | Raid panics and dies to avoidable overlap damage | Pre-assign healing cooldowns and commit to a calm collapse-and-stabilize plan |
Tanks: keep positioning predictable and communicate movement before it happens, because this fight punishes last-second drags. Healers: overlaps and transitions are the lethal moments; plan throughput there and do not waste it on quiet time. DPS: obey the balance caller and treat soak and tether rules as mandatory, because losing the room is how this boss kills raids-service">raids.
Lightblinded Vanguard

Lightblinded Vanguard is the coordination check: three bosses with independent energy bars, empowerment windows, and permanent consecration pressure that slowly steals the room. The fight wipes groups when energy windows overlap with no plan, when consecration zones are dropped in the wrong place, or when a lethal mechanic like Execution Sentence happens while the raid is already trapped. The clean strategy is to treat the encounter like a schedule: track energy, move bosses before auras end so consecration is placed safely, and pre-assign cooldown coverage for the lethal windows.
| Mechanic | What wipes groups | Practical execution rule |
|---|---|---|
| Energy auras and consecration placement | Consecration zones choke the center and the raid runs out of safe space | Tanks reposition bosses before aura expiration and keep lethal zones out of the core lanes |
| Overlap discipline | Empowerments stack together and healing cannot keep up | Track energy and call the next danger window early so defensives are used proactively |
| Execution Sentence windows | Targets die because there is no assigned coverage or positioning is chaotic | Pre-assign externals and make marked players move cleanly without clipping the raid |
| Tank combo pressure | Tanks die during overlaps because swaps and cooldowns are improvised | Plan swaps and mitigation for the combo windows and do not wait for near-death to react |
Tanks: this is your encounter; positioning controls the room, so move bosses before consecration is forced and keep overlaps readable. Healers: assign who covers marked players and who covers tanks during combo windows, and commit cooldowns to overlap moments, not comfort time. DPS: survive the schedule, do not freelance movement, and do not turn the room into a maze by dragging mechanics through the raid.
Crown of the Cosmos
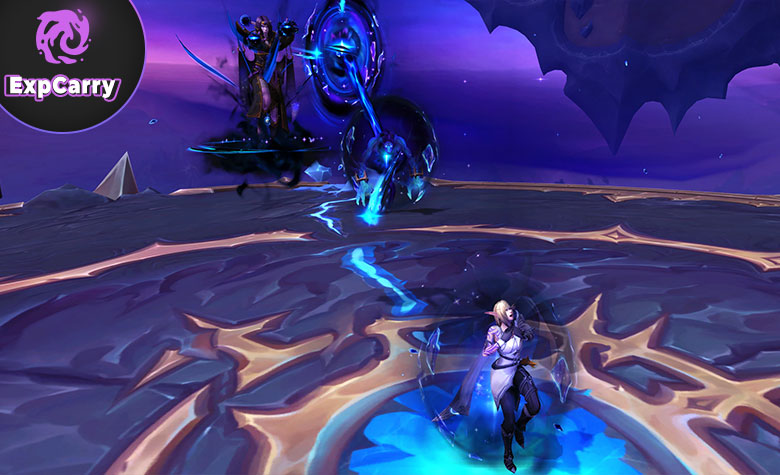
Crown of the Cosmos is the final encounter at the summit of the Voidspire, fought against Alleria Windrunner. This fight is a space and intermission survival problem first, and a DPS race second. The raid dies when line mechanics are aimed through the group, when persistent ground effects remove your lanes, or when the intermission forces movement and pulls that the raid fails to respect. Your win condition is to keep the room playable by controlling where lines and remnants go, use Silverstrike Arrow intentionally to cleanse key Void effects, and pre-plan defensive coverage for the intermission so the raid does not collapse late.
| Mechanic | What wipes groups | Practical execution rule |
|---|---|---|
| Silverstrike Arrow | Shot is aimed through the raid or wasted when cleansing matters | Mark a safe lane, aim away from the group, and use it intentionally to remove key Void effects |
| Line effects and removal windows | Lines cut through the raid or block the room | Targets place the line safely, raid keeps lanes clear, and healers prepare the removal moment |
| Void Expulsion and lingering ground | Ground carpets the center and the raid has no movement lanes | Drop effects in planned outer lanes and preserve a clean rotate path for the end |
| Null Corona | Absorb is panic-removed and spreads at the wrong time | Heal it off first, then remove only when your plan requires it |
| Intermission: Crushing Singularity | Raid stacks, gets pulled, or overlaps forced movement with no defensives | Spread, rotate personals and raid cooldowns, and avoid being dragged into lethal zones |
Tanks: keep melee contact so tank requirements are never violated, and hold the boss so lanes remain predictable during line mechanics. Healers: pre-plan the intermission cooldown chain and commit to it, then stabilize quickly so the end does not become panic healing. DPS: treat lines and lingering ground as a shared responsibility; your damage matters only if the room stays playable through the last stretch.
Practical preparation plan
Voidspire preparation is mostly assignment work, not farming. Before the run, assign Imperator Averzian soak teams and one caller for grid decisions, assign an interrupt lead for Salhadaar add casts, assign a balance caller plus alternating soak teams for Vaelgor and Ezzorak, and assign an energy tracker for Lightblinded Vanguard so boss movement happens before consecration is forced. For Vorasius, confirm your wall placement plan and where you will detonate adds to open the correct lane for Void Breath, and for Crown of the Cosmos assign safe lanes for line mechanics, agree on how you will handle Null Corona, and pre-plan a full defensive chain for Crushing Singularity so the intermission does not delete your raid.
Conclusion
WoW Midnight - Voidspire - Full Raid Guide comes down to discipline and assignments. Most wipes are self-inflicted: late soaks, late swaps, and space destroyed by careless placement. If your raid keeps the Averzian grid under control, executes Vorasius wall and lane logic cleanly while pacing healing for Roar ramps, handles Salhadaar orbs with a real stagger plan while controlling interrupts, keeps Vaelgor and Ezzorak balanced while executing tethers and soaks without choking the room, tracks Vanguard energy so consecration never traps the raid, and treats Crown of the Cosmos as a space and intermission survival problem first and a damage check second, the raid becomes predictable. Predictable is fast, and fast is what turns Voidspire into a clean weekly clear instead of a debate session.


