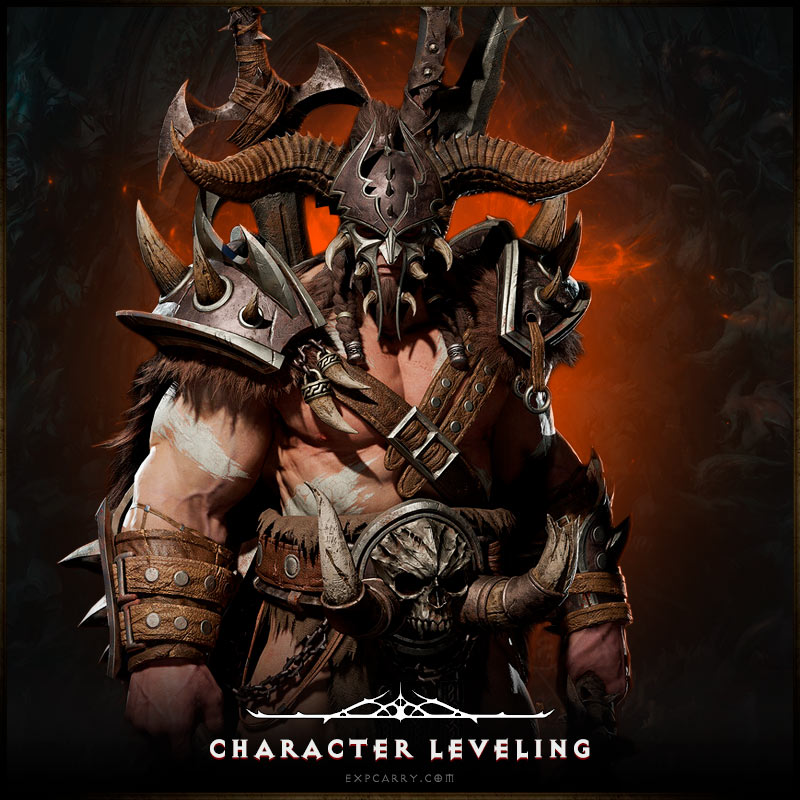

Whirlwind Barbarian is a mobile Diablo 4 build that clears groups of enemies while continuously moving and dealing damage. Its biggest challenge during leveling is Fury management: Whirlwind consumes your resource while channeling, so you need a reliable generator, supporting Shouts, and suitable equipment before you can keep spinning through entire groups. This guide covers a practical progression from level 1 to 70 and explains how to develop the character for the endgame.
The build reflects Season 15, Season of Hell's Legacy, and patch 3.2.3. It includes active skills, skill-point priorities, the Arsenal and Weapon Technique systems, Strength and other stats, Legendary Aspects, tempering, gems, runes, seasonal bonuses, Paragon boards, glyphs, and endgame equipment. The leveling version works without mandatory Unique items, while expansion-specific features and more demanding endgame combinations are explained separately.
Short answer: Start with Lunging Strike to generate Fury, unlock Whirlwind as your main Core skill, and add Rallying Cry, War Cry, Challenging Shout, and Wrath of the Berserker. Prioritize your assigned weapon's damage, Strength, Fury regeneration, cooldown reduction, and survivability. Unlock Weapon Technique at level 15, reach level 70, then develop your Paragon boards, glyphs, and a more specialized Whirlwind setup.
Whirlwind Barbarian Leveling Build Overview
Whirlwind is effective against groups because it deals damage around your Barbarian while you move. Lunging Strike helps approach enemies and refill Fury; Shouts add resource recovery, damage, and protection. Wrath of the Berserker provides an offensive cooldown for tougher encounters. You do not need to collect several rare Uniques before this combination becomes playable.
The maximum character level is now 70, and the game's 2026 progression no longer follows the original World Tier system. Blizzard's overview of the revised leveling and skill systems explains the increased level cap, the redesigned skill trees, and the expanded Torment difficulties. Your goal during leveling is to keep your damage and Fury generation consistent, even if that means choosing a lower difficulty.
| Level range | Main priority | Goal |
|---|---|---|
| 1–14 | Unlock Lunging Strike, Whirlwind, and initial support skills. | Establish a functional Fury-generation and spending cycle. |
| 15–29 | Complete the Arsenal class quest and improve Whirlwind and Shouts. | Increase mobility, damage, and resource stability. |
| 30–49 | Develop your skill modifiers, Berserking uptime, gear, and Aspects. | Clear larger groups without constantly interrupting Whirlwind. |
| 50–70 | Refine Fury regeneration, critical hits, defenses, and equipment. | Prepare a reliable build for the first Torment difficulties. |
| 70+ | Develop Paragon boards, upgrade glyphs in The Pit, and farm endgame items. | Transition toward a specialized Whirlwind build. |
Best Whirlwind Barbarian Skills and Skill Bar
The recommended leveling setup uses six active abilities: Lunging Strike, Whirlwind, Rallying Cry, War Cry, Challenging Shout, and Wrath of the Berserker. Together, they provide a Basic Fury generator, continuous area damage, movement and resource buffs, protection, and a powerful offensive cooldown. This setup is intended for leveling; specialized Diablo 4 character builds may use different support skills once their equipment generates enough Fury without a Basic attack.
| Skill | Function | When to use it |
|---|---|---|
| Lunging Strike | Basic Fury generator and gap closer | Build Fury before spinning or recover it between packs. |
| Whirlwind | Main channeled Core skill | Move through groups while dealing sustained area damage. |
| Rallying Cry | Movement and resource support | Activate before a long Whirlwind sequence or when you need faster Fury recovery. |
| War Cry | Offensive Shout | Use before engaging tough groups and during boss damage windows. |
| Challenging Shout | Defensive Shout and control | Protect yourself when surrounded or facing dangerous enemy attacks. |
| Wrath of the Berserker | Ultimate offensive cooldown | Use against elites, bosses, and particularly dangerous encounters. |
For players who need extra mobility, Leap can temporarily replace Challenging Shout during early leveling. Call of the Ancients is another option for boss damage before your Whirlwind setup becomes stronger. However, you should not continually switch between several Ultimate skills: build around one Ultimate at a time and keep your core resource-management skills intact.
Skill Point Order: Levels 1–14
The first levels are about establishing your resource cycle. Lunging Strike generates Fury, while Whirlwind spends it to damage nearby enemies. Do not try to maintain uninterrupted Whirlwind before unlocking enough resource support. The following order represents skill-point priorities; extra points from seasonal or account progression can bring some choices forward.
- Invest the first available point in Lunging Strike to gain a Fury generator and a way to approach enemies.
- Unlock Whirlwind as soon as the Core skill becomes available.
- Improve Whirlwind's damage with additional ranks and its first accessible modifiers.
- Unlock Rallying Cry to improve movement speed and resource generation.
- Add War Cry for an offensive buff that supports your entire attack sequence.
- Take Challenging Shout when you need a reliable defensive cooldown.
- Continue raising Whirlwind and its useful modifiers rather than investing heavily in unrelated Core attacks.
At this stage, use Lunging Strike several times before channeling Whirlwind. Release Whirlwind when Fury becomes too low, refill your resource, and continue moving. A weapon upgrade with substantially more damage is usually more useful than a small bonus to a secondary stat.
Skill Point Order: Levels 15–29
At level 15, complete the Barbarian class quest to unlock Weapon Technique. Continue investing in Whirlwind and improve Rallying Cry, War Cry, and your chosen defensive skill. Unlock Wrath of the Berserker when its skill group becomes available and use it for difficult fights.
The current Whirlwind skill tree offers different modifiers and Bonus Skill Variants. Bursting changes Whirlwind into a Fire-based option with burning effects, making it useful for clearing groups during leveling when the variant is available to your account. Other choices, including Tornado, support different physical or secondary-damage interactions. Select one available option from each compatible branch. Do not assume that mutually exclusive variants can be active together.
Skill Point Order: Levels 30–49
By now, your six-skill setup should be established. Continue ranking up Whirlwind and the support skills that improve your actual playstyle. Favor Rallying Cry if Fury recovery is weak, War Cry when your damage needs improvement, and Challenging Shout if enemies regularly break through your defenses. Strengthen Wrath of the Berserker so that elite and boss fights become more manageable.
In the redesigned 2026 skill trees, old passive and Key Passive nodes have been removed from the tree, with many of their effects transferred to skills, Legendary Aspects, and Uniques. Therefore, do not blindly follow old instructions to spend points on Unbridled Rage or other former passive nodes. Use the current active-skill ranks and branch modifiers instead.
Skill Point Order: Levels 50–70
Finish your main Whirlwind upgrades, strengthen the Shouts you rely on, and develop Wrath of the Berserker and your defensive options. Unlike the original skill tree, the current system supports considerably more investment into active skills. Additional skill points can come from the relevant account and seasonal progression systems, so the total available to two characters at the same level may differ.
Your practical order remains consistent: Whirlwind damage first, enough Fury generation to sustain it, offensive Shout uptime, then defenses and Ultimate damage. If Fury is stable but bosses take too long, add damage instead of more resource generation. If you frequently stop spinning, solve your Fury problem before chasing another damage multiplier.
Whirlwind Rotation, Fury Management, and Berserking
Whirlwind is a channeled ability that consumes Fury while active. You cannot simply hold the button forever on a fresh character. The build improves as Rallying Cry, equipment affixes, resource-related Aspects, and Berserking bonuses become available. The rotation should adapt to your Fury supply rather than forcing an uninterrupted channel at any cost.
- Use Lunging Strike to move into range and generate your initial Fury.
- Activate Rallying Cry before a longer engagement to improve movement and resource recovery.
- Use War Cry before your main damage window.
- Channel Whirlwind while moving through enemies; stay close enough for the damage to connect.
- Use Wrath of the Berserker for tough elites and bosses, then continue your Whirlwind attacks.
- Activate Challenging Shout when incoming damage becomes dangerous.
- Release Whirlwind and return to Lunging Strike when resource recovery cannot support continued channeling.
Berserking is a major source of offensive power. Wrath of the Berserker helps activate it, while skill variants and Legendary Aspects can improve its uptime. Aspect of Anger Management can support Berserking when your resource remains above its threshold, and Aspect of Berserk Fury can generate Fury while Berserking. Together, these effects can make the build considerably smoother, although their benefits depend on your actual equipment and resource balance.
For bosses, avoid spending every cooldown before the enemy is vulnerable or stationary. Build Fury in advance, activate your offensive Shout and Ultimate for the damage window, and move out of dangerous attacks. If an elite pack is too dangerous, use Challenging Shout early rather than waiting until your health is nearly gone.
Explore services related to this guide, selected from our Diablo IV catalog.
View All Diablo IV Services

Barbarian Arsenal System and Weapon Expertise
The Barbarian can carry four weapons at once: two one-handed weapons, one two-handed Slashing weapon, and one two-handed Bludgeoning weapon. Many skills can be assigned to a specific eligible weapon type. This means a weapon's effect can matter even when it is not the weapon currently used by Whirlwind, but the damage of your assigned Whirlwind weapon remains especially important.
How to Unlock Weapon Technique
At level 15, visit Ked Bardu and complete Masters of Battle, the Barbarian class quest associated with Forgemaster Kerdi. This unlocks the Weapon Technique slot. Weapon Expertise develops as you fight using the corresponding weapon types, while the Technique slot lets you gain the benefit of a selected Expertise even when using another weapon.
For Whirlwind leveling, Polearm Technique is a useful choice because it provides offensive benefits while you are Healthy. You still need to develop the relevant Expertise through weapon use. Check your available Expertise ranks before selecting a Technique that you have not meaningfully progressed.
Which Weapon Should Whirlwind Use?
Assign Whirlwind to the strongest suitable two-handed weapon you have, whether that is a two-handed Bludgeoning weapon or a two-handed Slashing weapon. Do not force a weaker Slashing weapon solely because an old guide recommends bleeding damage. Weapon-related bonuses and variants have changed, and your selected Whirlwind variant may emphasize Fire damage rather than Bleed.
Lunging Strike can generally remain on automatic weapon selection because its main role in this build is Fury generation and mobility. Review your Arsenal assignment after every major weapon upgrade. A weapon in an unused slot can still contribute its relevant affixes or Legendary power, but its raw damage does not replace the damage of the weapon assigned to Whirlwind.
Best Barbarian Stats and Gear for Leveling
Strength is the Barbarian's primary offensive attribute, but it is only one part of gearing. You need sufficient Fury generation to keep using Whirlwind, cooldown reduction for important Shouts, and defenses for fighting inside enemy groups. Vitality is not one of Diablo 4's four primary attributes; use Maximum Life and appropriate defensive affixes instead.
Season 15 reduced the Barbarian's damage scaling from Strength, but Strength remains the class's main stat. Blizzard documents the adjustment in its Season 15 class balance notes. Avoid relying on numerical stat priorities copied from the game's original release.
Barbarian Attribute Priority
As you level, compare equipment by its effect on damage, resource stability, and survivability rather than a single displayed number. Use the four core attributes as a foundation, then assess the affixes that accompany them.
- Strength: Your primary damage attribute. Look for it on weapons, armor, and other suitable equipment.
- Dexterity: Supports Critical Strike Chance and avoidance, becoming more useful as your Whirlwind build develops critical-hit synergies.
- Intelligence: Helps with elemental resistances and related utility, but is not a primary damage target.
- Willpower: Contributes to survival and supporting effects, but should not replace Strength as your offensive priority.
For most leveling situations, favor high assigned-weapon damage, Strength, Fury Regeneration, Resource Generation, Critical Strike Chance, Cooldown Reduction, Maximum Life, Armor, Resistances, and Movement Speed. If you are using the Fire-based Bursting variant, additional Fire damage can be relevant; a physical endgame setup will want different damage bonuses.
| Item slot | Useful affixes |
|---|---|
| Assigned two-handed weapon | High weapon damage, Strength, Critical Strike Damage multiplier, Maximum Life. |
| Other Arsenal weapons | Strength, useful damage multipliers, Maximum Life, relevant Legendary Aspects. |
| Helm | Cooldown Reduction, Strength, Maximum Life, Armor. |
| Chest armor | Strength, Maximum Life, Fury Regeneration, Armor or Resistances. |
| Gloves | Attack Speed, Critical Strike Chance, Strength, Critical Strike Damage multiplier. |
| Pants | Strength, Maximum Life, Fury Regeneration, Armor. |
| Boots | Movement Speed, Fury Regeneration, Strength, Maximum Life. |
| Amulet | Cooldown Reduction, Strength, Critical Strike Chance, useful damage multipliers. |
| Rings | Critical Strike Chance, Critical Strike Damage multiplier, Attack Speed, resource-related bonuses. |
Tempering and Equipment Upgrades
Tempering becomes useful once you find the relevant manuals. Prioritize effects that fill immediate gaps: Fury or resource recovery for continuous Whirlwind, Critical Strike Chance or damage for offense, Maximum Life and elemental resistances for survival, and Movement Speed for faster clearing. The available Tempering categories determine which item slots can receive each effect.
Do not spend every material trying to perfect temporary equipment. During early leveling, replacing a weak assigned weapon can be more important than keeping a low-damage weapon with a good Aspect. Reserve expensive rerolls for equipment you expect to use longer, and maintain enough gold for crafting and gear upgrades as you prepare for the endgame.
Best Legendary Aspects for Whirlwind Barbarian
Legendary Aspects are essential for improving damage and Fury management. Useful powers become available through Legendary equipment and the Codex of Power. Rather than forcing a perfect arrangement of Aspects onto low-level gear, start by collecting effects that help maintain Whirlwind and keep you alive.
- Aspect of Channeling: Increases damage while channeling a skill, making it a strong offensive choice for Whirlwind.
- Aspect of Berserk Fury: Restores Fury over time while Berserking, directly improving Whirlwind uptime.
- Aspect of Vocalized Empowerment: Improves primary resource regeneration while Shout effects are active.
- Aspect of Anger Management: Supports Berserking and damage while you maintain enough primary resource, but its resource-related tradeoff must be considered.
- Aspect of Heavenly Strength: Provides defensive value while wielding a two-handed weapon.
- Aspect of Might: Grants defensive protection after using Basic skills, fitting the Lunging Strike leveling rotation.
- Crushing Aspect: Increases damage while Fortified, especially useful when the build can maintain Fortify consistently.
- Edgemaster's Aspect: Rewards attacks based on available primary resource, making strong Fury management more valuable.
- Vehement Brawler's Aspect: Provides an offensive benefit when using your Ultimate skill.
- Wildbolt Aspect: Can help pull enemies closer, improving the efficiency of area damage.
Start with resource-supporting Aspects if you cannot maintain Whirlwind. Once Fury becomes reliable, add damage multipliers and defensive effects that match your current difficulty. Not every recommended Aspect must be equipped simultaneously, and a different slot arrangement may be better depending on what drops.
Best Gems, Runes, and Runewords
Gem choices depend on your current Whirlwind variant. A Fire-based leveling version and a physical Dust Devil-focused endgame setup do not necessarily use the same weapon gem. Runes add another layer of customization for players with the relevant expansions, but the basic build must remain functional without them.
Gems for Leveling and Endgame
For a leveling setup using Whirlwind's Bursting Fire variant, favor gems that directly support Fire damage and Strength. If you change to a physical endgame version, adjust the weapon gems rather than keeping Fire bonuses that no longer support your main damage.
- Weapon — Ruby: Supports Fire damage when using the Bursting leveling variant.
- Armor — Ruby: Adds Strength, increasing the Barbarian's main offensive attribute.
- Jewelry — Diamond: Provides useful elemental resistances.
- Physical endgame alternative — Skull in the weapon: Supports Physical Damage when using a physical Whirlwind setup.
- Defensive jewelry alternative — Skull: Consider additional Armor when physical damage is your main survival problem.
Runewords: Ritual and Invocation Runes
The runeword system introduced with Vessel of Hatred combines one Ritual Rune with one Invocation Rune in two sockets on the same item. Ritual Runes generate Offering when their conditions are met; Invocation Runes consume Offering to trigger an effect. You can have up to two such pairs equipped. Blizzard's official explanation of the runeword system describes these mechanics.
- Bac + Gar: Movement generates Offering that can activate a Critical Strike Chance bonus. This is useful for a constantly moving Whirlwind character.
- Cir + Vex: Repeated skill casts generate Offering for a temporary bonus to skill ranks. Remember that holding a channeled skill is not the same as repeatedly casting separate skills.
- Poc + Gar: An alternative resource-spending trigger for the Critical Strike Chance effect, useful when your Fury expenditure is consistent.
- Poc + Que: An optional defensive combination that can automatically trigger Earthen Bulwark after enough Offering is generated.
Choose up to two combinations based on the runes you actually find. Do not assume that every Rune of Ritual will trigger efficiently from Whirlwind's individual damage ticks; read the activation condition and test the pair. Characters without the necessary expansion access should use appropriate gems instead of planning around unavailable runewords.
Horadric Cube Runeword Items
Lord of Hatred also includes items crafted through the Horadric Cube using specific runeword recipes. This is a separate system from equipping a two-rune Ritual and Invocation pair. One relevant example is Insight, created by combining a suitable Common staff or polearm with Ral + Tir + Tal + Sol in the Cube.
Insight may provide useful offensive and resource-related bonuses, but it should not automatically replace your current weapon. Compare its actual damage and bonuses with the weapon assigned to Whirlwind. The four-rune Cube recipe is not a four-socket Ritual/Invocation runeword, and it requires the corresponding expansion features.
Season 15 Mechanics, Talismans, and Mercenaries
Season 15 adds temporary powers that can improve leveling speed or damage at a cost. These mechanics are separate from the permanent Barbarian class system. Seasonal Realm players should complete the associated questline to unlock Prime Evil powers and related progression, while Eternal Realm characters should focus on the regular skill, equipment, and endgame systems.
Prime Evil Powers and Soul Splinters
Season of Hell's Legacy includes Waking Nightmares, Prime Evil powers, and special jewelry gems called Soul Splinters. Select the seasonal activity track that matches the content you are completing. Powerful seasonal effects can improve farming, but they should not cause you to ignore survivability or resource management.
Splinter of Lies can improve experience and farming rewards, but permanently applies dangerous negative effects. It is best considered for comfortable lower-risk farming rather than difficult bosses or Hardcore play. Splinter of the Black Soulstone increases damage as its effect builds, but also increases incoming damage. Splinter of Pain adds protection while reducing movement speed, which can slow Whirlwind farming. Splinter of Hellfire offers a major damage bonus but removes Critical Strike Chance, so it may conflict with builds that depend on critical-hit interactions.
Lord of Hatred Talismans
Lord of Hatred adds a Talisman system made from a Seal and Charms. While leveling, use whatever combination offers practical bonuses such as Movement Speed, elemental resistance, Maximum Life, Strength, useful skill ranks, or additional experience. Do not force an incomplete set simply because an endgame guide recommends it.
At higher difficulties, specialized Barbarian sets such as Sescheron's Fury can support Berserking-focused Whirlwind setups. Their value depends on the current set bonuses, the number of Charm slots available, and your equipment. A fully developed Talisman is a later goal, not a requirement for completing the level 1–70 route.
Mercenaries for Whirlwind Barbarian
Mercenaries become available through the relevant expansion content. Raheir is a useful primary mercenary for survivability, with protective skills that complement close-range Whirlwind combat. Varyana is a useful reinforcement for offensive bonuses, particularly with War Cry triggers. Other mercenaries can be selected for convenience or more specialized requirements.
Develop mercenary Rapport as you play, but treat mercenary bonuses as supplemental. Your build must still maintain Fury, deal damage, and survive dangerous mechanics when a mercenary effect is unavailable.
Fast Whirlwind Barbarian Leveling Route: 1–70
Efficient leveling depends on clearing enemies quickly rather than selecting the highest possible difficulty. Normal, Hard, or Expert can all be appropriate depending on your weapon quality and Fury recovery. If regular enemy groups take too long to defeat or Whirlwind stops constantly, reduce the difficulty until the build becomes smoother.
- Levels 1–14: Follow the campaign if you are playing it for the first time, or choose suitable open-world activities when campaign skip is available. Unlock Lunging Strike and Whirlwind and upgrade your assigned weapon frequently.
- Level 15: Complete Masters of Battle in Ked Bardu to unlock Weapon Technique. Begin improving the Expertise relevant to your chosen setup.
- Levels 15–29: Use Helltides, Tree of Whispers objectives, appropriate dungeons, and seasonal activities to gain experience and equipment. Add Rallying Cry, War Cry, and defensive support.
- Levels 30–49: Prioritize activities with dense enemy groups that Whirlwind can clear efficiently. Collect resource Aspects, crafting materials, and stronger weapons.
- Levels 50–70: Improve your skill ranks, stabilize Fury generation, complete useful gear upgrades, and prepare for the early endgame.
- Level 70: Begin systematic Paragon progression, collect endgame equipment, and upgrade glyphs in The Pit.
Players with Lord of Hatred can use War Plans and other expansion activities after unlocking them. Season 15 players can complete Waking Nightmare objectives when their rewards fit the character's current needs. Helltides, Whispers, and ordinary dungeon farming remain useful throughout the progression.
When comparing repeated character runs or Diablo 4 leveling routes, measure actual experience gained per session rather than theoretical rewards. A slightly lower difficulty with uninterrupted Whirlwind clearing is often more productive than repeated deaths and long fights on a higher setting.
Paragon Boards and Glyphs for Whirlwind Barbarian
After reaching level 70, the Paragon system becomes the main long-term progression path. Start by unlocking useful Legendary Nodes and glyph sockets. You can connect up to five boards, including the Starter Board. The exact connection order and glyph placement can change between a simple leveling transition and a fully optimized endgame build.
Recommended Paragon Boards
For a Whirlwind build centered on Fury spending, Berserking, and physical or secondary area damage, the following boards are strong candidates. Choose their order according to which bonuses your current character needs most.
- Starter Board: Reach a useful glyph socket and collect efficient attribute nodes without unnecessary detours.
- Warbringer: Supports Fortify through Fury spending and provides offensive benefits while Fortified.
- Carnage: Develops attack-speed and Berserking-related damage synergies.
- Flawless Technique: Rewards repeated attacks using the same weapon, supporting critical-hit scaling during Whirlwind.
- Force of Nature: Becomes relevant to specialized setups that generate Dust Devils or related secondary damage effects.
Some builds use Blood Rage or a different board instead of one of these options. This is not a contradiction: the best Paragon layout changes with your equipped Uniques, chosen Whirlwind variant, and target difficulty. A beginner should prioritize accessible Legendary Nodes and useful glyph sockets before copying a high-Paragon pushing layout.
Best Paragon Glyphs and Upgrade Priority
Useful glyphs for Whirlwind include Challenger, Wrath, Twister, Exploit, and Marshal. Their value depends on your skill variant, damage sources, and the attributes within each socket's radius. Twister is particularly relevant when Dust Devils contribute heavily to your damage, while Exploit supports Vulnerable interactions and Marshal can improve Shout-related utility.
For a general physical endgame setup, a practical starting arrangement is Starter Board with Challenger, Warbringer with Wrath, Carnage with Twister, Flawless Technique with Exploit, and Force of Nature with Marshal. Adjust this arrangement when your available Paragon points, attribute thresholds, or chosen variant make a different layout stronger.
Upgrade glyphs through The Pit, not by earning glyph experience in Nightmare Dungeons. Rare glyphs gain additional radius and can become Legendary as they are improved. Concentrate on the glyphs actually socketed in your build rather than spreading upgrade attempts across every glyph you own.
Before investing heavily in Paragon glyph progression, check the requirements of each glyph and the attributes located within its radius. Prioritize unlocking the socket and its important bonuses, then improve the glyphs that provide the largest benefit to your current damage and resource setup.
Transitioning to an Endgame Whirlwind Barbarian
You can keep playing the leveling Whirlwind setup after level 70 while farming early Torment content. However, a specialized endgame version usually develops stronger Fury sustain, more consistent Berserking, better critical-hit scaling, and additional damage sources such as Dust Devils. The skill bar may also change once you no longer need Lunging Strike.
Many endgame Whirlwind versions use Rallying Cry, War Cry, Challenging Shout, Wrath of the Berserker, Iron Skin, and Whirlwind. Lunging Strike is removed only when equipment and other effects provide enough Fury without it. This is an important difference from the leveling setup: copying the endgame bar too early can leave your character unable to sustain Whirlwind.
Important Endgame Uniques and Mythic Uniques
Whirlwind has several valuable gear targets. They improve the build in different ways and should be considered upgrades to pursue after establishing a reliable farming setup, not requirements for starting a Barbarian.
- Gohr's Devastating Grips: Strengthens Whirlwind and helps pull enemies into its area of damage.
- Tuskhelm of Joritz the Mighty: Supports builds that maintain Berserking and benefit from additional offensive and resource-related effects.
- Ramaladni's Magnum Opus: Can provide a valuable damage multiplier based on Fury, but also introduces resource-management considerations.
- Tibault's Will: A useful option in builds that can consistently activate its relevant effects.
- Ring of Starless Skies: A Mythic Unique that can improve both damage and resource efficiency.
- The Grandfather: A Mythic weapon option for builds that benefit from its powerful critical-damage properties.
A physical endgame Whirlwind setup should reassess its gems, damage-type bonuses, Aspects, Paragon boards, and glyphs. If you used Bursting for Fire damage while leveling, switch away from Fire-specific bonuses when your new variation and equipment no longer benefit from them. Check which weapon Whirlwind is assigned to after every major Arsenal change.
Common Whirlwind Barbarian Problems and Fixes
Most leveling problems are caused by insufficient Fury, weak weapon damage, outdated skill-tree information, or trying to use an endgame setup without its required items. Fixing the specific cause is usually more effective than replacing your entire build.
- Whirlwind stops after a few seconds: Generate Fury with Lunging Strike, improve Rallying Cry, equip Fury Regeneration affixes, and look for Aspect of Berserk Fury or Aspect of Vocalized Empowerment.
- Damage against bosses is weak: Check your assigned weapon, Whirlwind ranks, War Cry uptime, Berserking effects, and whether you are using damage bonuses appropriate to your skill variant.
- You die while channeling: Improve Maximum Life, Armor, resistances, defensive Aspects, and Challenging Shout timing. Avoid dangerous ground effects instead of trying to spin through them.
- Weapon Technique is unavailable: Reach level 15 and complete Masters of Battle in Ked Bardu.
- An old guide recommends Unbridled Rage as a passive skill: The current skill tree has been redesigned. Use the available active-skill modifiers and relevant Legendary effects instead.
- Runes or Talismans are missing: Check your expansion ownership and whether the corresponding systems have been unlocked.
- Glyph upgrades are not progressing: Upgrade the glyphs through The Pit and check their socket requirements. Refer to Blizzard's current Diablo IV patch notes for subsequent game changes.
Final Whirlwind Barbarian Leveling Checklist
Before transitioning into the endgame, make sure your character can generate Fury reliably, use Whirlwind against ordinary enemy groups, activate Shouts when needed, and survive the difficulty you intend to farm. A strong assigned weapon, suitable Aspects, and well-chosen defensive stats are more important than immediately obtaining every recommended Unique.
- Reach level 70 with Whirlwind as your main Core skill.
- Complete Masters of Battle and configure your Weapon Technique and Arsenal assignments.
- Prioritize weapon damage, Strength, Fury recovery, cooldown reduction, and survivability.
- Use appropriate Shouts, Berserking effects, Aspects, Tempering bonuses, gems, and runes when available.
- Develop your Paragon boards and upgrade the glyphs equipped in your build through The Pit.
- Replace Lunging Strike only when your endgame equipment can sustain Whirlwind without it.
- Adapt your damage bonuses when switching from a Fire-based leveling variant to a physical endgame setup.
Whirlwind Barbarian succeeds by combining continuous movement with reliable Fury generation and well-timed offensive and defensive buffs. Establish that foundation during leveling, then use stronger gear, Paragon bonuses, and upgraded glyphs to turn a comfortable leveling build into a powerful endgame character.