Manaforge Omega Boss Strategies Guide: Conquer Season 3’s Epic Raid
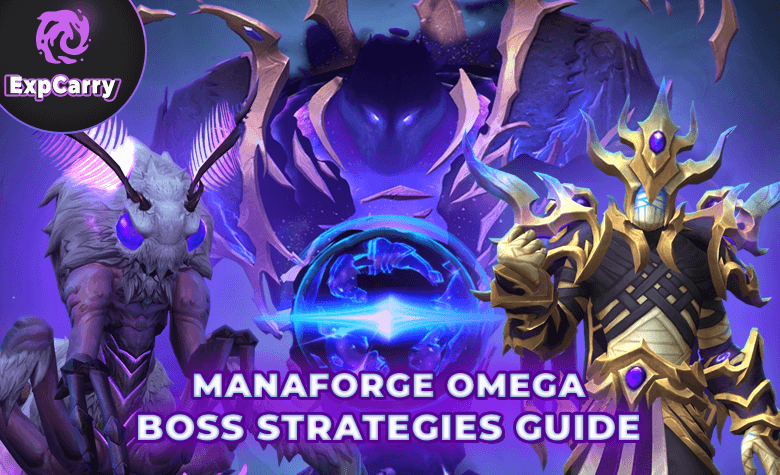
Welcome to our comprehensive Manaforge Omega boss guide for World of Warcraft: The War Within Season 3 (Patch 11.2). This climactic raid, set on the shattered world of K’aresh, pits you against eight formidable bosses, culminating in a reality-shaping battle against Dimensius, the All-Devouring. Each encounter demands precise coordination, mastery of unique mechanics, and the use of the Reshii Wraps artifact cloak to navigate the raid’s void-infused challenges. Whether you’re aiming for BiS gear, the Royal Voidwing mount, or the Cutting Edge: Dimensius achievement, this guide provides detailed strategies, loot tables, and tips to dominate Manaforge Omega on Normal, Heroic, or Mythic difficulty. Struggling with mechanics? ExpCarry’s professional teams offer expert carries to ensure you conquer every boss with ease! With the EXPCARRY coupon you can save 10% on the purchase of Manaforge Omega Raid Boost and play with the TOP guilds of the EU & US region without stress, wipes and guaranteed loot.
Why This Guide Matters
Players frequently search for terms like “Manaforge Omega boss guide,” “Plexus Sentinel tactics,” and “Dimensius strategy” to master this raid’s complex mechanics. Manaforge Omega, launched on August 12, 2025, is the final raid of The War Within, featuring eight bosses, including one optional encounter (The Soul Hunters). With item levels ranging from 681-723 across difficulties and exclusive rewards like the Unbound Star-Eater mount, this raid is a must for PvE enthusiasts. Our guide breaks down each boss’s mechanics, provides actionable strategies, and highlights key loot to help you succeed, whether you’re a casual raider or chasing Mythic progression.
Guide Overview: Manaforge Omega’s Challenges
Manaforge Omega, located at Shadow Point, K’aresh ([42, 21]), is a colossal arcane facility overtaken by the Shadowguard to resurrect Dimensius. Players access the raid using the Reshii Wraps cloak, unlocked via the Ghosts of K’aresh campaign, to phase-dive through its deadly defenses. The raid features three wings, with Normal, Heroic, and Mythic difficulties available from launch, and Raid Finder rolling out weekly. Below, we detail strategies for all eight bosses, including their key mechanics, positioning tips, and loot. For those struggling, ExpCarry’s boosting services can provide professional carries for a seamless clear.
Boss 1: Plexus Sentinel
Overview
The Plexus Sentinel is the first boss, a mechanical construct guarding Manaforge Omega’s mana intake pipeline. It enforces “pure energy” presence, using the Arcanomatrix Sieve to atomize non-energy players. The fight alternates between Phase 1 (space management) and Phase 2 (shield-breaking intermission).
Key Mechanics
- Phase Blink (Reshii Wraps): Use the Extra Action Button to teleport forward and transition to a higher energy state (14-second cooldown). Essential for surviving the Sieve in Phase 2.
- Arcanomatrix Sieve (Phase 2): At 100 Energy, the boss teleports to a new tunnel section, filling it with traps, rotating beams, orbs, and a lethal moving energy wall. Use Phase Blink to cross the wall safely.
- Eradicating Salvo (Phase 1): Stack under the boss to soak massive raid-wide damage. On Heroic/Mythic, two back-to-back missiles target the same player, requiring two soak groups to split damage and counter knockbacks.
- Obliteration Arcanocannon: Tank-buster that leaves a permanent pool. Tanks swap and move to a corner to drop pools, keeping the boss centered.
- Displacement Matrices: Players drop circles after 6 seconds that explode if touched, leaving slowing pools. Drop these against side walls, not stacked.
- Arcane Radiation: Avoid irradiated room sections, especially in Phase 2, to minimize ticking damage.
- Mythic: Overloading Attendants: Kill these adds quickly to prevent escalating raid damage.
Strategy
In Phase 1, position the boss centrally, with tanks swapping after each Obliteration Arcanocannon to drop pools in corners. Spread out to place Displacement Matrices along side walls, avoiding overlap. Stack under the boss for Eradicating Salvo to split damage (use two soak groups on Heroic/Mythic). In Phase 2, use Phase Blink to cross the lethal energy wall, dodge rotating beams and orbs, and break the boss’s shield to resume Phase 1. Healers should prepare for constant raid-wide damage, especially in Phase 2. On Mythic, prioritize Overloading Attendants with burst DPS.
Loot
- 681/694/707 ilvl (Normal/Heroic/Mythic): Armor, weapons, Tier Set tokens.
- Achievement: Of Mice and Manaforges (save all mice from atomization, Normal+).
Boss 2: Loom’ithar
Overview
Loom’ithar, a silk-borne creature, weaves “living silk” to create chaotic hazards. The fight splits into two phases at 50% health, with deadly threads and arcane energy.
Key Mechanics
- Infused Tangles: Break these webs to free trapped players, dealing light damage.
- Infusion Tether: Run 40 yards to snap tethers applied to players, preventing heavy damage.
- Writhing Wave (Phase 2): Stack to soak raid-wide damage as Loom’ithar splits, creating additional hazards.
- Arcane Webs: Dodge expanding web patterns that slow and damage players.
- Mythic: Unstable Silk: Random players spawn explosive silk patches, requiring quick movement.
Strategy
Spread out in Phase 1 to manage Infused Tangles and Infusion Tether. Assign DPS to break tangles quickly, while tethered players run 40 yards to snap tethers. Dodge Arcane Webs by watching floor patterns. In Phase 2, stack for Writhing Wave to mitigate damage, and spread afterward to avoid overlapping hazards. On Mythic, watch for Unstable Silk patches and move out immediately. Healers should prioritize tethered players and prepare for heavy raid damage in Phase 2.
Loot
- 681/694/707 ilvl: Armor, accessories, Tier Set tokens.
- Achievement: Time to Vote! Cute or Scary? (/cower or /cuddle before the fight, Normal+).
Boss 3: Soulbinder Naazindhri
Overview
Soulbinder Naazindhri binds ethereal souls into silk servitors, requiring tight add control and positioning.
Key Mechanics
- Soul Calling: Interrupt this cast to prevent summoning Shadowguard adds.
- Soulrend Orbs: Dodge these slow-moving orbs that deal heavy Shadow damage on impact.
- Soulfray Annihilation: Soak this raid-wide burst by spreading out and standing in designated safe zones.
- Mythic: Little Unbound Souls: Kill all adds before the boss’s next Soul Calling to avoid a wipe.
Strategy
Assign interrupt rotations for Soul Calling to minimize add spawns. Spread out to dodge Soulrend Orbs, moving predictably to avoid collisions. For Soulfray Annihilation, position in safe zones to soak damage evenly. On Mythic, prioritize killing Little Unbound Souls with burst DPS before the next Soul Calling. Tanks should kite adds away from the raid, and healers should prepare for spike damage during Annihilation.
Loot
- 681/694/707 ilvl: Trinkets, weapons, Tier Set tokens.
- Achievement: Mother of All Tantrums (defeat all Little Unbound Souls, Normal+).
Boss 4: Forgeweaver Araz
Overview
Forgeweaver Araz, a technomancer, channels arcane energy to fuel Dimensius, requiring interrupt coordination and add management.
Key Mechanics
- Arcane Convergence: Interrupt this cast to prevent Araz from gaining a damage buff.
- Void Forged Echo: Feed these adds to the Dark Singularity to despawn them safely.
- Astral Harvest: Manage debuffs by spreading out to avoid overlapping AoEs.
- Echoing Tempest: Dodge swirling AoE patterns to minimize damage.
- Mythic: Dark Singularity Pull: Counter the pull-in mechanic with movement abilities during the final phase.
Strategy
Assign interrupt rotations for Arcane Convergence to keep Araz’s damage in check. Kite Void Forged Echo adds to the Dark Singularity to despawn them, avoiding raid-wide damage. Spread for Astral Harvest to prevent overlapping AoEs, and dodge Echoing Tempest patterns. In the final phase, use movement abilities to counter Dark Singularity Pull on Mythic. Healers should focus on players with Astral Harvest debuffs, and tanks should position Araz away from adds.
Loot
- 697/701/713 ilvl: Utility armor, professional reagents.
- Achievement: Cheat Meal (feed a Void Forged Echo to Dark Singularity, Normal+).
Boss 5: The Soul Hunters (Optional)
Overview
The Soul Hunters, a trio led by demon hunter Adarus, is an optional encounter skippable for faster runs but offers unique loot.
Key Mechanics
- Abyssal Gaze: Use Adarus’ Spare Blindfold to avoid gaze effects, which stun and damage players.
- Metamorphosis: Coordinate cooldowns to survive the trio’s transformation, dealing heavy raid-wide damage.
- Chaos Blades: Dodge sweeping blade patterns from Ilyssa and Velaryn.
- Mythic: Abyssal Overload: Manage additional adds spawning during Metamorphosis.
Strategy
Assign players to use Spare Blindfold for Abyssal Gaze, rotating to cover all casts. Save defensive cooldowns for Metamorphosis, stacking to mitigate damage. Dodge Chaos Blades by watching floor patterns. On Mythic, focus burst DPS on Abyssal Overload adds to prevent overwhelm. Tanks should separate the trio to reduce cleave damage, and healers should prepare for heavy spike damage during Metamorphosis.
Loot
- 697/701/713 ilvl: Boots (enhance Reshii Wraps trigger rate), off-hand weapons.
- Achievement: I See... Absolutely Nothing (all players wear blindfold, Normal+).
Boss 6: Fractillus
Overview
Fractillus, an elemental of sand and glass, controls the arena with environmental hazards.
Key Mechanics
- Nexus Crystals: Destroy these to prevent raid-wide damage bursts.
- Entropic Shockwave: Dodge radial shockwaves that knock back and deal heavy damage.
- Glass Shards: Avoid standing in shard pools that slow and damage.
- Mythic: Fourth Wall: Destroy the fourth wall 18 times to trigger a vulnerability phase.
Strategy
Prioritize DPS on Nexus Crystals to minimize raid damage. Spread out to dodge Entropic Shockwave and avoid Glass Shards pools. On Mythic, coordinate to destroy the Fourth Wall 18 times to trigger Fractillus’s vulnerability, maximizing DPS windows. Tanks should kite the boss to clear areas, and healers should manage raid-wide damage during Shockwave phases.
Loot
- 697/701/713 ilvl: Caster trinkets, weapons (dagger).
- Achievement: Breaking the Fourth Wall (destroy fourth wall 18 times, Normal+).
Boss 7: Nexus-King Salhadaar
Overview
Nexus-King Salhadaar, atop his Voidwing, commands the Shadowguard with dark oaths and cosmic attacks.
Key Mechanics
- Oath-Bound: Interrupt this cast to prevent players from becoming thralls.
- Starkiller Swing: Dodge massive cleave attacks from Salhadaar’s Voidwing.
- Dark Stars: Avoid orbiting star patterns that deal heavy damage.
- Mythic: Galactic Strikes: Survive additional AoE bursts during the final phase.
Strategy
Assign interrupt rotations for Oath-Bound to prevent thrall conversions. Spread out to dodge Starkiller Swing and Dark Stars, using movement abilities to reposition quickly. In the final phase, stack for Galactic Strikes on Mythic, using raid cooldowns to survive. Tanks should position Salhadaar centrally to manage cleaves, and healers should prepare for heavy raid damage during star phases.
Loot
- 701/704/716 ilvl: Jewelry, weapons (1H sword), Tier Set tokens.
- Achievement: King’s Ransom (defeat with a hidden assassin, Normal+).
Boss 8: Dimensius, the All-Devouring
Overview
Dimensius, the All-Devouring, WoW’s largest raid boss, manipulates space, gravity, and reality in a multi-phase fight to save Azeroth.
Key Mechanics
- Void Devour: At 100 Energy, Dimensius deals Shadow damage every second for 5 seconds, pulling players with insufficient Collective Gravity into Oblivion (instant death). Stack with players to gain Collective Gravity stacks.
- Cosmic Collapse: Stack to mitigate massive raid-wide damage, triggered by Dimensius’s collapse into the Dark Heart.
- Fists of the Voidlord: Tank-buster with knockback, damaging nearby players.
- Massive Smash: Deals 9-22M Cosmic damage within 20 yards, applying Mortal Fragility (100% increased Physical damage taken).
- Dark Matter: Dodge 4-yard impact zones dealing Shadow damage.
- Extinguish the Stars: Survive heavy raid-wide damage in the final phase.
- Mythic: Antimatter Soak: Stand in Antimatter pools to reduce raid-wide damage, using defensives.
Strategy
In Phase 1, stack players with Excess Mass to gain Collective Gravity stacks, preventing Void Devour wipes. Tanks swap after Fists of the Voidlord and move away for Massive Smash to minimize raid damage. Spread for Dark Matter to avoid overlaps. In Phase 2, stack for Cosmic Collapse and use raid cooldowns. On Mythic, assign players to soak Antimatter pools with defensives. In the final phase, survive Extinguish the Stars with heavy healing and burst DPS to finish Dimensius. Use Reshii Wraps to escape the Dark Heart pull with Xal’atath’s aid.
Loot
- 697/710/723 ilvl: BiS weapons, trinkets, Tier Set tokens, Hungering Void Curio.
- Mounts: Royal Voidwing (Heroic/Mythic), Unbound Star-Eater (Mythic, time-limited).
- Achievements: Ahead of the Curve: Dimensius (Heroic), Cutting Edge: Dimensius (Mythic).
- Achievement: Defying Gravity (all players hit by Reverse Gravity, Normal+).
Tips for Success
- Reshii Wraps Mastery: Practice using Phase Blink to navigate mechanics like the Arcanomatrix Sieve and Dark Heart pull.
- Coordinate Interrupts: Assign clear interrupt rotations for bosses like Soulbinder Naazindhri and Nexus-King Salhadaar to prevent wipes.
- Prioritize Adds: Focus burst DPS on adds like Little Unbound Souls and Overloading Attendants on Mythic.
- Use Defensive Cooldowns: Save defensives for high-damage phases like Writhing Wave, Soulfray Annihilation, and Extinguish the Stars.
- Loot Optimization: Choose Armor Priority VIP with ExpCarry’s boosting services to maximize gear drops for your armor type.
Why Choose ExpCarry for Manaforge Omega?
Struggling with Plexus Sentinel tactics, Dimensius strategy, or other complex mechanics? ExpCarry’s professional teams offer Mythic, Heroic, or Normal carries paid with in-game gold, ensuring a safe, Blizzard-compliant experience. Whether you need a single boss kill or a full raid clear, ExpCarry provides:
- Self-Play Runs: Participate without account sharing.
- Guaranteed Loot: Secure BiS gear, Tier Set tokens, and mounts like the Royal Voidwing.
- 24/7 Support: Flexible scheduling to fit your needs.
- Expert Strategies: Learn from top-tier raiders to improve your skills.
Contact ExpCarry today to book your Manaforge Omega boost and conquer Season 3’s ultimate raid!
Loot Table Summary
| Boss | Normal ilvl | Heroic ilvl | Mythic ilvl | Notable Drops |
|---|---|---|---|---|
| Plexus Sentinel | 681 | 694 | 707 | Tier Set tokens, armor |
| Loom’ithar | 681 | 694 | 707 | Accessories, transmog helms |
| Soulbinder Naazindhri | 681 | 694 | 707 | BiS trinkets, weapons |
| Forgeweaver Araz | 697 | 701 | 713 | Utility armor, reagents |
| The Soul Hunters (Optional) | 697 | 701 | 713 | Boots (Reshii Wraps boost), off-hands |
| Fractillus | 697 | 701 | 713 | Caster trinkets, dagger |
| Nexus-King Salhadaar | 701 | 704 | 716 | Jewelry, 1H sword |
| Dimensius, the All-Devouring | 697 | 710 | 723 | Royal Voidwing, Unbound Star-Eater, Hungering Void Curio |
Conclusion
Manaforge Omega is the pinnacle of The War Within Season 3, offering thrilling encounters and top-tier rewards. From mastering Plexus Sentinel tactics to executing a flawless Dimensius strategy, this guide equips you with the knowledge to succeed. For those seeking a stress-free clear, ExpCarry’s Manaforge Omega carries provide professional support, ensuring you claim 681-723 ilvl gear, mounts, and achievements. Don’t let complex mechanics hold you back—book your boost today and dominate K’aresh’s void-infused forge!

