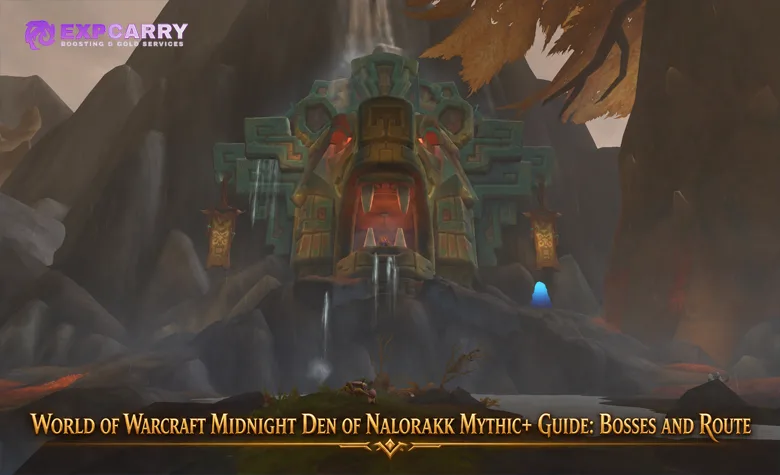
World of Warcraft Midnight Den of Nalorakk is a three-boss Mythic+ dungeon where route execution matters as much as boss knowledge. The opening section is built around collecting six Food Offerings before The Hoardmonger, the winter section adds environmental movement and several dangerous caster packs, and the final wing punishes groups that do not assign interrupts before pulling. A clean run depends on knowing which trash can be grouped safely, which casts must never finish, and where the tank should position bosses and packs for the next mechanic.
This World of Warcraft Midnight Den of Nalorakk guide gives a practical Mythic+ route for pickup groups and organized teams, with tank responsibilities, interrupt priorities, Food Offering interactions, useful dungeon buffs, and all three boss mechanics. The route is deliberately based on current pack types and fixed dungeon interactions rather than an old percentage string, because Blizzard already changed the first area by removing two Earthwhisper Tenders and has continued hotfixing the dungeon during Season 2.
Den of Nalorakk Mythic+ Route at a Glance
Den of Nalorakk has a 32-minute Mythic+ timer and three bosses: The Hoardmonger, Sentinel of Winter, and Nalorakk. Blizzard's official Zul'Aman zone overview identifies those three encounters as Nalorakk's trials. The safest Mythic+ route follows the dungeon's natural progression while using optional interactions to reduce pressure. The first section should end with six valid Food Offerings, the winter section should end by killing Winter Squall before Sentinel, and the final wing should be treated as a controlled interrupt gauntlet rather than a sequence of oversized pulls.
| Section | Route Goal | Tank Priority | Critical Group Job |
|---|---|---|---|
| Foraging area | Collect 6 Food Offerings while taking efficient trash | Keep Spirit of Hunger pulls controlled and avoid unnecessary double-danger packs | Interrupt Healing Breeze and Scavenge; kill Starvation Effigy quickly |
| The Hoardmonger | Control Resourceful Measures order and mushroom space | Position boss near the next desired supply pile | Soak Rotten Mushrooms before they burst and dispel Toxic Spores where possible |
| Winter approach | Clear selected Frostfang, Mauler, Revenant, Rumbler and Avatar packs | Respect early Frostfang tank damage and ground effects | Interrupt Frigid Roar; dispel Cryo Surge; break Glacial Tomb |
| Harsh Winds | Reach and kill Winter Squall | Move pack to safe terrain without dragging players into wind | Use cover and take Snowworn Provisions interaction if available |
| Sentinel of Winter | Control tornado bait, adds and pushback | Keep boss near useful snow piles for Frozen Tempest | Interrupt Winter's Shroud and soak Rimeshatter |
| Final wing | Clear the linear route to Nalorakk without missed priority casts | Control Saberfang armor stacks and Warbringer pressure | Kick Arc Lightning and Lightning Bolt; kill Magma and Volatile Totems |
| Nalorakk | Place Bear Echoes safely and protect Zul'jarra | Control boss facing and soak Forceful Slam correctly | Stand behind Zul'jarra for Onslaught and body-block echoes during Fury |
The exact enemy-forces route can vary with key level, group damage, and current Mythic+ routing tools. What should not vary is the responsibility structure. The group needs six Food Offerings before boss one, enough winter trash to reach Winter Squall cleanly, and a final-wing interrupt plan before entering the last packs.
Players who want to practice the dungeon without building the route from scratch can use a Den of Nalorakk Mythic+ run as one external option. For self-play, start with the route below and change only pull size or optional trash after the group can execute the core mechanics consistently.
Food Offerings: Collect Six Before The Hoardmonger
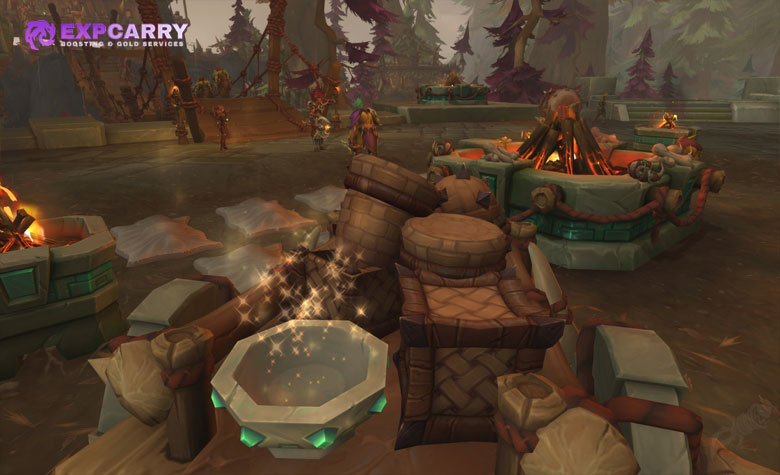
The first part of Den of Nalorakk is not simply an enemy-forces corridor. The group must gather six valid Food Offerings to progress into The Hoardmonger encounter. Offerings come from interactable food sources around the opening area, including berry bushes, fishing locations, and barrels of apples. Build the first pulls around reaching those interactions rather than clearing every visible pack.
Blizzard's Midnight hotfix rollup includes a September 1 fix for Food Offering interactions: using an Offering while mounted could temporarily make it non-interactable. The bug is fixed, but the interaction remains part of the route. Groups should still verify that the Offering was successfully collected before moving far enough away that returning costs time.
Do not let Keen-Eyed Strikers reach a nearby food source uncontested. Their Scavenge cast can interfere with the resource you are trying to collect, so it belongs near the top of the interrupt list. The tank should also avoid dragging an active pack over multiple Offering locations if the group's clicker cannot interact safely.
Use the Food Route to Choose Your Trash
A PUG-safe opener should take packs that naturally connect the six Offering sources rather than forcing a high-risk percentage route. The common enemy types are Earthwhisper Tenders, Thornclaw Gatherers, Keen-Eyed Strikers, Territorial Matriarchs with Curious Yearlings, and Spirit of Hunger packs with Starvation Effigies.
Blizzard removed two Earthwhisper Tenders from the first area on August 25. That means route strings or screenshots created before that hotfix can show caster counts that no longer match the live dungeon. Use current enemy-forces values in the game or a current route tool for the exact percentage, but keep the same logic: collect six Offerings, prioritize efficient packs along that path, and avoid adding a second dangerous Spirit pull just to imitate an older route.
Warding Incense Gives the Whole Group 5% Versatility
The opening area contains Warding Incense interactions that can provide a significant dungeon buff. Current live behavior allows a Druid in Bear Form or a player with at least 25 skill in Midnight Alchemy to activate the incense. After Blizzard's August 18 hotfix, the effect grants 5% Versatility, applies to all allies in the instance, lasts 10 minutes, and persists through death.
Because the buff is group-wide, one eligible player is enough. Plan the interaction before the key if your composition can use it, and activate it without turning the pull into a dangerous detour. The value is highest when the group can carry the buff through a large portion of the first boss and winter approach.
First-Area Trash: Mandatory Interrupts and Tank Jobs
The opening trash is dangerous because several mobs punish different kinds of mistakes at the same time. The group needs hard interrupts for heals and resource interference, a curse dispel for Spirit of Hunger pressure, and tank awareness for stacking physical damage. Assign the first interrupt before each pull rather than reacting after two important casts overlap.
Earthwhisper Tender
Healing Breeze is the critical cast. Interrupt it every time. If it finishes, the resulting healing effect can be purged, but allowing the cast costs damage and can extend the pull enough for the next dangerous ability cycle. Earth Bolt is lower priority and can take spare interrupts after Healing Breeze is covered.
Keen-Eyed Striker and Thornclaw Gatherer
Scavenge from Keen-Eyed Striker is especially important near a Food Offering. Stop it before the mob interferes with the route objective. Razor Dive targets a player and can apply a bleed, so the target should use a defensive if needed rather than standing away from the healer during a busy pull.
Thornclaw Gatherer applies Shredding Claws pressure to the tank and drops Rotten Supplies ground hazards. Blizzard increased the Rotten Supplies cooldown to 17 seconds on August 25, reducing frequency without making the mechanic harmless. Tanks should keep the pack moving enough to preserve melee space while avoiding excessive movement that breaks casts or splits cleave.
Spirit of Hunger and Starvation Effigy
Spirit of Hunger is one of the mobs that should determine pull size. It is crowd-control immune and creates heavy group pressure through Insatiable Hunger and Feast of Misery. Kill the associated Starvation Effigy quickly to limit the hunger mechanic, and use curse dispels on Insatiable Hunger when available. Blizzard capped Insatiable Hunger at five stacks on August 18.
In pickup groups and higher keys, pulling Spirits one at a time is the safer baseline. Combining two Spirit packages creates overlapping healer pressure and makes a missed Effigy swap disproportionately expensive. Pull larger only when the group has planned cooldowns and enough damage to remove the Effigies immediately.
Territorial Matriarch and Curious Yearlings
The Matriarch becomes more dangerous as nearby cubs die because Mother's Wrath increases her pressure. Tanks should anticipate the damage ramp instead of spending every defensive at the start of the pull. Enrage removal is valuable here when the group has access to Soothe or an equivalent effect; removing Mother's Wrath clears all of its stacks.
For a group still learning the dungeon, avoid stacking Matriarch pressure with a Spirit of Hunger unless the route absolutely requires it. Both mechanics become more dangerous as the pull develops rather than only on the opener.
Explore services related to this guide, selected from our World of Warcraft catalog.
View All World of Warcraft Services

The Hoardmonger Boss Mechanics
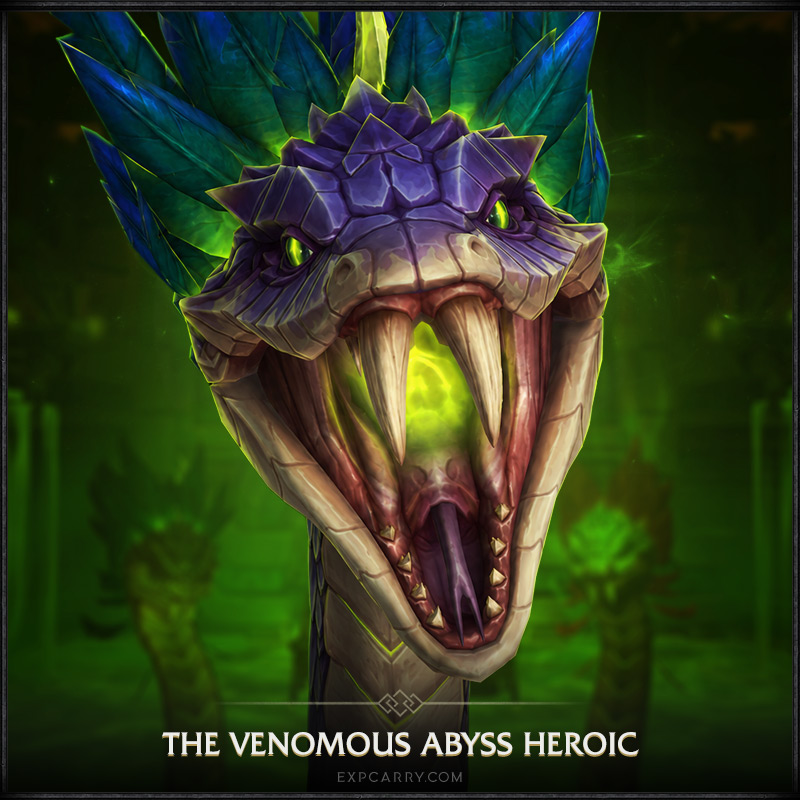
The Hoardmonger is a positioning boss disguised as a simple damage check. On Mythic and Mythic+, Resourceful Measures triggers at 90%, 70%, and 40% health and makes the boss gather from the nearest resource pile. On Mythic difficulty, each newly acquired ability remains active for the rest of the fight, so the order in which the boss reaches supplies determines how complicated the final phase becomes.
A common PUG-friendly recommendation is to control the boss so meat is taken first, bone second, and mushrooms last. This is a community routing preference rather than a Blizzard-mandated order, but it reduces early mushroom management while the group is still learning the encounter. The tank should position the boss closer to the desired next pile and away from the one the group wants to delay.
Meat, Bone, and Mushroom Mechanics
The meat pile upgrades Ravenous Bellow into Hearty Bellow, adding a knockback and a 10-second Physical damage-over-time effect to the group-wide hit. The bone pile replaces Earthshatter Slam with Bonespike Slam, which leaves bone spikes on the ground for 45 seconds and applies Bonespiked on contact. The mushroom pile grants Overflowing Supplies, increasing the number of Rotten Mushrooms thrown by Spoiled Supplies.
A Rotten Mushroom grows for 12 seconds and must be soaked before it expires or it triggers Putrid Burst. Soaking destroys the mushroom and applies Toxic Spores, a stacking poison effect. Spread mushroom assignments across the group instead of having one player repeatedly collect every stack, and use poison dispels where available to reset dangerous accumulation.
The tank's largest contribution is controlling Resourceful Measures. A badly positioned boss can reach an undesired pile and force the group to handle the hardest mechanic earlier than planned. Keep the arena organized from the first health threshold instead of trying to correct positioning after the boss has already committed.
Winter Route: Harsh Winds, Snowworn Provisions, and Winter Squall
After The Hoardmonger, the dungeon changes from a foraging route into a winter survival section. The safest path clears selected Frostfang, Terra Rumbler, Frigid Mauler, Glacial Revenant, and Avatar of Determination packs while preserving enough room to deal with Harsh Winds. The route should culminate in killing Winter Squall, which removes the persistent wind pressure.
Harsh Winds is handled with terrain rather than raw movement speed. Move between protected positions and use the snow-free or sheltered ground as a visual guide. Tanks should stop at locations where the full group can fight behind cover instead of reaching the next pull first and forcing ranged players to cross exposed terrain during casts.
Snowworn Provisions and Rune of Anchoring
About halfway through the wind section, Snowworn Provisions can provide a useful movement interaction. Night Elves, Trolls, and Druids in Bear Form can activate it to grant the group Rune of Anchoring, reducing movement-force effects by 50% for 15 minutes. The buff persists through death.
This is not required to complete the dungeon, but it is valuable in a section built around wind and displacement. If the group has an eligible character, take the interaction without turning it into a long backtrack. The buff is especially useful when players are still learning the safe terrain and Sentinel movement.
Winter Trash Interrupts and Defensive Priorities
The winter packs contain fewer route-specific interactions than the first area, but missed casts are more lethal. Frigid Mauler and Glacial Revenant need clear assignments, while Frostfang and Avatar of Determination put direct pressure on the tank and group positioning.
| Enemy | Priority Ability | Response | Role Most Responsible |
|---|---|---|---|
| Earthwhisper Tender | Healing Breeze | Interrupt every cast; purge the heal if missed | DPS / interrupt rotation |
| Keen-Eyed Striker | Scavenge | Interrupt, especially near Food Offerings | DPS / interrupt rotation |
| Spirit of Hunger | Insatiable Hunger | Kill Effigy quickly; curse dispel dangerous stacks | DPS + healer / curse dispel |
| Frigid Mauler | Frigid Roar | Interrupt every cast | Assigned kick |
| Glacial Revenant | Cryo Surge | Spread and Magic dispel | Healer / dispeller |
| Avatar of Determination | Glacial Tomb | Break roots quickly; use freedom effects when useful | Whole group |
| Stormbound Mystic | Arc Lightning | Interrupt every cast; use spare kicks on Lightning Bolt | Assigned kick |
| Ruthless Totemcaller | Magma Totem | Swap and destroy the totem | DPS |
| Bonded Beasttamer | Bestial Wrath | Soothe or enrage dispel if available | Utility player |
| Loa Speaker Nanea | Lightning Bolt / Volatile Totem | Rotate kicks on bolts and kill Volatile Totem immediately | Whole group |
Frigid Roar and Arc Lightning are the casts that most deserve a named kick before the pull. Healing Breeze belongs in the same category in the first area. Everything else should be layered around those assignments so two players do not overlap interrupts and leave the next critical cast uncovered.
Frostfang, Terra Rumbler, and Avatar of Determination
Frostfang hits the tank hardest early in the pull because Bloodrush increases opening pressure. Tanks should enter the pack with mitigation ready instead of waiting for health to collapse. Frostbite also adds recurring frost pressure around melee, so do not stack unnecessary hazards under the tank.
Terra Rumbler gains Rumbling Ward, a shield that causes repeated group damage while it remains active. Focus damage into the shield rather than leaving the Rumbler untouched inside a large pull. Avatar of Determination is crowd-control immune and can root the group with Glacial Tomb; free trapped players quickly and move out of Pulverize.
Glacial Revenant and Winter Squall
Cryo Surge from Glacial Revenant needs a loose spread and a Magic dispel. When the Revenant dies, Snowdrift creates another positioning hazard, so the tank should avoid finishing it in the exact place the group needs for the next wind transition.
Winter Squall should be treated as the end of the environmental gauntlet. It is crowd-control immune and maintains Harsh Winter pressure until killed. Commit damage and healing cooldowns if necessary rather than dragging the encounter out, because killing it removes the Harsh Winds problem for the remainder of that section.
Sentinel of Winter Boss Mechanics
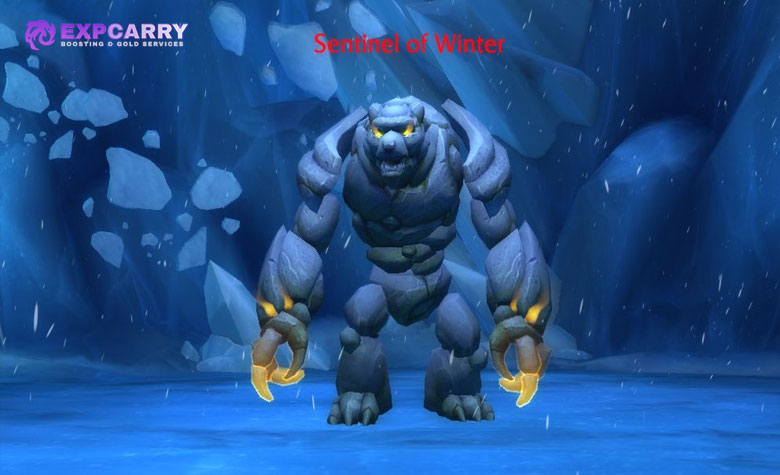
Sentinel of Winter combines an icy arena, dispels, add control, and forced movement. Shattering Frostspike reveals Fractured Shivercores; when they die, they leave Snowdrifts that reduce movement speed by 40% but make players standing inside immune to forced movement. Plan where the adds die so a useful Snowdrift is available inside the Eye of the Storm for Frozen Tempest.
Glacial Torment is a Magic debuff that should be dispelled promptly. During Raging Squall, stack the group tightly enough to bait the tornado pattern, then move together instead of spreading tornadoes across every safe lane. Shattering Frostspike creates two Fractured Shivercores that must die quickly.
Interrupt Winter's Shroud and Use Rimeshatter Correctly
The spawned Fractured Shivercores cast Winter's Shroud, which should be interrupted. When one dies, Rimeshatter lands six seconds later and must hit at least one player within its 5-yard soak area. If nobody soaks it, Rime Detonation damages the whole group and roots everyone for four seconds.
For Frozen Tempest, stay inside the Eye of the Storm and use a Snowdrift to become immune to the forced push. A strong tank technique is to keep Sentinel and the Shivercore deaths positioned so a Snowdrift is available where the group needs it. This dramatically reduces random sliding and makes healer positioning more predictable.
If boss positioning or group movement is the main problem rather than raw gear, WoW Mythic+ coaching is one external option for reviewing pulls and cooldown assignments. For self-play, record one failed key and check whether the wipe came from an interrupt, a dispel, or where the boss was parked before changing the entire route.
Final Wing Route: Treat It as an Interrupt Gauntlet
After Sentinel of Winter, the route becomes more linear. Most groups clear the required trash on the natural path toward Nalorakk rather than trying to build elaborate skips. The important optimization is to control dangerous packs with a kick order and tank cooldown plan.
Stormbound Mystics, Ruthless Totemcallers, Grizzled Warbringers, Bonded Beasttamers with Loyal Saberfangs, and Loa Speaker Nanea form the main threat set. Avoid stacking too many interrupt-dependent casters unless the group has enough short kicks to cover them. Saving several seconds on enemy forces is not worth a wipe to overlapping Arc Lightning and Lightning Bolt casts.
Stormbound Mystic and Ruthless Totemcaller
Arc Lightning from Stormbound Mystic is a mandatory interrupt. Assign the first and second kick before engaging more than one Mystic. Lightning Bolt is secondary and can take spare interrupts when Arc Lightning is safely covered.
Ruthless Totemcaller demands target switching. Magma Totem should die quickly instead of being ignored while players tunnel the main mob. If the pack also contains a priority caster, decide whether the group's cleave can remove the totem automatically or whether one DPS is responsible for swapping immediately.
Grizzled Warbringer, Beasttamer, and Loyal Saberfang
Grizzled Warbringer is crowd-control immune and adds unavoidable group pressure through Primal Echo. Poison Spear Volley creates ground hazards that should be moved away from without scattering the pack. Tanks should preserve defensives for the moments when Warbringer pressure overlaps other melee threats.
Bonded Beasttamer can enrage itself and its Loyal Saberfang through Bestial Wrath. Soothe the effect when possible. Loyal Saberfang applies stacking Shred Armor pressure to the tank, so a long pull can become dangerous even when every caster is interrupted correctly. Kite or use stronger mitigation before the stacks become the reason the tank dies.
Loa Speaker Nanea
Nanea is crowd-control immune and should be treated like a mini-boss. Rotate interrupts on Lightning Bolt, move out of Earthquake while trying to place ground effects compactly, and immediately kill Volatile Totems. The group should enter the pull with all players knowing whether they are first, second, or backup interrupt.
Nalorakk Boss Mechanics
Nalorakk is a coordination fight centered on Bear Echo placement and protecting Zul'jarra. Most failures come from placing an Echo behind the tank, failing to stand behind Zul'jarra for Overwhelming Onslaught, or missing the follow-up Forceful Slam soak.
Echoing Maul targets three players and later creates Bear Echoes. Place these toward the edge or in a controlled shared zone so the center remains usable. Avoid running through nearby Echoes because Spectral Slash punishes contact. Forceful Roar pushes all players away, so keep a safe path behind the group and avoid being knocked toward an Echo. The tank should always know where the existing Echoes are before the next shield mechanic begins.
Overwhelming Onslaught and Forceful Slam
During Overwhelming Onslaught, Zul'jarra jumps behind the tank and creates the protection the group needs. Everyone should move behind Zul'jarra; Defensive Stance reduces Overwhelming Onslaught damage by 80% for players behind her. The final hit knocks the group back, so the tank must avoid positioning their back toward a Bear Echo or forcing the party through Spectral Slash.
After the knockback, the tank needs to return quickly and soak Forceful Slam near Zul'jarra. The impact hits players within 6 yards, so other players should stay out while the tank takes the soak. If no player is hit, Zul'jarra takes the blow and triggers Demoralizing Scream, dealing group damage and increasing damage taken by 10% for 30 seconds; the effect stacks.
Fury of the War God
Fury of the War God turns the Bear Echoes into moving threats. The group should form a protective wall around Zul'jarra and intercept the charging Echoes before they reach her. Each intercepted Echo hits its first target with Echoing Fury, while an Echo that reaches Zul'jarra triggers Demoralizing Scream. Spread the body blocks enough that one player is not trying to catch every charge.
Good Echo placement earlier in the fight makes this phase much easier. If Echoes were dropped randomly around the arena, the group must cover charges from multiple angles. If they were placed deliberately, the direction of incoming threats is more predictable and defensive cooldowns can be planned around the remaining damage. Each Echo remains for one additional Fury of the War God before vanishing.
Tank Responsibilities From Start to Finish
Den of Nalorakk rewards tanks who route for mechanics rather than only enemy count. Pull size should be based on interrupt coverage and active tank debuffs, while boss positioning should prepare the next mechanic before it begins.
- Opening area: path through six Food Offerings, avoid unnecessary double-Spirit pulls, and move Thornclaw puddles away from melee space.
- Matriarch packs: anticipate Mother's Wrath as cubs die and use mitigation or Soothe support before damage peaks.
- The Hoardmonger: control which resource pile is reached next and keep frontal mechanics predictable.
- Winter trash: use defensives at the start of Frostfang pulls and park packs where Harsh Winds terrain remains safe.
- Sentinel: place Shivercore deaths so a useful Snowdrift is available inside the Eye of the Storm, then stand in it for Frozen Tempest.
- Final wing: monitor Saberfang Shred Armor, Beasttamer enrage, and Warbringer pressure before combining packs.
- Nalorakk: keep your back away from Bear Echoes during Onslaught and return to soak Forceful Slam after the knockback.
The tank should also call when a pull is being enlarged. An extra caster is not simply more health; it can require an additional interrupt slot the party does not have available.
Healer and DPS Responsibilities
The healer's workload is predictable when the group respects priority casts. Dispel Insatiable Hunger curses where applicable, Toxic Spores poison stacks on Hoardmonger when your class can remove them, Cryo Surge and Glacial Torment Magic effects, and prepare major throughput for Bellow, Spirit of Hunger pressure, Winter Squall, Frozen Tempest, and Nalorakk failures or overlaps.
DPS players should treat interrupts and target swaps as part of their damage profile. Healing Breeze, Frigid Roar, Arc Lightning, and the assigned Nanea bolts matter more than squeezing one extra global into the wrong target. Starvation Effigy, Magma Totem, Volatile Totem, and Sentinel adds should be swapped to quickly even when the main enemy is nearly dead.
The existing ExpCarry Mythic+ dungeon hub covers the full Midnight dungeon pool. Den of Nalorakk is worth a dedicated route because Food Offerings, class or profession interactions, Harsh Winds, and the final interrupt gauntlet create more routing-specific decisions than a generic Season 2 overview can explain.
Route Adjustments for Pickup Groups and Higher Keys
A pickup-group route should prioritize repeatability. Pull one Spirit of Hunger package at a time, avoid combining several mandatory-kick mobs unless kicks are assigned in chat, and take the natural final-wing route. The time saved by an aggressive pull is smaller than the time lost to a full wipe plus a death penalty. The ExpCarry Midnight Mythic+ plan covers broader Season 2 preparation, while this guide keeps the route-specific Den responsibilities separate.
In an organized group, you can combine more trash when you know exactly which kick, Soothe, dispel, and defensive covers each overlap. The first area is the best place to adapt because the six Food Offerings create several viable paths. Den of Nalorakk is part of the current rotation listed in Blizzard's Midnight Season 2 overview, so route changes should be evaluated against the live Season 2 dungeon rather than PTR or launch-era values. Do not change a stable winter or final-wing route merely to gain a small percentage advantage unless the group has tested the replacement pull.
Current route tools should be checked after hotfixes rather than copied forever. Blizzard's first-area Tender reduction already made pre-August 25 exact pack counts stale. Use a current route for enemy-forces percentage, but use the mechanics in this guide to decide whether that route is actually safe for your composition. Players who want to practice different key levels across the current pool can also use the WoW Mythic+ Keys route as an external option.
Common Den of Nalorakk Mythic+ Mistakes
Most failed keys are not caused by an obscure boss ability. They come from missing one of the dungeon's recurring responsibilities: Offerings, kicks, add swaps, tank positioning, or environmental movement.
- Leaving the first area without six valid Food Offerings: confirm the interaction registered before moving on.
- Using an old pre-hotfix route without checking packs: Blizzard removed two Earthwhisper Tenders from the first area on August 25.
- Missing Healing Breeze: interrupt it first; purge the heal only as a recovery plan.
- Pulling multiple Spirits without a plan: Effigy and hunger pressure can overwhelm a PUG quickly.
- Ignoring Warding Incense: an eligible Druid or player with at least 25 Midnight Alchemy can provide 5% Versatility to the entire party.
- Standing in Harsh Winds instead of using terrain: route between safe cover positions.
- Missing Frigid Roar or Arc Lightning: both should have named interrupt assignments.
- Leaving Magma or Volatile Totems alive: target swaps are mandatory even when the main mob is low.
- Random Bear Echo placement on Nalorakk: poor placement makes Forceful Roar, Onslaught, and Fury much harder.
- Tank missing Forceful Slam: return after the knockback and soak near Zul'jarra.
When learning the dungeon, fix the first recurring mistake before increasing pull size. A route becomes faster naturally once the group stops losing time to mechanics.
Den of Nalorakk Mythic+ FAQ
These questions cover the current route interactions and interrupt priorities most likely to change how a key is played.
How many Food Offerings do you need in Den of Nalorakk?
You need six valid Food Offerings before progressing into The Hoardmonger. Collect them from the available food interactions in the first area while routing through useful trash.
Is Food Offering still bugged when mounted?
Blizzard fixed the issue on September 1, 2026. Previously, interacting while mounted could temporarily make the Offering non-interactable.
What are the most important Den of Nalorakk interrupts?
Healing Breeze from Earthwhisper Tender, Frigid Roar from Frigid Mauler, Arc Lightning from Stormbound Mystic, Winter's Shroud from Sentinel adds, and the assigned Lightning Bolts on Loa Speaker Nanea are top priorities. Scavenge from Keen-Eyed Striker is especially important near Food Offerings.
How does Warding Incense work?
A Druid in Bear Form or a player with at least 25 Midnight Alchemy can activate it. The current buff gives 5% Versatility to all allies in the instance for 10 minutes and persists through death.
What does Snowworn Provisions do?
Night Elves, Trolls, or Druids in Bear Form can use the interaction to grant the group Rune of Anchoring, reducing movement-force effects by 50% for 15 minutes. The buff persists through death.
What order should The Hoardmonger take resource piles?
A common PUG recommendation is meat first, bone second, mushrooms last because it delays the mushroom-management mechanic. It is a strategy choice rather than a fixed game requirement.
How do you stop Harsh Winds?
Use terrain and protected ground while moving through the section, then kill Winter Squall. The Snowworn Provisions interaction can also reduce movement-force effects for eligible characters.
What should the tank do on Sentinel of Winter?
Position the Shivercore deaths so a Snowdrift is available inside the Eye of the Storm for Frozen Tempest. The group should stand in the Snowdrift to become immune to the push, interrupt Winter's Shroud, and make sure each Rimeshatter is soaked.
What is the main tank mechanic on Nalorakk?
Control Bear Echo positioning, account for Forceful Roar knockback, keep your back away from an Echo during Overwhelming Onslaught, stand correctly with Zul'jarra's protection, then return after the knockback to soak Forceful Slam.
Do I need an exact MDT route for Den of Nalorakk?
You need a current enemy-forces plan, but old exact pull strings can become stale after hotfixes. A PUG-safe route can follow the natural dungeon path while selecting first-area packs around six Food Offerings and current enemy-forces requirements.
Conclusion
The safest World of Warcraft Midnight Den of Nalorakk Mythic+ route is built around responsibilities rather than one permanent pull string. Collect six Food Offerings while taking efficient first-area packs, interrupt Healing Breeze and Scavenge, use Warding Incense when the composition allows it, control The Hoardmonger's resource order, then move through Harsh Winds with terrain and kill Winter Squall before Sentinel. On Sentinel, place Shivercore deaths so Snowdrifts are usable during Frozen Tempest. In the final wing, slow the route down enough to guarantee Arc Lightning, totem, and Nanea coverage.
Tanks should route around Spirit pressure, Matriarch and Saberfang stacks, Frostfang burst, and boss positioning; DPS should own the mandatory kicks and target swaps; healers should plan dispels and cooldowns around the predictable pressure windows. Once those jobs are consistent, the exact enemy-forces route can be made more aggressive without changing the dungeon's core logic. Use current route data after hotfixes, keep Food Offering and interrupt assignments explicit, and the key becomes much more repeatable for both pickup groups and coordinated teams.