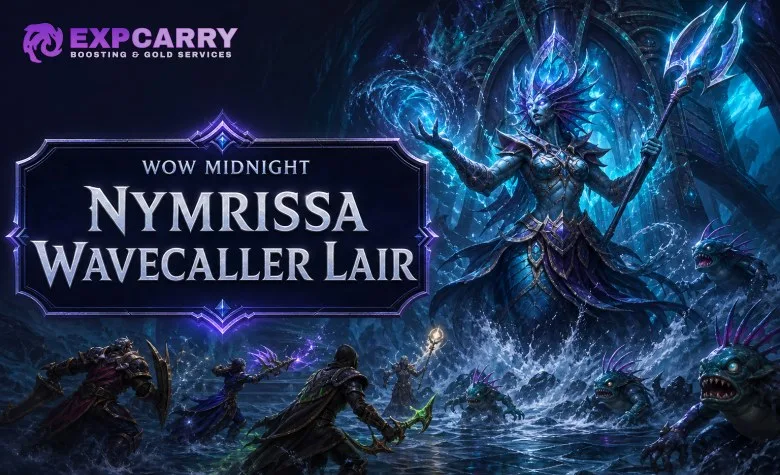
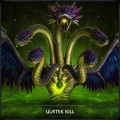
This Nymrissa Wavecaller guide covers the only boss inside The Tidebound Grotto, the first Lair in World of Warcraft: Midnight Season 2. All four difficulties are open, and the encounter has now been cleared thousands of times, so the strategy below reflects how the fight actually plays rather than the pre-season Dungeon Journal.
Why this boss matters more than a single-boss encounter usually would: Nymrissa is the only boss in Midnight Season 2 with Flexible Mythic, scaling for 15 to 25 players instead of demanding a fixed 20-player roster. She also counts toward the Raid row of your Great Vault. Between those two facts, she is the fastest Raid-row Vault credit available to a small guild in the entire season.
The fight in one sentence: stop Bubblefin murlocs from reaching the Alluring Bubble, because every one that gets through becomes a Berserker that pulses raid-wide Frost damage — and two or three at once is what actually kills groups.
Where Is The Tidebound Grotto?
The Lair sits underwater on the eastern side of The Coiled Isle, in the Atal'Utek area near the Wreck of Gral's Belly. There is no entrance on the surface — you have to swim down to find the portal.
Use this waypoint:
/way #2512 59.9 66.3 The Tidebound Grotto
Bring an aquatic mount. The dive is longer than it looks, and there is no shortcut. Once you reach the portal you will also find a summoning stone there, which is the practical way to get a raid group inside without ten people swimming separately.
How to Enter and Queue
The Tidebound Grotto uses an entrance interface closer to Delves than to a traditional raid, which is the single most common source of confusion. There is no Raid Finder listing for it.
| Difficulty | How you get in | Group needed |
|---|---|---|
| World | Select World at the portal and join the automatic Group Finder queue | None — this is the only difficulty a solo player can queue into |
| Normal | Raid leader selects the difficulty at the entrance and presses Enter | Organised group |
| Heroic | Same as Normal | Organised group |
| Mythic | Same as Normal, with flexible scaling | 15–25 players |
Solo or duo players: World difficulty replaces the traditional open-world boss and needs no premade group at all. It still gives Raid-row Great Vault credit, which makes it the easiest Vault progress in the game for players with no raid team.
Loot, Item Levels and Mistcrests
Nymrissa drops thirteen equipment pieces covering all four armor types, plus a staff, a shield, an off-hand, a ring and a trinket. There is no Tier Set armor and no Tier token on this table — if you need tier, that comes from The Venomous Abyss or the Catalyst.
| Difficulty | Item level | Upgrade track | Mistcrests |
|---|---|---|---|
| World | 279 | Veteran 1/6 | Veteran |
| Normal | 292 | Champion 1/6 | Champion |
| Heroic | 305 | Hero 1/6 | Hero |
| Mythic | 318 | Myth 1/6 | Myth |
The reason to run Heroic even if you don't need the gear: the clear awards Hero Mistcrests, and Mythic awards Myth Mistcrests. For a character short on upgrade currency, one Lair kill per week is a meaningful top-up on top of the Vault credit.
Complete loot table
| Item | Slot |
|---|---|
| Cincture of the Abyssal Grotto | Cloth waist |
| Tidebound Sorceress's Robes | Cloth chest |
| Coiled Hex Legguards | Leather legs |
| Breakwater Boots | Leather feet |
| Rising Tide Wristguards | Mail wrist |
| Grips of Swirling Fury | Mail hands |
| Swelling Sea Spaulders | Plate shoulders |
| Forgotten Grotto Girdle | Plate waist |
| Tidepiercer's Bubble Popper | Two-handed staff |
| Bubblefin Splash Guard | Shield |
| Frostscale's Mystic Frond | Off-hand |
| Alluring Bubbleband | Ring |
| Wavecaller's Seastone | Trinket |
| Clumped Asteroidea | Player Housing decor — drops on any difficulty |
The Bubblefin Splash Guard is worth flagging: it is an Intellect shield with Haste and Mastery, which makes it a genuine target for Holy Paladins and Restoration Shamans rather than a filler drop.
Explore services related to this guide, selected from our Raids catalog.
View All Raids Services
Great Vault Math
A Nymrissa kill counts as one eligible raid boss toward the Raid row. It does not create a separate Vault category and it does not unlock a reward on its own.
- The Raid row unlocks slots at 2, 4 and 6 eligible boss kills.
- Nymrissa combines freely with bosses from The Venomous Abyss, so she can be the kill that pushes you over a threshold.
- The Vault reward quality follows the difficulty you killed her on, exactly like any other raid boss.
Practical use: if you finish the week on 1, 3 or 5 raid kills, a single Nymrissa clear at your highest available difficulty unlocks the next Vault slot for a fraction of the time a full raid lockout costs.
Strategy Cheat Sheet
| Mechanic | Difficulty | Immediate response |
|---|---|---|
| Alluring Bubble | All | Switch to murlocs and stop them before they enter the bubble. |
| Bubblefin Shorerunner | All | Slow, root and stun the pack early; do not knock them toward the bubble. |
| Bubblefin Berserker | All | Off-tank picks it up, raid kills it before returning to the boss. |
| Tidepiercer's Rush | All | Move laterally out of the storm lanes. |
| Pop! | All | Pre-heal, use a personal, and never stand with an edge or Frost behind you. |
| Frost Barrage | All | Spread at least six yards, do not overlap markers. |
| Water Flurry | Normal, Heroic | Active tank mitigates; healers focus the tank through the channel. |
| Abyssal Rain | All | Planned raid cooldown for the four-second unavoidable hit. |
| Drifting Globules | Heroic, Mythic | Assigned players pop them deliberately, with a defensive up. |
| Lingering Frost | Heroic, Mythic | Place patches at the edges, never across movement lanes. |
| Bubblefin Frostscale | Mythic | Kill first — its Waterfog Shield gives nearby adds 98% damage reduction. |
| Water Jet | Mythic | Tank aims it through Frost patches, away from the raid, then swaps. |
| Unending Tides | All | Final burn. Treat it as an enrage, not a healing phase. |
Complete Strategy
Nymrissa is a single-phase fight with repeating mechanic cycles. The difficulty comes entirely from overlaps: add waves, Frost hazards, tank pressure and unavoidable raid damage all landing at once. Learn what each mechanic is for rather than memorising a timer.
The core loop: Alluring Bubble
Nymrissa creates a large water bubble near the centre of the arena, and Bubblefin murlocs immediately start walking toward it. Every murloc that reaches it becomes a Bubblefin Berserker, which pulses raid-wide Frost damage through Pulsing Tides. One Berserker is survivable. Three at once is not.
- Identify the spawn directions
As soon as the bubble appears, call which lanes the murlocs are coming from.
- Apply control before they arrive
Slows first, then roots, stuns and grips. Control used after they reach the bubble is wasted.
- Focus one group at a time
Spreading damage across every add is the most common reason a wave gets through.
- Do not tunnel the boss
Boss damage is never worth an extra Berserker. This is the single biggest cause of wipes.
- Reposition before Pop!
When the bubble bursts it knocks the raid back. Check what is behind you before it happens.
Every mechanic explained
The basic murloc adds. Individually harmless; collectively the whole fight. Use area slows early and avoid knocking them toward the bubble or into another lane — a badly aimed knockback can deliver adds faster than doing nothing.
Joins the add waves and applies Waterfog Shield, cutting damage taken by nearby Shorerunners by 98%. Kill the Frostscale first, always. Dumping cooldowns into a shielded pack is a guaranteed wipe on Mythic.
Fast water storms travel toward the bubble. Move laterally out of the lane rather than running through the bubble, the add pack or a Frost patch. Melee should not surround the boss from every angle, because that removes everyone's escape route.
The bubble bursts for raid-wide Frost damage plus a knockback. Healers should pre-heal rather than react. Use a personal defensive whenever Pop! overlaps Abyssal Rain, Pulsing Tides or a globule detonation.
Icy impacts damage everyone within roughly six yards. Spread before they land, then return without crossing Lingering Frost or a storm lane.
A globule can be popped on contact, dealing Frost damage, applying sustained damage to whoever popped it and leaving a Lingering Frost patch. Left alone it detonates after about 30 seconds and hits the whole raid much harder. Assign mobile players with strong defensives; never let people improvise this.
Damages players and makes them slide, which turns an otherwise routine Frost Barrage into a death. Place patches at the edges. On Mythic, place them in a planned line the tank can clear with Water Jet.
A sustained channel on the active tank. Mitigate before it starts, and never combine it with an unplanned Berserker pickup.
A six-second channel on the current target that pushes the tank backward and applies a 40-second vulnerability: +45% Water Jet damage and +15% Frost damage taken. It also clears Lingering Frost from the ground, making it both a tank mechanic and the raid's arena-cleaning tool. Tanks must swap after each channel.
Unavoidable raid-wide Frost damage every second for four seconds, applying Drenched for continuing periodic damage. Drenched is not dispellable — plan throughput and mitigation instead of looking for a cleanse.
Repeated extreme Frost damage to everyone. Treat it as an enrage: this is the final burn, not a phase you heal through. If you consistently arrive here with high boss health, the problem is add control and deaths, not healer count.
Mythic Water Jet routing
- Position before the cast
Make sure the tank has clear space behind them, since the jet pushes them backward.
- Aim through planned Frost
Line the channel up with one or more Lingering Frost patches to clear the arena.
- Never point it at people
Not through melee, not through ranged, not through the add team at the bubble.
- Mitigate and swap
Use active mitigation plus a cooldown, then have the second tank taunt because of the 40-second vulnerability.
Role Guide
- Keep Nymrissa away from the add lanes
- Mitigate Water Flurry every channel
- Pick up Berserkers the moment they transform
- Do not drag the boss through Lingering Frost
- On Mythic, aim Water Jet through planned Frost and swap after
- Build a cooldown rotation for Abyssal Rain before the pull
- Pre-heal for Pop! rather than reacting to it
- Track who is assigned to globules
- Watch tanks through Water Flurry and Water Jet
- Hold something back for the Unending Tides burn
- Switch to murlocs the moment the bubble appears
- Use crowd control before adds reach the centre
- Kill Mythic Frostscales before anything they shield
- Kill Berserkers before returning to the boss
- Spread six yards for Frost Barrage
- Never walk into a globule by accident
Recommended Composition
| Raid size | Tanks | Healers | DPS |
|---|---|---|---|
| 15 players | 2 | 3 | 10 |
| 20 players | 2 | 4 | 14 |
| 25 players | 2 | 5 | 18 |
Do not over-heal this fight. Adding a fifth or sixth healer makes the raid survive longer but removes the damage needed to kill adds and finish before Unending Tides. Groups that die to the enrage almost always have a damage problem, not a healing one.
Best Class Utility
No class is mandatory. The fight rewards add control, raid mitigation and mobility far more than single-target damage rankings.
| What you need | Why | Who brings it |
|---|---|---|
| Grips and displacement | Pulls murlocs off their path to the bubble | Death Knight (Death Grip, Gorefiend's Grasp), Druid, Monk |
| Area stuns and roots | Stops whole waves before they arrive | Demon Hunter, Warrior, Monk (Leg Sweep), Druid (Ursol's Vortex), Hunter (Binding Shot, Tar Trap) |
| Raid movement | Recovery after Pop! and dodging storm lanes | Druid (Stampeding Roar), Shaman (Wind Rush Totem), Warlock (Demonic Gateway), Evoker |
| Raid-wide mitigation | Abyssal Rain, Pulsing Tides and bubble bursts | Paladin (Aura Mastery), Priest (Power Word: Barrier), Warrior (Rallying Cry), Demon Hunter (Darkness), Shaman (Spirit Link Totem), Evoker (Zephyr) |
| Strong personal defensives | Assigned globule detonations | Mage, Hunter, Rogue, Paladin, Death Knight |
| Mobile ranged damage | Killing adds while repositioning | Hunter, Evoker, Mage, Balance Druid |
Do not stack low-damage utility specs. Control only helps if the raid still has enough damage to kill the murlocs, the Berserkers and the boss before the enrage.
Difficulty Differences
| Difficulty | What is added | Focus |
|---|---|---|
| World | Simplified matchmade version | Learn the arena and the bubble |
| Normal | Full base kit: bubble, murlocs, storms, Pop!, Frost Barrage, tank channel, Abyssal Rain | Clean add switches and positioning |
| Heroic | Drifting Globules and Lingering Frost | Assigned globule handling, disciplined movement |
| Mythic | Bubblefin Frostscales, Waterfog Shield, Water Jet | Frost placement, tank routing, strict add priority |
Achievements
The Tidebound Grotto has six boss achievements: three for clearing at each difficulty, and three matching versions for guild groups.
| Achievement | Requirement |
|---|---|
| Nymrissa Wavecaller | Defeat her on any difficulty |
| Heroic: Nymrissa Wavecaller | Defeat her on Heroic |
| Mythic: Nymrissa Wavecaller | Defeat her on Mythic |
| Nymrissa Wavecaller Guild Run | Defeat her on Normal or higher in a guild group |
| Heroic: Nymrissa Wavecaller Guild Run | Defeat her on Heroic in a guild group |
| Mythic: Nymrissa Wavecaller Guild Run | Defeat her on Mythic in a guild group |
The Lair does not award Ahead of the Curve or Cutting Edge. Those remain tied to the final boss of The Venomous Abyss.
Common Mistakes
- Tunnelling the boss. DPS ignore murlocs and let several Berserkers spawn at once. This causes more wipes than every other mistake combined.
- No add assignments. Everyone assumes someone else is covering the same lane.
- Late crowd control. Grips and stuns used after adds reach the bubble do nothing.
- Attacking through Waterfog Shield. Mythic groups burn cooldowns into 98% damage reduction.
- Improvised globule pops. Someone touches one during Abyssal Rain and the raid loses three players.
- Frost in the middle. Lingering Frost placed across the main movement route.
- Bad knockback positioning. Standing with a wall, edge or Frost patch behind you before Pop!
- Water Jet through the raid. The Mythic tank aims the channel at people instead of at Frost.
- All healer cooldowns on the first Rain. Nothing left for the dangerous overlaps later.
- Too many healers. The raid lives longer and then dies to the enrage anyway.
- Wrong loot specialization. Set it before the kill, not after.
Nymrissa Wavecaller FAQ
Where is the Tidebound Grotto entrance?
Underwater on the eastern side of The Coiled Isle in Atal'Utek, near the Wreck of Gral's Belly, at /way #2512 59.9 66.3. Bring an aquatic mount — the swim is not short. There is a summoning stone at the portal.
Can I solo queue for Nymrissa?
Only on World difficulty, which uses an automatic Group Finder queue like a Delve. Normal, Heroic and Mythic all require an organised group whose leader selects the difficulty at the entrance. There is no Raid Finder listing.
How many players do I need for Mythic?
Between 15 and 25. Nymrissa is the only boss in Midnight Season 2 with Flexible Mythic scaling, which makes her the only Mythic-difficulty loot a small guild can realistically farm without a fixed 20-player roster.
Does Nymrissa count toward the Great Vault?
Yes, as one eligible boss kill in the Raid row. The row unlocks slots at 2, 4 and 6 kills, and Nymrissa combines with Venomous Abyss bosses. She is the fastest way to push past a threshold if you finish the week one kill short.
What item level does she drop?
279 on World, 292 on Normal, 305 on Heroic and 318 on Mythic — Veteran, Champion, Hero and Myth track respectively. The clear also awards Mistcrests of the matching tier.
Does the Tidebound Grotto drop tier set gear?
No. The table has thirteen equipment pieces, a staff, shield, off-hand, ring and trinket, plus housing decor — but no Tier Set armor and no Tier tokens.
What is the hardest part of the fight?
Add control. Every murloc that reaches the Alluring Bubble becomes a Berserker pulsing raid-wide Frost damage, and multiple Berserkers overlapping with Abyssal Rain is what actually kills groups. Boss damage is almost never the limiting factor.
Can Drenched be dispelled?
No. Healers need to plan throughput and mitigation for it rather than looking for a cleanse.
Does she award Ahead of the Curve?
No. The Lair has its own six achievements, including three guild-run versions. Ahead of the Curve and Cutting Edge remain tied to The Venomous Abyss.
Is the Bubblefin Splash Guard worth taking?
Yes, if you are a Holy Paladin or Restoration Shaman. It is an Intellect shield with Haste and Mastery, which is a real target rather than a filler drop for the two shield-using healer specs.
Related Season 2 Guides
- The Venomous Abyss Raid Guide
- Venomous Abyss Loot Table
- Season 2 Gearing Guide
- Season 2 Tier Sets
- Season 2 DPS Tier List