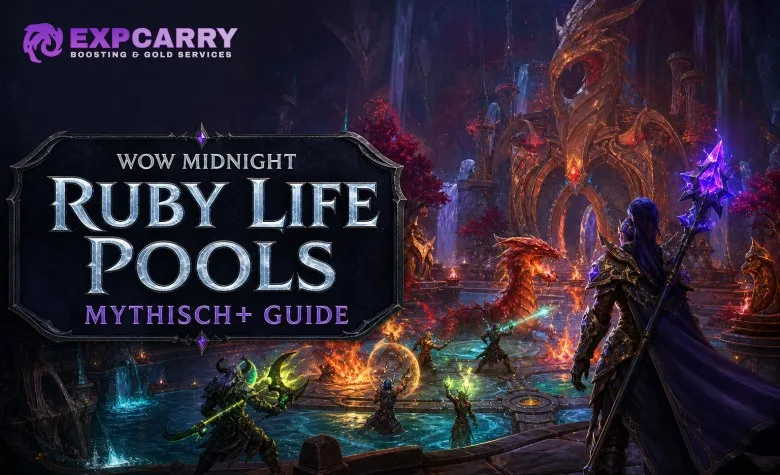
Ruby Life Pools returns to the Mythic+ rotation in Midnight Season 2. The dungeon is located in the Waking Shores and contains three encounters: Melidrussa Chillworn, Kokia Blazehoof, and Kyrakka with Erkhart Stormvein. The route is compact, but the key is demanding because several encounters combine heavy group-wide damage, movement requirements, dangerous ground effects, and high-value interrupts. Treat the dungeon as a mechanics check rather than a simple damage race.
Ruby Life Pools in Midnight Season 2
| Fact | Details |
|---|---|
| Expansion | Dragonflight |
| Zone | The Waking Shores |
| Season | Midnight Season 2 |
| Dungeon bosses | Melidrussa Chillworn, Kokia Blazehoof, Kyrakka and Erkhart Stormvein |
| Dungeon type | Mythic and Mythic+ |
| Entrance | Ruby Life Pools in the Waking Shores |
| Seasonal reward | Ruby Life Pools contributes to Midnight Season 2 Mythic+ achievements and teleport rewards |
Midnight Season 2’s Mythic+ pool contains eight dungeons: Altar of Fangs, Murder Row, Den of Nalorakk, The Blinding Vale, Voidscar Arena, King’s Rest, Temple of Sethraliss, and Ruby Life Pools. Blizzard has also made broader dungeon updates for the season, including clearer precast visuals for cone and line abilities and adjustments intended to reduce problematic mechanics in returning dungeons. The exact final values and encounter changes for Ruby Life Pools have not yet been finalized.
How to Reach Ruby Life Pools
Ruby Life Pools is in the northern part of the Waking Shores. The dungeon entrance is at approximately 60.00, 75.77. You can fly directly to the entrance, use the dungeon’s entrance marker on the world map, or travel there after selecting Ruby Life Pools in the Mythic+ interface.
For Mythic+, place the Ruby Life Pools Keystone in the appropriate Font of Power at the dungeon entrance. A Mythic Keystone group does not use the Dungeon Finder queue, so you must form or join a premade group. At the start of the dungeon, confirm the route, assign interrupts, and decide who will handle dispels and emergency crowd control before activating the key.
Ruby Life Pools Route and Trash Priorities
The dungeon progresses through the lower pools, the upper chamber, and the final platform. There are no major route branches that require a specialized skip, but the open spaces around the first and final encounters make positioning important. Avoid unnecessary combat pulls: the timer is usually lost through deaths, repeated boss attempts, and uncontrolled caster packs rather than through a few seconds of conservative movement.
Primalist Invaders
- Interrupt elemental casters. Icebolt and similar direct-damage casts become increasingly dangerous as the key level rises, especially when more than one caster is active.
- Stop defensive or protective casts. Ice Shield and comparable mitigation effects significantly increase the time needed to kill a target. Assign a specific interrupt order instead of relying on random kicks.
- Control enemies before the pull becomes crowded. Stuns, incapacitates, silences, and displacement effects are most valuable when they prevent multiple casts at once.
- Move away from lingering fire and frost effects. The open areas can make ground effects look harmless, but they restrict the space needed for later mechanics.
Primal Juggernaut
Primal Juggernauts are dangerous primarily because of their tank damage and frontal attacks. The tank should face them away from the group, while melee players stay behind or to the side. Sidestep Excavating Blast rather than attempting to absorb it. Crushing Smash is a tank-buster that should be paired with an active mitigation ability or a defensive cooldown on higher keys.
Flashfrost Chillweaver
Chillweavers are among the most important trash targets in the dungeon. Interrupt Icebolt consistently and stop Ice Shield whenever possible. If several casters are pulled together, establish a priority order before the pull: one player handles the first interrupt, another covers the next cast, and the group uses crowd control for emergencies.
Do not allow the group to begin the next pull while a previous caster is still uncontrolled. A single missed cast can force the healer to spend major cooldowns before the next boss.
Explore services related to this guide, selected from our Mythic Dungeons catalog.
View All Mythic Dungeons Services

Melidrussa Chillworn Strategy
Melidrussa is the first boss and tests movement, add control, and group-wide healing. The encounter becomes much more dangerous when the group allows the Infused Whelps to remain alive or fails to manage the boss’s frost effects.
Positioning
Keep Melidrussa near the center of the platform so the group has room to spread and move. The tank should avoid turning the boss toward the party. Ranged players should maintain enough distance to prevent overlapping ground effects, while melee players should remain close enough to switch quickly to newly spawned whelps.
Infused Whelps
Infused Whelps spawn during the encounter and must be gathered and defeated quickly. They are not harmless filler enemies: leaving them alive increases incoming damage and makes the platform progressively harder to navigate.
- Use cleave and short-duration crowd control to keep the whelps grouped.
- Switch to whelps immediately when they appear unless the group has a clear plan to finish the boss before the next dangerous event.
- Do not chase a whelp through hazardous ground effects. The tank should bring the adds into a safe, central position.
- Save burst damage for add waves if the group’s damage profile cannot eliminate them through normal cleave.
Frost Damage and Group Survival
Melidrussa applies heavy frost pressure through repeated area damage and movement mechanics. Players should react to ground indicators immediately and avoid standing in overlapping effects. The healer should plan a cooldown for each major group-damage sequence rather than attempting to recover the party with raw healing alone.
Defensive abilities are especially valuable when movement overlaps with add spawns. A player who is forced to move should use a personal defensive instead of expecting the healer to compensate for avoidable damage.
Common Melidrussa Wipes
- Whelps remain alive for too long.
- Players stand in frost effects while changing targets.
- The tank positions the boss at the edge of the room and removes safe movement space.
- Multiple players use interrupts on the same add while another dangerous cast succeeds.
- The group enters the encounter without enough defensive or healing cooldowns for the first major damage sequence.
Kokia Blazehoof Strategy
Kokia is the second boss and is commonly the most punishing encounter for groups that do not control movement. The fight combines a tank-facing attack, Molten Boulder, Blazebound Firestorm, and fire pools that permanently reduce usable space if they are placed poorly.
Boss Positioning
Keep Kokia toward the outside of the room, but do not place her directly against the wall. The tank should leave enough space for the boss to move and for players to route around fire effects. Face the boss away from the party at all times.
Molten Boulder
When Molten Boulder targets a player, the targeted player should move away from the group and position the impact where it will not obstruct the next movement pattern. Do not drop the boulder in the center of the room unless the group has deliberately reserved that area.
Players should avoid crossing the path of the boulder and should return to the group only after the dangerous ground effect has been created. The tank must be ready to move Kokia if the impact area threatens the boss’s position or the next phase of the encounter.
Blazebound Add
Kokia summons a Blazebound add that must be controlled and defeated. The group should switch quickly, interrupt its dangerous casts, and keep the add away from the boss when required by the current mechanic. Killing the add creates a lingering fire effect, so the tank should plan the add’s death location before the final few percent of its health.
Do not allow the add to die in the center of the arena. A poorly placed death can divide the room and make the next Molten Boulder impossible to handle safely.
Fire Management
- Place fire effects around the perimeter in a consistent direction.
- Do not overlap new fire with existing pools unless the group has no safe alternative.
- Keep a clear lane through the arena for players targeted by movement mechanics.
- Use personal defensives when crossing a dangerous area is unavoidable.
- Do not greed damage during the final phase if the remaining space is limited.
Common Kokia Wipes
- Molten Boulder is placed in the center of the arena.
- The Blazebound add dies in an unsafe location.
- The tank turns Kokia toward the group during movement.
- Players continue attacking the boss while ignoring the add.
- Fire effects are placed randomly, leaving no reliable movement route.
Kyrakka and Erkhart Stormvein Strategy
The final encounter begins with Kyrakka and Erkhart Stormvein. The fight contains two linked phases: Kyrakka applies fire and movement pressure from the air, while Erkhart controls the ground phase and forces the group to manage frontal attacks, dispels, and positioning.
Phase One: Kyrakka
During the aerial phase, Kyrakka applies burning effects and targets players with fire-based attacks. Spread enough to prevent overlapping damage, but remain close enough that the group can support one another and move together when the platform becomes dangerous.
Players affected by a spreading fire mechanic should move to the designated outer area, drop the effect, and return without running through other players. Establish a clockwise or counterclockwise movement pattern before the pull so that every player knows where to go.
- Do not drop fire in the center of the arena.
- Use defensive cooldowns for unavoidable group damage, especially when fire effects overlap with movement.
- Ranged players should avoid standing at maximum distance if it prevents the group from using coordinated dispels or healing cooldowns.
- Interrupt any interruptible cast from the active boss or associated enemies immediately.
Phase Two: Erkhart Stormvein
When Erkhart becomes active, the tank should face him away from the group and maintain a stable position. Players must react to his wind and storm abilities while continuing to manage any fire effects carried over from the previous phase.
Keep the boss away from hazardous ground effects whenever possible. If the group is forced to move, the tank should move first and allow melee players to follow rather than dragging the boss unpredictably across the arena.
Phase Transitions
The transition between Kyrakka and Erkhart is where many groups lose control. Finish the current mechanic before chasing the boss, clear dangerous ground effects when possible, and make sure the healer has enough resources for the next phase. Do not use every offensive cooldown at the same moment if doing so leaves the group without a defensive response to the following storm sequence.
Common Final-Boss Wipes
- Players drop fire effects on top of the group.
- The tank turns Erkhart toward melee or ranged players.
- Players are knocked or pushed into existing fire.
- Dispels are delayed until several players are affected.
- The group uses major cooldowns during a transition and has nothing available for the next damage event.
Role Responsibilities in Ruby Life Pools
Tank
- Face Primalist Juggernauts and both final-boss phases away from the group.
- Keep casters grouped without pulling additional packs.
- Plan where Kokia’s add will die and where fire effects will be placed.
- Move bosses only when necessary; uncontrolled movement causes avoidable melee downtime.
- Use active mitigation for Crushing Smash and other tank-busters.
Healer
- Prepare for repeated group-wide frost, fire, and storm damage.
- Track personal defensives and remind players to use them during movement mechanics.
- Do not waste major cooldowns recovering players who remain in avoidable ground effects.
- Keep enough mana and cooldowns for Kokia and the final encounter.
- Dispel promptly when a debuff threatens to overlap with another area-damage event.
Damage Dealers
- Interrupt Chillweavers and other dangerous casters.
- Switch to Infused Whelps and the Blazebound add without delay.
- Use defensives during predictable group damage instead of waiting until low health.
- Place targeted ground effects away from the group and along the agreed route.
- Prioritize survival over marginal uptime during Kokia and the final boss.
Mythic+ Affixes and Ruby Life Pools
The weekly affix combination changes the correct approach to the dungeon. Affixes that increase enemy health make add priority and interrupt discipline more important, while affixes that punish movement or death increase the value of conservative positioning.
- Fortified-style weeks: prioritize caster interrupts, crowd control, and defensive cooldowns for trash packs.
- Tyrannical-style weeks: save damage and defensive cooldowns for Melidrussa, Kokia, and Kyrakka and Erkhart.
- Explosive or similar target-priority affixes: assign players to handle extra targets rather than expecting the entire group to notice them.
- Affixes that punish death: avoid risky skips and preserve cooldowns for unavoidable mechanics.
Affix names, schedules, and the final Midnight Season 2 affix structure should be checked again when the season becomes live. Do not build a fixed route around a single PTR week.
Ruby Life Pools Rewards and Season 2 Progression
Mythic+ rewards come from the seasonal dungeon reward structure rather than from a separate fixed boss loot table. Completing Ruby Life Pools contributes to Mythic+ rating, the Great Vault, weekly progression, and Midnight Season 2 achievements.
Ruby Life Pools also has a Keystone Hero achievement for completing the dungeon at Mythic Level 10 or higher within the time limit during Midnight Season 2. This achievement grants the dungeon’s teleport reward. Season-wide Mythic+ achievements also require rating milestones and are not completed by Ruby Life Pools alone.
Loot item levels, upgrade-track details, and Great Vault values depend on the final Season 2 reward structure. Verify those values after the season opens before publishing a numerical loot table.
Recommended Preparation for Ruby Life Pools
- Review the current dungeon journal for the three encounters and confirm which abilities are interruptible.
- Assign every important trash interrupt before the key begins.
- Choose a consistent direction for placing fire effects during Kokia and the final boss.
- Reserve at least one defensive or healing cooldown for each major boss damage sequence.
- Use voice or clear party markers for Molten Boulder, add spawns, and final-boss movement.
- Prioritize clean mechanics over aggressive skips until the group knows the current Season 2 layout.
Common Ruby Life Pools Mythic+ Mistakes
- Pulling multiple caster packs without an interrupt plan.
- Leaving Infused Whelps alive while continuing to damage Melidrussa.
- Dropping Molten Boulder or add-death fire in the center of Kokia’s arena.
- Turning a boss toward the group during movement.
- Using all major cooldowns at the start of a phase and having none available for the following damage event.
- Treating avoidable fire and frost damage as a healer problem.
- Attempting a high key before learning where the current season places dangerous mechanics.