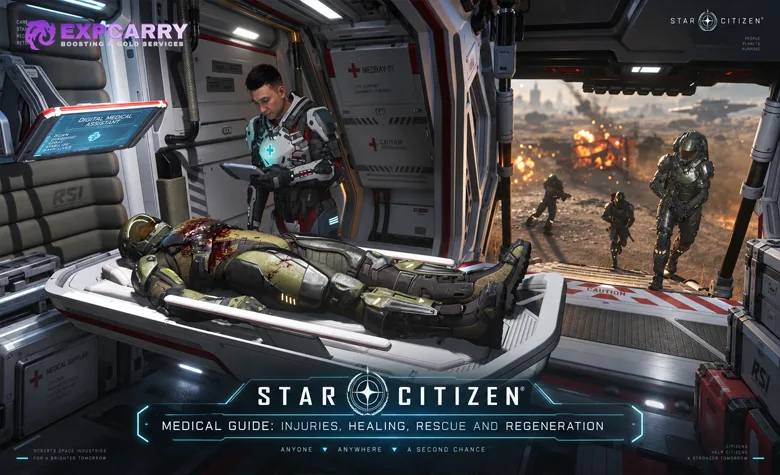
Star Citizen medical gameplay is built around one important distinction: restoring health in the field is not the same as fully treating an injury. A MedPen, LifeGuard Medical attachment, or CureLife Medical Tool can restore health, control bleeding, revive an incapacitated player with Hemozal, and temporarily suppress injury symptoms, but Moderate and Severe injuries still require an appropriate medical bed for complete treatment. If the patient dies, the system moves from rescue to regeneration, using the medical bed or facility previously selected as the regeneration point when it is available, functional, and within range.
A good medic therefore needs more than healing equipment. You need to recognize injury severity, manage Blood Drug Level, decide whether to revive or extract, carry enough MedGel, choose a medical bed that can actually cure the patient's injury tier, and understand what happens if the rescue fails. Updated for the current Alpha 4.10 live environment, this Star Citizen medical guide covers the complete medical gameplay loop from self-treatment and ally care to medical beacons, rescue ships, MedBed tiers, regeneration, and post-death recovery.
Star Citizen Medical System: Health, Injuries and Medical Bed Tiers
Star Citizen separates ordinary health damage, persistent injuries, incapacitation, and death into different states. Health damage can often be restored in the field. Injuries affect specific body regions and impose penalties until they are stabilized or fully treated. Incapacitation leaves the player alive but unable to continue normally, creating a rescue window. Death ends that rescue opportunity and starts the regeneration process instead.
The current RSI medical treatment guide remains the most useful official reference for the live medical system. It confirms three injury severities, field stabilization, medical drugs, MedBed tiers, MedGel consumption, regeneration ranges, and the emergency medical-beacon flow.
Health damage and injuries are separate problems
A player can lose health without receiving a serious persistent injury, and an injured player can have health restored while still suffering from the injury itself. This is why a medic can make someone mobile again without actually curing the underlying trauma. The immediate objective in the field is to keep the patient alive and functional enough to reach proper treatment.
After a firefight, do not assume that a full-looking health bar means the casualty is fully treated. Check the body status, symptoms, and CureLife Medical Tool readout. A player with an untreated Moderate or Severe injury may still have impaired movement, aiming, stamina, vision, hearing, or the ability to hold equipment.
Star Citizen injuries affect specific body regions
Head, torso, arms, and legs produce different functional penalties. Arm injuries make weapon handling and melee performance worse, with severe arm trauma capable of preventing normal use of held items. Leg injuries slow movement and can eventually prevent the patient from standing. Torso injuries reduce stamina and can lead to incapacitation at high severity, while head injuries interfere with vision and hearing and can also become severe enough to incapacitate the player.
This matters during extraction because the same amount of remaining health does not mean the same operational ability. A patient with severe leg trauma may need transport immediately even if they are conscious, while a player with a less disruptive injury may be able to move under their own power once stabilized.
| Injury severity | What field treatment can do | Bed required for full cure | Practical response |
|---|---|---|---|
| Minor / Tier 3 | Can be treated on site with appropriate medical equipment | Tier 3 or better | Heal, confirm mobility and continue if the area is secure. |
| Moderate / Tier 2 | Can be stabilized and symptoms temporarily suppressed | Tier 2 or better | Stabilize, then move the patient to a T2 bed or suitable facility. |
| Severe / Tier 1 | Can be stabilized but not fully cured in the field | Tier 1 or hospital | Prioritize survival and immediate evacuation to high-tier care. |
The tier numbering can be unintuitive: Tier 1 is the most severe injury and the highest-capability medical bed. Tier 3 is the least severe injury and the most basic bed tier.
Star Citizen Incapacitation, Bleeding, Revive and Death
Incapacitation is the critical state where another player can still save you. The patient is down, unable to continue the activity normally, and working against a limited rescue window. Additional damage and other harmful actor states can make the situation worse. A successful revival keeps the player in the field, while failure to receive treatment before that window closes results in death and regeneration.
How to revive an incapacitated player with Hemozal
Hemozal is the core medical substance used for restoring health, controlling bleeding, and reviving incapacitated players. The standard MedPen administers Hemozal as a simple single-use emergency item, while the LifeGuard attachment and CureLife Medical Tool provide reusable options for field treatment.
Revival is not the same as full recovery. After the patient stands up, immediately check for persistent injuries. A revived player may still have major movement, vision, stamina, or weapon-handling penalties and may need a medical bed before returning to combat.
Death leaves recovery work behind
If the patient dies, the rescue changes from saving the character to recovering from the loss. The player regenerates at a valid selected medical bed or falls back to the primary residence when the chosen regeneration point cannot be used. Equipment carried at death should not be assumed to return automatically with the regenerated character.
For players learning this larger recovery loop, the ExpCarry Star Citizen Beginner Guide covers regeneration-point planning, replacement kits, ship claims, inventory, and the practical routine after a failed mission. Medical preparation is much easier when the player has already established a reliable operating base.
Best Star Citizen Medical Equipment: MedPens, LifeGuard and CureLife Tool
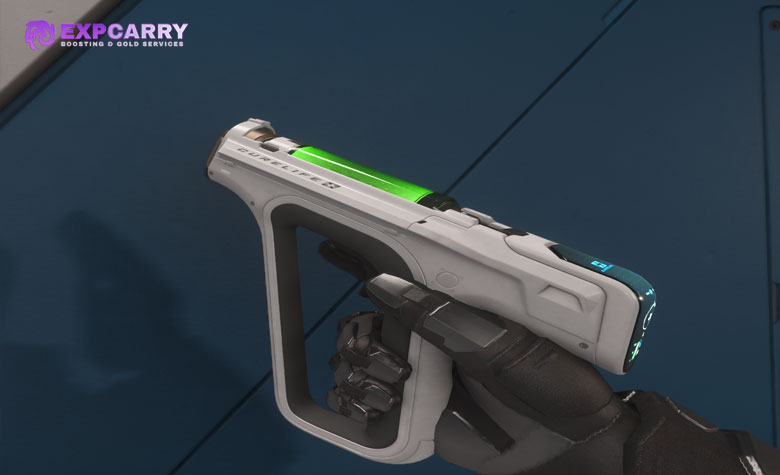
A basic Star Citizen medical loadout should cover three jobs: immediate health restoration, precise treatment of another player, and symptom control long enough to reach an appropriate medical facility. A solo player can travel light with MedPens, while a dedicated responder benefits from the CureLife Medical Tool, refills, Detox capability, and enough supplies for more than one patient.
MedPen is the fastest emergency healing option
The standard MedPen uses Hemozal. It restores health, addresses bleeding, and can bring an incapacitated player back when Hemozal is administered successfully. It is ideal for a rapid self-save or simple field revival because there is little setup compared with a full medical-tool diagnosis.
Carry more than one if you are entering FPS combat. A single pen can solve one emergency, but a longer bunker, boarding action, or rescue can consume several. Medical supplies are inexpensive compared with the time lost after death. If the limiting factor is simply keeping enough aUEC for supplies, replacement equipment, fuel, and rescue ships, ExpCarry's Star Citizen aUEC service is the related currency option; for self-play, maintain a separate operating reserve rather than spending the entire balance on weapons or ships.
LifeGuard Medical attachment provides reusable field healing
The Greycat Multi-Tool can use the LifeGuard Medical attachment for basic health treatment. It is a practical backup because many players already carry a Multi-Tool for utility work. Its medical role is simpler than the dedicated CureLife Medical Tool: it can restore health with Hemozal but does not replace advanced diagnostics, drug management, or a medical bed.
A responder who depends on the LifeGuard should carry the correct MedGel supply and confirm the tool is loaded before deployment. Discovering an empty medical device after reaching an incapacitated player defeats the purpose of carrying reusable equipment.
CureLife Medical Tool (ParaMed): how the medgun works
The CureLife Medical Tool, also known as the ParaMed Medical Device or simply the medgun, provides the most complete handheld treatment workflow. It can read a patient's condition, restore health, and in Advanced mode administer specific medical drugs for injury symptoms. The tool can also be used by the operator for self-treatment.
Use the patient scan before applying multiple drugs. The purpose of Advanced mode is precision, not stacking every available medication. Every unnecessary dose can increase Blood Drug Level and create an overdose problem on top of the original injury.
Explore services related to this guide, selected from our Star Citizen catalog.
View All Star Citizen Services


Star Citizen Medical Drugs and Blood Drug Level (BDL)
Medical drugs temporarily reduce specific symptoms so a patient can survive, move, fight, or reach higher-tier care. They do not make a Tier 1 or Tier 2 injury disappear permanently. The medic's goal is to administer enough treatment to stabilize the situation without pushing Blood Drug Level into overdose.
| Drug | Pen | Main use | Important limitation |
|---|---|---|---|
| Hemozal | MedPen | Restores health, controls bleeding and revives incapacitated players | Does not permanently cure Moderate or Severe injuries. |
| Demexatrine | AdrenaPen | Reduces symptoms of muscle fatigue and head injuries such as concussion | Adds to Blood Drug Level. |
| Roxaphen | OpioPen | Reduces severe arm and leg injury symptoms | Symptom relief is not the same as treating the underlying injury. |
| Sterogen | CorticoPen | Reduces severe torso-injury symptoms such as extreme fatigue and respiratory impairment | Patient may still require T2 or T1 care. |
| Resurgera | DetoxPen | Reduces Blood Drug Level and overdose symptoms | Used to correct medication load, not the original injury. |
| Canoiodide | DeconPen | Reduces radiation-exposure symptoms | Specialized environmental treatment. |
Star Citizen overdose begins above 50% BDL
Blood Drug Level rises when most medical drugs are administered. RSI's current support documentation states that overdose effects begin when BDL goes above 50 percent. Symptoms can include blurred vision and mobility impairment, making an overmedicated patient harder to extract safely.
Watch BDL while using the CureLife Medical Tool in Advanced mode, especially when treating a casualty who may already have used medical pens before you arrived. Do not assume you are starting from zero. If the patient is already near the threshold, use only what is necessary and consider Resurgera when overdose becomes the immediate problem.
Stabilization buys time but does not cure the injury
Drug treatment can suppress the penalties of a Moderate or Severe injury long enough for a patient to walk, aim, or survive transport. That temporary improvement is useful, but it can create false confidence. Once the drug effect ends, the underlying injury remains.
After stabilizing a casualty, decide where the final treatment will happen before moving. A T3 ship bed cannot fully cure a Tier 2 or Tier 1 injury, so the evacuation route should be based on the patient's actual injury tier rather than whichever medical ship is closest.
Star Citizen Medical Bed Tiers, MedGel Costs and Respawn Range
Medical beds are the permanent-treatment layer of the current Star Citizen medical system. Higher-tier beds include the treatment capabilities of lower tiers, while lower-tier beds cannot fully cure more severe injuries. All current medical bed tiers can stabilize injuries and can support regeneration when the required range, MedGel, and functionality conditions are met.
| Medical bed | Full treatment capability | Regeneration range | Player-owned MedGel capacity |
|---|---|---|---|
| Tier 3 | Minor / Tier 3 injuries | 50 km | 200 cSCU |
| Tier 2 | Minor and Moderate / Tier 2 injuries | 8,000 km | 400 cSCU |
| Tier 1 | Minor, Moderate and Severe / Tier 1 injuries | 750,000,000 km | 600 cSCU |
| Hospital or supported clinic | Depends on the facility; hospitals can fully treat all current injury tiers | Facility-based regeneration where supported | No player MedGel load required |
The regeneration range is one of the biggest operational differences between MedBed tiers. T3 works as a local rescue and respawn solution. T2 reaches across most planetary-scale operations. T1 has practical system-scale reach. A high-tier bed is therefore not only better treatment; it can also be a much stronger mobile regeneration anchor.
Player-owned medical beds consume MedGel
Ship and vehicle medical beds depend on MedGel for treatment and regeneration. CIG's current medical documentation lists a 200 cSCU MedGel canister, treatment consumption of 5 cSCU for a Minor injury, 10 cSCU for Moderate and 20 cSCU for Severe, and a regeneration cost of 100 cSCU. Beds located in hospitals and clinics do not require players to supply those MedGel reserves themselves.
Before using a ship as the party's regeneration point, check its MedGel level. A bed without enough usable MedGel is not a dependable safety net. For long deployments, carry replacement canisters in cargo rather than assuming the starting fill will survive repeated treatment and regeneration.
MedBed tier determines treatment capability, not just quality
A T3 bed can stabilize a Severe injury but cannot permanently cure it. A T2 bed can fully handle Moderate injuries but not Severe ones. A T1 bed can treat all current injury tiers. This is why small ambulances and higher-tier medical ships occupy different rescue roles.
If you are choosing a medical ship rather than learning the treatment system itself, the ExpCarry Star Citizen Ship Tier List compares current medical, exploration, and support roles. The important medical question is not which ship is generally strongest, but which MedBed tier, durability, size, and patient capacity fit the operation.
Best Star Citizen Medical Ships and Vehicles for Rescue
A Star Citizen medical ship does not replace field treatment; it extends the responder's range and determines which injuries can be permanently treated before reaching a hospital. Small T3 craft work as fast ambulances. T2 platforms can fully treat Moderate injuries. Configurable Apollo medical modules can provide T1 capability, turning the ship into a mobile high-tier treatment and long-range regeneration platform.
C8R Pisces and Cutlass Red are rapid-response medical ships
The Anvil C8R Pisces carries one Tier 3 medical bed and is well suited to fast solo response, short-range rescue, and stabilizing a patient for onward transport. The Cutlass Red carries two Tier 3 medical beds and offers more internal room, making it practical when the mission also requires equipment, an additional crewmember, or more than one patient.
These are not full hospitals. A patient with a Moderate or Severe persistent injury still needs T2 or T1 treatment. Their strength is response time and extraction, not the ability to solve every injury on location.
Terrapin Medic brings Tier 2 treatment into dangerous areas
The Terrapin Medic uses one Tier 2 medical bed, allowing it to fully treat Moderate injuries while retaining the compact, protected character of the Terrapin platform. It is a strong choice when the extraction zone itself is dangerous and the patient may need more than basic T3 care.
The trade-off is specialization and patient capacity. If the mission only needs a quick revive and pickup, a smaller or cheaper ambulance can be more efficient. Match the ship to the casualty profile and threat level rather than always deploying the highest-capability hull available.
RSI Apollo is the flexible high-tier medical ship
The RSI Apollo Triage and Medivac are active live-game medical ships. The Alpha 4.7 release later expanded their accessibility by adding Apollo Triage acquisition through Wikelo's Emporium and rental support for the Apollo variants; it was not the patch that first turned the Apollo from a concept into a live vehicle.
The Apollo's defining feature is its two configurable medical rooms. Each room can use a module with three Tier 3 beds, two Tier 2 beds, or one Tier 1 bed. This means an Apollo can be configured for up to six T3 beds, four T2 beds, two T1 beds, or a mixed setup. The standard configuration uses two T3 MedBed modules, trading maximum treatment tier for higher patient and regeneration throughput.
Players specifically building toward a mobile high-tier rescue platform can use the verified RSI Apollo Medivac page to check its current in-game purchase information and required aUEC. The ship does not replace medical knowledge: a poorly stocked Apollo with insufficient MedGel or an unsecured extraction plan can still fail a rescue.
How to Rescue an Incapacitated Player in Star Citizen
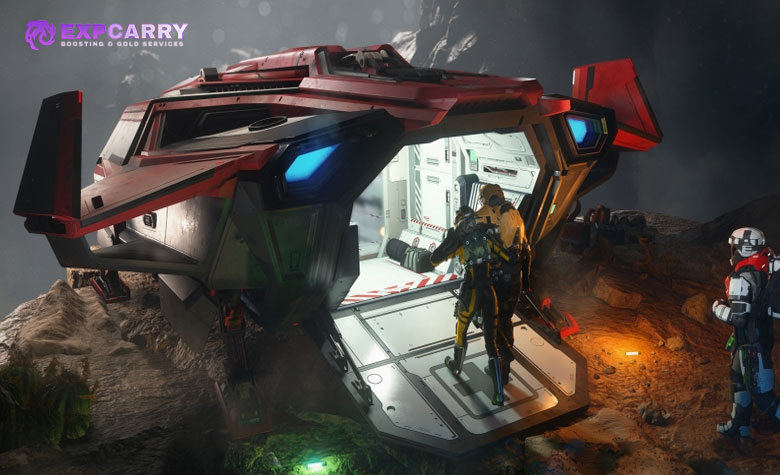
A Star Citizen medical rescue is a security operation first and a treatment operation second. Reaching the beacon does not make the area safe. The responder must identify the patient's location, control immediate threats, revive or stabilize the casualty, and then decide whether the patient can continue or must be moved to an appropriate medical bed.
How to send and complete a Star Citizen medical rescue beacon
An incapacitated player can use the emergency rescue prompt to request assistance. On the default QWERTY layout, holding M sends the preset medical beacon. The current RSI support page notes that this function may use another key on different keyboard layouts, including AZERTY, so players should verify their actual control binding before depending on the HUD prompt.
The standard medical-assistance beacon currently advertises a 15,000 aUEC reward. According to RSI's medical support guide, the payout is awarded to the responder after the patient is delivered to an Emergency Medical Drop-Off or medical bed. Treat the beacon as a rescue contract, not merely a marker pointing to a body.
Secure the scene before using the medgun
The fastest way to turn one casualty into two is to run directly to the body while the attacker is still active. Scan the approach, identify NPCs or players near the patient, park the ship so it can leave quickly, and use a second responder as security when possible. In hostile bunkers, boarding actions, and PvP areas, the medic is exposed while treating.
Once the immediate threat is controlled, revive with Hemozal, check the injury tier, then decide whether to treat symptoms in place or extract. Do not spend a long time fine-tuning drugs inside an active firing lane when a basic revive and rapid movement to cover will save the patient more reliably.
Choose whether to revive, stabilize, or evacuate
Simple health loss with no persistent injury can end with field healing. A Minor injury can be treated on site with suitable medical equipment. A Moderate or Severe injury requires the appropriate higher-tier medical bed for a full cure even if the casualty is walking again after symptom-control drugs.
Plan the destination before leaving. A severely injured player should not be transported to a T3 bed merely because it is nearby if appropriate T1 care is reasonably accessible. The correct destination eliminates the need for a second transfer.
Star Citizen Medical Rescue Workflow
The easiest way to avoid panic during a medical beacon is to use the same order every time. The workflow below works for solo responders and scales naturally to a two- or three-person medical team.
- Read the beacon before accepting. Check distance, system, expected route, payout, and whether the location is likely to be hostile.
- Prepare before launch. Carry Hemozal, the CureLife Medical Tool, MedGel supplies, Detox capability, weapons if the location is dangerous, and enough fuel for the return route.
- Confirm the medical bed. If the ship is part of the treatment plan, verify its MedBed tier and current MedGel reserve before leaving.
- Approach cautiously. Do not land directly beside hostile NPCs, turrets, or unknown players just because the patient marker is close.
- Secure the immediate area. Eliminate or contain the threat before beginning a long treatment interaction.
- Revive the patient. Administer Hemozal through an appropriate medical item or tool if the patient is still incapacitated rather than dead.
- Diagnose injuries. Check the affected body region, injury tier, health, and Blood Drug Level.
- Stabilize only as much as needed. Use the correct drug to restore useful function without creating an overdose.
- Move to the correct bed. T3 for Minor, T2 or better for Moderate, T1 or hospital for Severe.
- Complete the delivery. Use an Emergency Medical Drop-Off or medical bed when the beacon requires formal patient delivery.
- Restock immediately. Replace medical pens, MedGel and ammunition before accepting another rescue.
This order keeps medical treatment inside a larger extraction plan. A responder who can revive perfectly but arrives with an empty ship, no fuel, or the wrong bed tier is still not ready for the mission.
Star Citizen Emergency Medical Drop-Offs
Emergency Medical Drop-Off elevators provide a direct route from hangars attached to medical facilities into the treatment area. They are useful when a casualty cannot walk reliably through a landing zone or when a medical-assistance beacon requires formal patient delivery.
Use the Emergency Medical Drop-Off when walking is the bottleneck
A Severe leg injury can make ordinary movement impossible, and other injuries can turn a long walk through a landing zone into unnecessary risk. Bring the patient to the marked Emergency Medical Drop-Off rather than trying to navigate the normal public route to the medical facility.
The drop-off also acts as a clear handover point for a medical rescue. Once the casualty reaches the facility, the field responder no longer needs to improvise symptom management in the hangar or ship. This is especially useful when the patient can no longer move reliably without assistance or repeated drug treatment.
Do not confuse the drop-off with full medical treatment
The elevator is access to the medical facility, not a medical bed by itself. The patient still needs treatment at the appropriate facility after delivery. For serious trauma, continue until the injury is actually cured rather than stopping because the patient reached the station.
In a coordinated team, one player can handle the patient while another stores, refuels, or prepares the rescue ship. That reduces turnaround time before the next beacon and keeps the medical workflow separate from ship servicing, which is useful when several rescue contracts arrive close together.
Star Citizen Regeneration and Respawn After Death
Regeneration is Star Citizen's current respawn process. Before taking risks, set an appropriate medical bed or supported facility as the regeneration point. If you die within that bed's supported range and the bed is functional and sufficiently supplied, the character can regenerate there. If the selected point cannot be used, the game falls back to the primary residence.
Medical bed respawn range depends on MedBed tier
Tier 3 beds support regeneration within about 50 km, making them useful local anchors around a mission area. Tier 2 reaches about 8,000 km, which covers much larger planetary operations. Tier 1 extends to about 750,000,000 km, giving it practical system-scale coverage.
Range should influence where a group sets its regeneration point before an operation. A T3 bed parked close to a bunker can be useful, but the same bed is not a dependable anchor after the team travels to another moon or far across a planetary system.
A regeneration bed must also be functional and supplied
Distance alone is not enough. A selected player-owned medical bed can fail as a regeneration destination if it is destroyed, is otherwise unavailable, or lacks enough MedGel for regeneration. A mobile respawn plan should therefore include ship survival and MedGel logistics rather than simply registering a bed once and forgetting it.
Before a long combat operation, physically check the ship and medical stores. A crew that expects several deaths should budget for the current 100 cSCU regeneration cost per use plus any MedGel consumed by treatment between deaths.
Death does not automatically return all carried gear
Regeneration restores the character, not every item carried at death. Equipment recovery can require returning to the body, while some eligible account-linked items may follow separate recovery mechanics. Do not plan a medical route on the assumption that the entire combat kit will automatically reappear with the regenerated player.
The ExpCarry Star Citizen Item Recovery Guide separates supported recovery cases from ordinary lost, looted, or in-game-acquired equipment. For routine medical planning, the safer rule is still to keep replacement undersuits, helmets, armor, weapons, magazines, and medical supplies near the expected regeneration location.
Star Citizen Death of a Spaceman: What Is Live and What Is Still Future
Star Citizen's long-term death design is broader than the regeneration system currently playable. Regeneration exists now, but older design discussions also describe regeneration degradation, inheritance, long-term character consequences, and legacy mechanics that are not all part of the live game.
CIG has explicitly clarified this distinction in the Ursa Medivac Q and A: current respawning and regeneration are one component of the wider Death of a Spaceman framework, while regeneration degradation, inheritance, and additional related systems are still planned for the future.
Current Star Citizen death is not permanent character loss
The live medical decision is whether to wait for rescue or regenerate, not whether the current character permanently disappears after a fixed number of deaths. Future systems are intended to make repeated death more consequential, but those planned mechanics should not be presented as current live penalties.
That makes rescue valuable today mainly because it can preserve mission progress, location, time, equipment access, and continuity. Those are already meaningful costs without inventing future character-degradation rules. When deciding whether to wait, compare the realistic rescue time with the time and equipment cost of regenerating and returning to the mission.
Medical preparation matters even before future death penalties arrive
Even without the complete long-term death design, a failed rescue can remove the player from the mission, strand them at a distant regeneration point, expose equipment to loss or looting, and consume ship or medical resources during the return. A good medical plan already saves substantial time and aUEC.
As CIG adds more pieces of the long-term health and death framework, the best evergreen habit is to follow the current medical interface and official treatment documentation rather than assuming an older Death of a Spaceman design description has already been implemented exactly as written.
Best Star Citizen Medical Loadout for Solo Players and Rescue Crews
The best Star Citizen medical loadout depends on whether you are protecting yourself or deliberately answering rescue calls. Solo players need compact redundancy. Dedicated medics need enough diagnostic, treatment, extraction, and security capability to handle someone else's emergency without becoming another casualty.
Solo medical loadout
A solo pilot should carry several MedPens, one Detox option, and either a LifeGuard-equipped Multi-Tool or CureLife Medical Tool when the activity has meaningful FPS risk. Keep replacement medical supplies in the ship instead of carrying the entire stock on your character, because dying with every refill defeats the redundancy.
If the ship has a medical bed, add spare MedGel when the route is long or regeneration is part of the plan. T3 medical ships are useful local safety nets, but remember that both their treatment capability and regeneration range are limited compared with higher-tier beds.
Dedicated medical rescue loadout
A medical responder should add the CureLife Medical Tool, multiple refills, a selection of symptom-control drugs, Detox capability, spare Hemozal, and enough personal protection for the destination. Medical specialists entering bunkers or combat wrecks should also carry a weapon and compatible ammunition because treatment cannot begin until the immediate area is safe.
For groups learning medical response, extraction positioning, FPS security, or medical-ship operation in live sessions, ExpCarry's Star Citizen Coaching is the relevant self-play service option. The same skills can be practiced independently by running low-risk rescues first and adding hostile environments only after the treatment workflow becomes automatic.
Medical ship loadout
A dedicated medical ship should carry reserve MedGel, handheld medical tools, pens, weapons for the crew, food and water for longer deployments, and spare basic equipment for a patient who lost gear. Keep these supplies somewhere accessible without unloading the entire cargo hold during an emergency.
Also keep the medbay physically clear. Boxes, loose equipment, and crew congestion can turn a small treatment area into an obstacle during an extraction. Medical throughput is partly inventory management, and a well-organized medbay reduces the time between loading a casualty, diagnosing the injury, and moving the patient to the correct bed.
Common Star Citizen Medical Mistakes
Most failed medical rescues are not caused by a lack of healing power. They happen because the medic misreads injury severity, overdoses the patient, uses the wrong MedBed tier, ignores MedGel, or enters an unsecured area too quickly.
Assuming full health means fully treated.
Persistent Moderate and Severe injuries can remain after health is restored. Scan the patient and use the correct MedBed tier.
Taking every casualty to a Tier 3 bed.
T3 is enough for Minor injuries and stabilization, but Moderate needs T2 or better and Severe needs T1 or hospital treatment.
Ignoring Blood Drug Level.
Repeated drugs can push BDL above the overdose threshold and create new impairment. Diagnose before dosing.
Registering a ship bed and forgetting MedGel.
Player-owned beds need MedGel for treatment and regeneration. A bed without enough MedGel is not a reliable respawn plan.
Answering a rescue beacon without security.
The patient may be inside an active hostile zone. Secure the scene before spending time on treatment.
Using old Death of a Spaceman rules as live mechanics.
Regeneration is active, but regeneration degradation, inheritance, and other long-term systems are not all implemented.
Choosing a medical ship only by size.
A fast T3 responder can be better than a large high-tier medical ship for one nearby casualty. Match MedBed tier, range, durability, and patient capacity to the mission.
Respawning too quickly.
If rescue is realistic, waiting can preserve mission position and simplify equipment recovery. Regeneration is the fallback when extraction is no longer practical.
Star Citizen Medical FAQ
These answers cover the Star Citizen medical-system questions that most often determine whether a player should treat in place, request rescue, or regenerate.
Can a MedPen revive another player?
Hemozal can bring an incapacitated player back. After revival, check for persistent injuries that may still require a medical bed.
Can a Tier 3 medical bed heal a Tier 1 injury?
No. It can stabilize the patient, but a Severe Tier 1 injury requires a Tier 1 bed or hospital for full treatment.
What medical bed heals a Moderate injury?
A Tier 2 bed or better can fully treat a Moderate Tier 2 injury.
What happens if my regeneration bed is out of range?
If the selected bed cannot be used because of range, destruction, unavailability, or insufficient MedGel, the game can return you to your primary residence instead.
How much MedGel does regeneration use?
CIG's current medical documentation lists regeneration at 100 cSCU of MedGel on player-supplied medical beds.
How do I call for medical rescue when incapacitated?
Use the emergency rescue prompt. The default QWERTY binding is to hold M, but RSI warns that different keyboard layouts can use another key.
What happens if Blood Drug Level goes over 50 percent?
Overdose symptoms begin, including blurred vision and mobility impairment. Resurgera, including the DetoxPen form, is used to reduce BDL and overdose symptoms.
Is Death of a Spaceman fully implemented?
No. Regeneration is live, but CIG still identifies regeneration degradation, inheritance, and other parts of the broader framework as future systems.
Conclusion
Star Citizen medical gameplay is a chain of decisions rather than one healing button. Restore health and control bleeding first, diagnose the injury, use drugs only when their symptom relief is needed, monitor Blood Drug Level, and move the patient to the correct medical bed when field treatment cannot provide a permanent cure. Tier 3 handles Minor injuries, Tier 2 handles Moderate injuries, and Tier 1 or a hospital is required for Severe trauma. Player-owned beds also need enough MedGel to perform treatment and regeneration.
For rescue work, preparation matters as much as medicine. Read the beacon, stock the ship, verify MedBed tier and MedGel, secure the scene, revive with Hemozal, stabilize only what is necessary, and extract to the correct facility. If rescue fails, regeneration returns the player through a valid selected medical point while equipment recovery becomes a separate problem. That complete loop - prevention, treatment, rescue, evacuation, regeneration, and restocking - is what makes Star Citizen medical gameplay a real support career instead of a collection of MedPens.