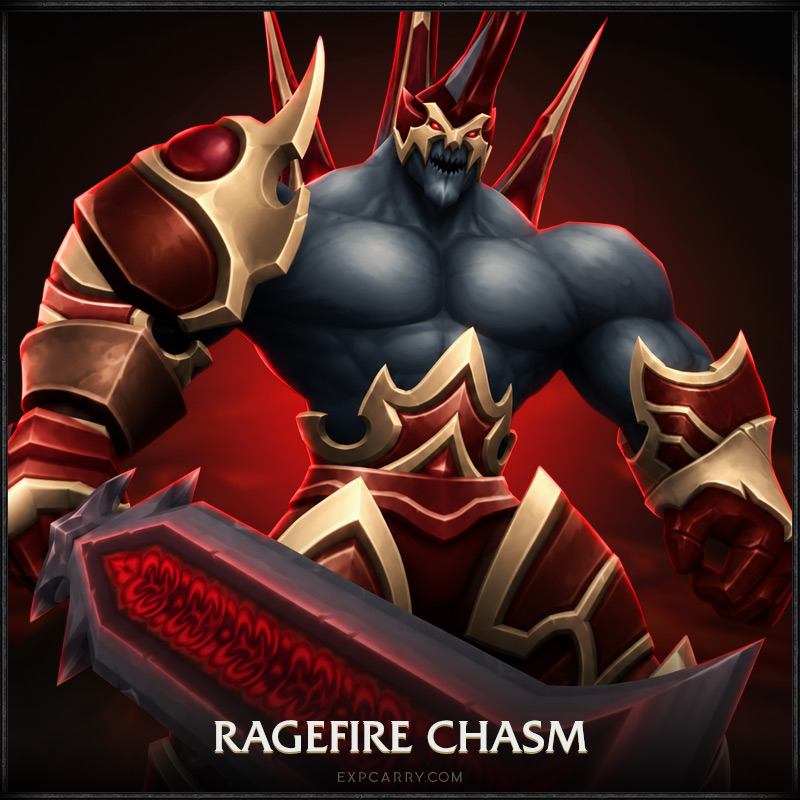

Ragefire Chasm, usually shortened to RFC, is a five-player WoW Forever dungeon beneath Orgrimmar's Cleft of Shadow. The recommended range is approximately level 13–18, while current difficulty guidance places level 9 at Hard, 12 at Medium, 14 at At Level and 19 at Easy.
RFC is the first practical dungeon for most Horde characters. It has four bosses, a compact route and a strong package of early quests from Orgrimmar, Thunder Bluff and Undercity. Forever also expands the boss loot: Oggleflint and Bazzalan now have dedicated rare-quality drops alongside the established Taragaman and Jergosh tables.
Quick answer: gather your Horde quests before forming the group, progress Thrall's Hidden Enemies chain until it sends you inside RFC, visit Oggleflint and Maur Grimtotem before leaving the trogg section, kill Taragaman for Slaying the Beast, collect both books for The Power to Destroy..., then kill Bazzalan and Jergosh for Hidden Enemies.
| Ragefire Chasm | Details |
|---|---|
| Recommended level | 13–18 |
| Hard | 9 |
| Medium | 12 |
| At Level | 14 |
| Easy | 19+ |
| Location | Cleft of Shadow, Orgrimmar |
| Group size | 5 players |
| Bosses | 4 |
| Quest entries | 6, all Horde |
| Final area | Jergosh the Invoker and Bazzalan |
Ragefire Chasm Location and Entrance
Ragefire Chasm is located on the lowest level of the Cleft of Shadow in Orgrimmar. Horde players can simply travel into the Cleft and follow the cavern down to the instance portal.
A useful entrance coordinate is around /way Orgrimmar 53.0 48.9.
Can Alliance Enter Ragefire Chasm?
Technically yes, but it is not an efficient Alliance dungeon. The entrance is inside Orgrimmar and every normal RFC dungeon quest is Horde-only.
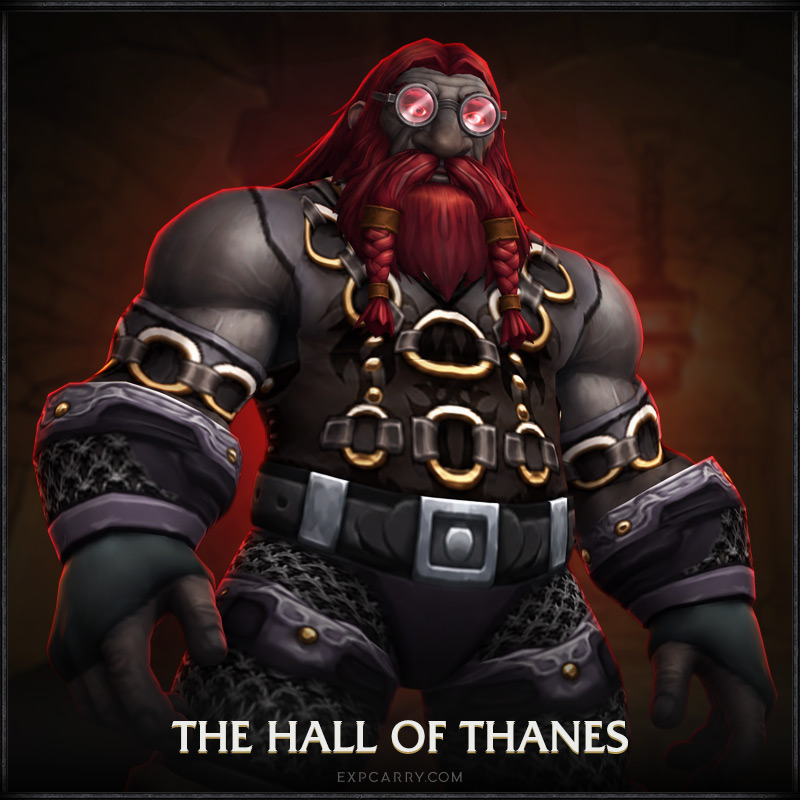
An Alliance character would need to enter hostile Orgrimmar and reach the Cleft of Shadow, usually through repeated corpse runs. For normal leveling, Alliance players should use Hall of Thanes, Deadmines, Wailing Caverns or other level-appropriate instances instead.
Ragefire Chasm Map
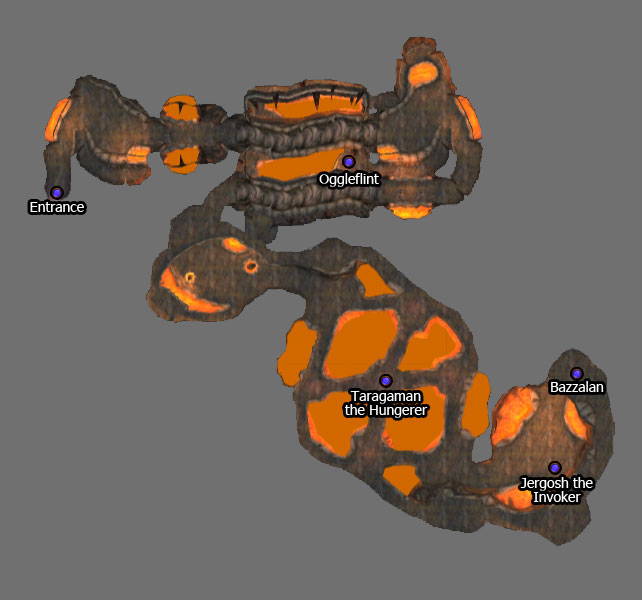
RFC has a much simpler layout than later dungeons. The route begins with worms and troggs, branches toward Oggleflint and Maur Grimtotem, then continues through the lava chamber to Taragaman and finally into the Searing Blade section containing Bazzalan and Jergosh.
All Ragefire Chasm Quests
Current Forever data contains six RFC quest entries. Five are picked up before or during the main quest chains, while Returning the Lost Satchel is the inside-dungeon continuation of Searching for the Lost Satchel.
| Quest | Faction | Minimum Level | Objective |
|---|---|---|---|
| Slaying the Beast | Horde | 9 | Kill Taragaman the Hungerer and loot his heart. |
| The Power to Destroy... | Horde | 9 | Loot Spells of Shadow and Incantations from the Nether from Searing Blade enemies. |
| Testing an Enemy's Strength | Horde | 9 | Kill 8 Ragefire Troggs and 8 Ragefire Shamans. |
| Searching for the Lost Satchel | Horde | 9 | Find Maur Grimtotem inside RFC. |
| Returning the Lost Satchel | Horde | 9 | Inside-dungeon follow-up from Maur Grimtotem; return to Rahauro. |
| Hidden Enemies | Horde | 9+ | Final dungeon stage requires Bazzalan and Jergosh the Invoker. |
Hidden Enemies level note: Wowhead's quick-reference currently associates the chain with level 9, while the detailed dungeon stage is reached later in the multi-step chain. The important part is to finish the prerequisite steps from Thrall before forming your RFC group.
Explore services related to this guide, selected from our Dungeons catalog.
View All Dungeons Services

Hidden Enemies Quest Chain
Hidden Enemies is the most important RFC quest chain because the dungeon stage is not available immediately.
- Speak with Thrall in the Valley of Wisdom.
- Travel to Skull Rock east of Orgrimmar.
- Loot the Lieutenant's Insignia from Burning Blade enemies.
- Return to Thrall.
- Speak with Neeru Fireblade in the Cleft of Shadow and exhaust his dialogue.
- Return to Thrall again.
- Continue the chain until the dungeon objective appears.
- Enter RFC and kill Bazzalan and Jergosh the Invoker.
The current Forever dungeon reward package includes four weapon choices:
- Kris of Orgrimmar — dagger;
- Hammer of Orgrimmar — main-hand mace;
- Axe of Orgrimmar — two-hand axe;
- Staff of Orgrimmar — staff.
Slaying the Beast
Pick this up from Neeru Fireblade in Orgrimmar's Drag. Kill Taragaman the Hungerer and loot Taragaman the Hungerer's Heart.
Taragaman is directly on the normal dungeon route, so this quest is almost impossible to miss once it is active.
Searching for the Lost Satchel
Rahauro on Elder Rise in Thunder Bluff sends you to find Maur Grimtotem inside RFC.
Maur is in a side cave beside the early trogg area and is guarded by Oggleflint and two elite troggs.
After reaching Maur, he starts Returning the Lost Satchel. Return to Rahauro in Thunder Bluff after the dungeon.
Current reward choices include:
- Featherbead Bracers;
- Savannah Bracers;
- Garrison Cuffs.
Testing an Enemy's Strength
Rahauro also gives Testing an Enemy's Strength. Kill:
- 8 Ragefire Troggs;
- 8 Ragefire Shamans.
These enemies are concentrated in the early half of RFC. Check both counters before moving permanently into the Searing Blade section.
The Power to Destroy...
Varimathras in Undercity gives this quest. You need two books:
- Spells of Shadow;
- Incantations from the Nether.
They drop from Searing Blade Cultists and Searing Blade Warlocks in the later half of RFC.
Current reward options include:
- Ghastly Trousers;
- Dredgemire Leggings;
- Gargoyle Leggings.
Best One-Run RFC Route
- Finish the prerequisite stages of Hidden Enemies before entering.
- Collect Slaying the Beast from Neeru Fireblade.
- Visit Thunder Bluff for Testing an Enemy's Strength and Searching for the Lost Satchel.
- Collect The Power to Destroy... in Undercity.
- Enter RFC and begin the trogg kill counters immediately.
- Take the side branch to Oggleflint.
- Speak with Maur Grimtotem and accept Returning the Lost Satchel.
- Return to the main route and clear toward Taragaman.
- Kill Taragaman and loot his heart.
- Continue into the Searing Blade section and collect both quest books.
- Take the upper ramp to Bazzalan and kill him.
- Clear the final room and kill Jergosh the Invoker.
- Before leaving, verify both books, Taragaman's Heart and all trogg counters.
Ragefire Chasm Bosses
| Boss | Main Mechanics | Notable Forever Loot |
|---|---|---|
| Oggleflint | Cleave, two trogg adds | Barbaric Crossbow; Trogg Scepter; Bone Knuckles |
| Taragaman the Hungerer | Fire Nova, Uppercut | Subterranean Cape; Crystalline Cuffs; Cursed Felblade |
| Jergosh the Invoker | Immolate, Curse of Weakness, two adds | Robe of Evocation; Cavedweller Bracers; Chanting Blade |
| Bazzalan | Sinister Strike, Deadly Poison, two adds | Searing Dagger; Satyrskin Cloak; Chasm Walkers |
Oggleflint Strategy and Loot
Oggleflint is guarded by two elite troggs. Crowd-control one add, kill the second, then focus the boss.
His only meaningful boss ability is Cleave, so the tank should face him away from the party and melee players should avoid standing beside the tank.
Oggleflint Loot
- Barbaric Crossbow — ranged crossbow;
- Trogg Scepter — healing one-hand mace;
- Bone Knuckles — fist weapon.
Taragaman the Hungerer Strategy and Loot
Taragaman stands on a platform surrounded by lava. Tank him away from the edge because Uppercut can knock the tank backward.
Ranged players should stay at maximum practical distance to reduce exposure to Fire Nova.
Taragaman Loot
- Subterranean Cape — cloak;
- Crystalline Cuffs — cloth wrist;
- Cursed Felblade — main-hand sword.
Jergosh the Invoker Strategy and Loot
Jergosh is accompanied by two enemies. Crowd-control one and kill the other before focusing the boss.
Immolate adds magic damage over time, while Curse of Weakness reduces physical pressure from the affected player. Remove the debuffs when your group has the appropriate dispel.
Jergosh Loot
- Robe of Evocation — cloth chest;
- Cavedweller Bracers — mail wrist;
- Chanting Blade — dagger.
Bazzalan Strategy and Loot
Bazzalan is on the raised ramp near the final Searing Blade section and is accompanied by two adds.
One nearby enemy can usually be pulled separately. Crowd-control the remaining add and focus Bazzalan because Sinister Strike and Deadly Poison create stronger single-target pressure than most other RFC encounters.
Bazzalan Loot
- Searing Dagger — spellpower dagger;
- Satyrskin Cloak — cloak;
- Chasm Walkers — leather feet.
Ragefire Chasm Full Loot Table
| Boss | Loot |
|---|---|
| Oggleflint | Barbaric Crossbow; Trogg Scepter; Bone Knuckles |
| Taragaman the Hungerer | Subterranean Cape; Crystalline Cuffs; Cursed Felblade |
| Jergosh the Invoker | Robe of Evocation; Cavedweller Bracers; Chanting Blade |
| Bazzalan | Searing Dagger; Satyrskin Cloak; Chasm Walkers |
Best RFC Loot by Role
Healers: Trogg Scepter is the clearest dedicated early healing weapon target.
Caster DPS: Searing Dagger, Robe of Evocation and Crystalline Cuffs are useful items to compare against your current gear.
Physical melee: Cursed Felblade, Bone Knuckles and Chanting Blade provide several weapon options.
Hunters: Barbaric Crossbow is the most obvious ranged target.
Mail users and tanks: Cavedweller Bracers and several quest rewards can provide strong early upgrades depending on your existing gear.
Important RFC Trash
Ragefire Trogg and Ragefire Shaman
These enemies are required for Testing an Enemy's Strength. Pull smaller groups when underleveled and prioritize Shamans when their casting creates extra pressure.
Earthborers
Early worm packs can apply armor-reducing pressure to the tank. Avoid letting multiple loose mobs reach cloth users.
Searing Blade Cultists and Warlocks
These enemies drop the two books for The Power to Destroy.... Check your quest inventory before leaving the final section.
Recommended Group and Preparation
A standard group of one tank, one healer and three DPS is sufficient.
- Bring crowd control for boss adds.
- Keep ranged players away from Taragaman's Fire Nova.
- Bring Curse or Magic dispels when available for Jergosh.
- Leave enough bag space for quest items.
- Collect quests from all three Horde capitals before the run when possible.
- Do not enter before progressing Hidden Enemies to its dungeon step.
Ragefire Chasm Mistakes to Avoid
- Forming the group before unlocking the dungeon stage of Hidden Enemies.
- Skipping the Oggleflint side cave and Maur Grimtotem.
- Leaving the trogg section before completing both kill counters.
- Tanking Taragaman beside the lava edge.
- Leaving before both books for The Power to Destroy... have dropped.
- Pulling Jergosh or Bazzalan with all their adds uncontrolled.
- Forgetting Taragaman's Heart.
Where RFC Fits Into Horde Leveling
RFC is particularly strong as a first dungeon because the entrance is directly inside Orgrimmar and several of its quests connect naturally with early Durotar and Horde-capital progression.
For the broader route, use our WoW Forever Horde Leveling Guide and WoW Forever Dungeon Quests Guide.
Is Ragefire Chasm Worth Repeating?
Your first fully prepared quest run provides the highest guaranteed value. Additional runs are reasonable when targeting a specific Forever boss drop such as Barbaric Crossbow, Trogg Scepter, Searing Dagger or Cursed Felblade.
Once the quests are finished and the boss loot is no longer an upgrade, moving into the next leveling zones and dungeons is generally more efficient.
WoW Forever Ragefire Chasm Boost
Players who want help with a full RFC clear, all four bosses or specific dungeon objectives can use our WoW Forever Ragefire Chasm Boost.
Quest chains that begin outside the dungeon, including the prerequisite stages of Hidden Enemies, need to be active at the correct step before the run unless the selected service specifically includes preparation.