Voidscar Arena is one of the more flexible dungeons in World of Warcraft Midnight Season 2, but that flexibility is exactly what makes a bad route expensive. The dungeon gives you an opening path choice, several trash sections with different utility checks, three bosses that punish poor positioning, and a mandatory final lieutenant sequence before Charonus. This World of Warcraft Midnight Voidscar Arena guide uses the current Patch 12.1 version and a PUG-first route: take the left opening path through Aegyra the Unyielding, keep pulls controlled around the arena events, use the lower-dispel-demand approach to Atroxus unless your group has reliable poison removal, and defeat all three Devouring Brutalizers before the final boss.
The key has a 30-minute timer and is part of the active Midnight Season 2 Mythic+ rotation. Blizzard's official Voidstorm overview identifies Taz'Rah, Atroxus, and Charonus as the three dungeon bosses. Route data also needs to be treated as current-build information: Mythic Dungeon Tools corrected enemy positions, pull groupings, and floor assignments for Voidscar Arena on August 25, and the addon has moved through several releases since then. Do not import an old beta or early Season 2 route and assume its pack layout is still correct.
Voidscar Arena Mythic+ Route for a Standard Group
The safest Voidscar Arena Mythic+ route is not the route with the largest possible pulls. It is the route that keeps interrupts predictable, leaves room for boss mechanics, and reaches each event gate without asking a random group to solve several utility checks at once. For a normal group, use the left opening path, finish Taz'Rah, take the lower-dispel-demand side toward Atroxus, then clear the final arena in controlled pieces before Charonus.
| Stage | Standard route | Group position | Main failure point |
|---|---|---|---|
| Opening wing | Go left toward Aegyra the Unyielding and earn Proof of Endurance | Keep the group behind or beside the tank and leave room for ground effects | Overlapping dangerous casts while interrupts are still unassigned |
| Taz'Rah | Enter after the chosen opening champion and fight the boss with the outer edge reserved for fissures | Loose spread, with melee and tank keeping the middle readable | Nether Dash lines crossing the group or Void Fissures filling the center |
| Atroxus approach | Take the Watchful Harrower side for the lower-dispel-demand PUG route; the Agitated Voidscythe side becomes attractive with reliable poison-dispel coverage | Do not stack every pack into one corner; preserve movement lanes | Utility overload from dangerous casts, dispels, and unavoidable damage |
| Atroxus | Keep the boss near an edge and immediately swap to each Toxic Creeper | Keep the boss stable, watch where Noxious Breath is aimed, and leave the open half of the arena available for movement | Poison pools remove safe space and the Creeper remains alive too long |
| Final arena | Defeat all three Devouring Brutalizers, controlling nearby trash rather than chaining every pack | Tank Brutalizers near stable walls and keep healers away from push hazards | Devour healing, Dreadbellow displacement, and missed Mending Void casts |
| Charonus | Enter with defensives and movement tools available | Boss near the middle, players loosely spread with assigned singularity lanes | Orb paths crossing, Cosmic Crash overlaps, or a player being Atomized |
The left opening is the default because it reduces the number of caster interrupts your group needs to coordinate and gives Proof of Endurance, the Versatility route buff. That is a better baseline for a mixed PUG than building the first minutes around a perfect caster-control rotation. Groups that already know their exact key level and dungeon can use a specific Mythic+ key setup, but the route itself should still be planned around the utility actually present in the party.
Do not hard-code enemy-forces percentages from an old screenshot into this route. The MDT 6.2.8 update specifically corrected Voidscar Arena enemy positions, pull groupings, and floor assignments, and CurseForge lists MDT 6.2.15, released September 5, 2026, as the current main release. Before starting the key, load a route built on the current mapping and confirm that its final enemy-forces bar reaches 100 percent. The sequence in this guide is designed to remain useful even when a small trash grouping changes.
How the Opening Event and Arena Gates Work
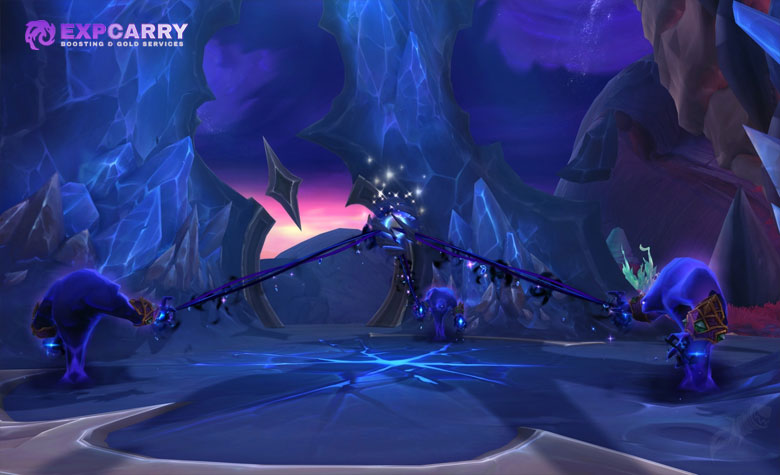
Voidscar Arena does not begin as a single straight corridor. The opening fork decides which champion you fight and which persistent route buff the party receives. The left route leads to Aegyra the Unyielding and Proof of Endurance, while the right route leads to Raj'kess the Spellstorm and Proof of Mastery. For the standard route, commit to the left path before the timer starts so the group does not lose time discussing the choice after the first pull.
Old warnings about the Aegyra gate need context. Blizzard fixed an issue where defeating Aegyra while she was channeling Earthsplitter could fail to open the arena door, and later tuning converted Proof of Endurance and Proof of Mastery into buffs. The current route should therefore treat the champion kill as normal progression rather than planning around a beta-era door failure. Blizzard's current Midnight hotfix record is the better reference for event behavior than an early test route.
The second critical gate occurs after Atroxus. The final area contains three Devouring Brutalizers, and all three must die before the Charonus arena opens. Enemy forces and gate progression are separate checks: reaching the forces requirement early does not remove the Brutalizers from the route. Each Brutalizer can attempt Devour on another creature. Kill the Devour target before the action resolves so the lieutenant cannot recover a large amount of health, then stabilize before moving to the next dangerous pack.
Voidscar Arena Interrupts, Dispels, and Stop Assignments
Voidscar Arena interrupts should be assigned before the pull that contains the caster, not after two players kick the same spell. A simple three-person rotation is enough for most groups: melee interrupt first, ranged interrupt second, tank or spare DPS third. Save hard stops for moments when the assigned player cannot reach the target or when two priority casts overlap.
| Enemy or source | Ability | Response | Priority |
|---|---|---|---|
| Dominated Brawler | Demoralizing Shout | Interrupt | High - do not allow repeated reductions to party damage dealt |
| Voidtouched Magi | Shadowbolt Volley | Interrupt | High - prevents avoidable party damage |
| Angry Krolusk | Violent Sand | Interrupt | High when combined with other damage |
| Killvore Screamer | Mad Shriek | Interrupt | High - plan a kick before the pull |
| Voidminder | Mending Void | Interrupt or stop | Very high - do not let the final arena heal back |
| Sycophantic Tarasek | Melt Armor | Magic dispel | High on the tank |
| Agitated Voidscythe | Corrosive Essence | Poison dispel | High, especially when several players are affected |
| Longtooth Tuskarr | Bolster | Soothe / Enrage removal | Remove quickly before the empowered enemy becomes a problem |
Atroxus can also apply Mind-Numbing Poison if a player is hit by a Poison Pool. That is a failed-mechanic dispel, not something the group should plan to absorb. Avoid the pool first; dispel the Haste reduction only when someone is actually clipped. This distinction matters because saving a poison dispel for a planned Corrosive Essence is better than spending it on damage that should never have happened.
Explore services related to this guide, selected from our World of Warcraft catalog.
View All World of Warcraft Services

Voidscar Arena Boss Mechanics: Taz'Rah Positioning
Taz'Rah is a space-management fight. The group wants the center of the arena readable while Void Fissures accumulate near the outside. Start with the tank slightly off-center and the rest of the group loosely spread. Do not stand on opposite edges of the room; the goal is enough separation to read line attacks without making healing and movement inefficient.
Umbral Rupture creates the dangerous fissure pattern on Mythic and Mythic+. Place the eruption toward the edge whenever possible, then rotate the group into fresh space. Dark Bloom deals heavy party-wide Shadow damage and causes the fissures to erupt, so players should be healthy before the cast and should use a personal defensive when the healer is already covering another overlap. Treat the outside of the arena as your hazard storage and the middle as your movement lane.
Ethereal Shades use Nether Dash in lines aimed through players. Once the shades appear, stop making large unnecessary movements until the lines are clear, then sidestep rather than running through another player's lane. The tank needs a defensive for Void Blast because it deals heavy Shadowstrike damage and knocks the target back. Position so the knockback cannot send the tank into a fissure or through the rest of the group.
The best practical rule is to rotate the arena in one direction. Drop a fissure on the edge, move a short distance, handle Nether Dash, then repeat. Random movement causes the same amount of ground danger to occupy more space and makes later Dark Bloom casts harder than they need to be.
Atroxus Boss Mechanics and Defensive Plan
Atroxus is where the route changes from interrupt discipline to poison and add control. Keep the boss near an outer section of the arena and stay close enough to react quickly when Noxious Breath is aimed. The frontal is directed in front of Atroxus during the cast, so the group should watch its direction and sidestep it rather than relying only on the tank's initial facing. Ranged players should use the open half of the room, because Poison Splash gradually converts usable floor into poison pools.
Monstrous Roar deals heavy group damage that ignores armor and summons a Toxic Creeper. This is the main planned defensive checkpoint. The healer should prepare a group cooldown or strong throughput window for the roar, while players use personals if they are low or another mechanic is overlapping. The moment the Creeper appears, swap damage to it. Its Toxic Aura damages the group while it remains alive, so delaying the swap turns one healing event into sustained pressure.
The Toxic Creeper fixates and can apply Sickening Bite, which increases Nature damage taken and stacks. Kite it instead of trading unnecessary melee hits. This matters for the tank because Atroxus also uses Hulking Claw for heavy Nature damage. A tank carrying extra Nature vulnerability makes the next Claw much harder to survive, so use mobility and crowd control that actually affects the add rather than trying to out-heal repeated bites.
Poison Splash is the room-management mechanic. Move out of the impacts and place the resulting pools toward already-used space when possible. Stepping in a pool applies Mind-Numbing Poison and reduces Haste, so the group should not deliberately path through one just to maintain uptime. A lost global is cheaper than losing safe space, taking a poison debuff, and forcing the healer to spend a dispel during the next Roar.
Charonus Boss Mechanics and Orb Assignments
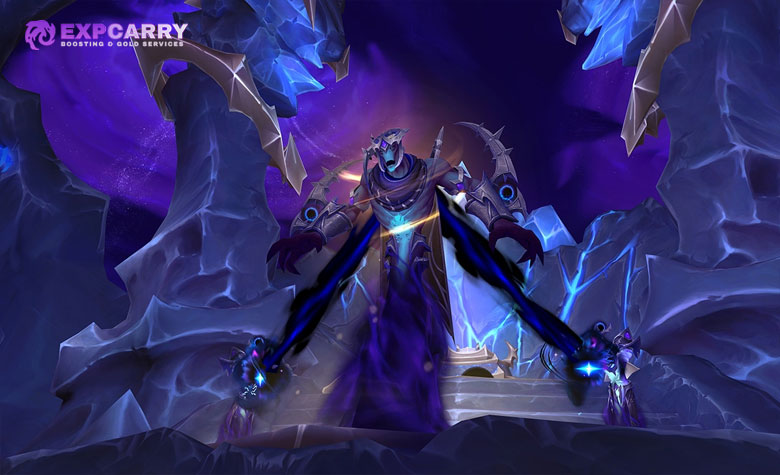
Charonus is the most assignment-heavy fight in the dungeon, but it becomes much simpler if the group decides how to use the singularities before Gravitic Orbs spawn. Keep Charonus near the middle without standing inside the singularities, and have players loosely spread around the boss. The tank should aim Dark Waves away from the group and avoid dragging the boss across another player's orb lane.
Unstable Singularity creates the hazards that later destroy Gravitic Orbs. Entering a singularity is not a shortcut: a player pulled inside becomes Atomized and cannot attack or use abilities for 15 seconds. When Gravitic Orbs appear, each targeted player should take the shortest clean route to a different nearby singularity. Use pings before the first set if needed. Crossing two orb carriers through the same lane is one of the easiest ways to create panic movement.
Each pursuing orb applies Condensed Mass every second, dealing damage and adding a stacking movement slow. That makes slow orb handling progressively worse. Movement freedom effects and personal defensives are valuable if a carrier is delayed, but the actual solution is fast pathing into a singularity. Do not circle the arena looking for a perfect angle while the stacks rise.
Cosmic Crash places an 8-yard impact around players, knocks them back, and leaves a damage-over-time effect. Spread before it lands and make sure the knockback cannot throw you into a singularity. On Mythic and Mythic+, Void Cascade sends dangerous projectiles toward a player. The target should move into open space and increase the distance the projectiles need to travel, while everyone else stays out of the line. This is a good place for a personal defensive if the target has limited movement or is already carrying Cosmic Crash damage.
Defensive Cooldown Plan for Dangerous Sections
A defensive plan is more useful than telling everyone to use personals when health drops. Assign at least one party cooldown to each predictable high-damage event and leave personal defensives for overlaps or mistakes. If the group is doing several keys in one session, a multi-run Mythic+ plan can cover repeated weekly completions, but every run still benefits from calling the same defensive assignments before the timer starts.
| Section | Danger window | Recommended defensive plan | What not to overlap |
|---|---|---|---|
| Opening champion | Heavy champion ability plus trash damage | Use one minor group cooldown and tank mitigation | Do not spend every major cooldown before Taz'Rah |
| Taz'Rah | Dark Bloom with active fissures | Healer throughput or group defensive; personals if already injured | Avoid wasting tank externals needed for Void Blast |
| Atroxus | Monstrous Roar into Toxic Creeper | Major group defensive or healing cooldown, then immediate add burst | Do not stack multiple major group cooldowns on the first Roar unless the key level requires it |
| Atroxus tank | Hulking Claw after Nature vulnerability | Tank major or external defensive | Do not enter the hit with an avoidable Creeper bite stack |
| Final arena | Dreadbellow or dangerous caster overlap | Personal defensives and one short group cooldown while stabilizing | Do not chain the next Brutalizer before interrupts and health are ready |
| Charonus | Gravitic Orbs plus Cosmic Crash or Void Cascade | Movement freedoms, personals, and a healer cooldown if several Condensed Mass stacks are active | Do not spend movement tools before orb paths are established |
The exact cooldown names depend on composition, but the sequence should remain consistent. Call the planned group cooldown before the damage event, not after the first player is already at critical health. If a pull goes cleanly and the assigned cooldown is not needed, carry it forward rather than forcing the original schedule.
Return Points, Wipe Recovery, and Safe Releases
Voidscar Arena is a poor dungeon for speculative death skips because the current public material does not provide a complete official table of every live respawn pad and its activation condition. The safe rule is simple: use the respawn marker shown by the live client as the authority. If the group is inside a boss fight or the final Brutalizer sequence and the release location is uncertain, a combat resurrection is usually safer than discovering that the runback is much longer than expected.
After a wipe, fix the assignment that caused it before changing the route. On Taz'Rah, that usually means cleaner fissure placement or dash lanes. On Atroxus, it means faster Toxic Creeper damage, better poison-pool placement, or a defensive on Monstrous Roar. On Charonus, it usually means one orb carrier did not have a singularity assignment or two players crossed paths. The route should not be rebuilt because one mechanic was executed badly.
Do not use beta checkpoint claims or old event skips as timing assumptions. Voidscar Arena received live hotfixes to gates, pack placement, and encounter visuals during Season 2, so a death-skip route copied from an earlier build can fail even if the broad dungeon layout looks the same.
Risky Route Optimizations for Coordinated Groups
The standard route intentionally gives up some theoretical speed for control. The Voidscar Arena boss mechanics are already movement-heavy, so route aggression should not also consume every interrupt, dispel, and defensive before the bosses. Once a group has fixed interrupt assignments, reliable poison removal, and enough damage to shorten dangerous trash, there are several optimizations worth testing. These are not the default recommendations for a random group.
- Take the right opening path for Proof of Mastery: Raj'kess the Spellstorm can be a better choice for a composition that gains more from Mastery and has enough interrupts for the caster-heavy approach. The time gain disappears if Shadowbolt Volley or other priority casts repeatedly land.
- Use the Agitated Voidscythe side before Atroxus: This branch becomes more attractive when the group has multiple reliable poison dispels. Corrosive Essence is much more manageable when dispels are assigned before the pull instead of improvised after several players are affected.
- Attach extra trash to a Devouring Brutalizer: Coordinated groups can increase pull size in the final arena, but only if Mending Void, Devour, displacement, and tank damage all have owners. The optimization is adding a known pack to a controlled lieutenant, not dragging the whole room together.
- Use offensive cooldowns on trash instead of saving everything for bosses: If a difficult final-arena pull is the route's largest time loss, spending cooldowns there can be faster than entering Charonus with every button available. This requires knowing the cooldown recovery time before the key starts.
Do not call an optimization faster unless it stays faster after failed kicks, dispels, and deaths are included. A route that saves 20 seconds on paper but causes one death on a +12 or higher key under Xal'atath's Guile loses 15 seconds from the timer until the final minute, before the runback and lost damage are counted.
Notable Voidscar Arena Loot and Wowhead Tooltips
Route planning is the focus of this guide, but Voidscar Arena also contains several boss-specific trinkets worth recognizing when you are deciding whether repeated runs are useful for your character. Taz'Rah can drop Void Execution Mandate, Atroxus can drop Tumor of the Swarm, and Charonus can drop Mindpiercer's Sigil. These links use the current Wowhead item IDs, so a site-wide Wowhead tooltip integration can show the item card on hover without adding JavaScript to the article itself.
Do not treat a dungeon run as a guaranteed specific-item purchase. Mythic+ loot is still subject to the current reward rules and class eligibility. If your goal is simply to raise a character's overall gear level before pushing harder keys, an item-level gearing route is a broader option than farming one Voidscar Arena drop. For dungeon-specific route and seasonal preparation, the WoW Dungeon and Mythic+ Guides hub keeps the surrounding Midnight Season 2 guides together.
Midnight Season 2 Mythic+ is already live, and Blizzard lists Voidscar Arena in the active eight-dungeon rotation in the official Season 2 overview. That makes current live routing more important than beta guides, especially for a dungeon that has already received pack-placement and event fixes.
FAQ
The most common Voidscar Arena questions are about the opening choice, mandatory final lieutenants, interrupt priorities, and whether an old route can still be trusted after the Season 2 corrections.
Which opening path is best for a normal Voidscar Arena group?
Use the left path through Aegyra the Unyielding as the default. It requires fewer caster interrupts and grants Proof of Endurance. The right Raj'kess path is better treated as a composition-specific optimization for groups that want Mastery and can control the extra casts.
Which Voidscar Arena interrupts matter most?
Prioritize Demoralizing Shout, Shadowbolt Volley, Violent Sand, Mad Shriek, and Mending Void. Assign players to the casts before each pull so two interrupts are not wasted on the same ability.
Can the group skip the Devouring Brutalizers after reaching 100 percent enemy forces?
No. All three Devouring Brutalizers are part of the progression gate to Charonus. Enemy forces and the final arena gate are separate requirements.
Should I use an old MDT or Keystone route for Voidscar Arena?
Not without checking its mapping version. MDT corrected Voidscar Arena enemy positions, pull groupings, and floor assignments on August 25. Use a current route export and verify its enemy-forces total before the key.
Where should the group stand on Charonus?
Keep the boss near the middle, stay loosely spread for Cosmic Crash, and pre-assign nearby singularities for Gravitic Orbs. The tank faces Dark Waves away while orb carriers use separate short lanes.
Are there confirmed death-skip checkpoints for the current build?
No complete official live checkpoint table is available to rely on for a route. Use the current client respawn marker, and avoid planning a death skip around a beta or early-build return point.
Conclusion
The reliable Voidscar Arena route is built around control rather than maximum pull size. Take Aegyra and Proof of Endurance for the standard opening, keep Taz'Rah fissures on the edge, choose the Atroxus approach that matches your dispel coverage, kill each Toxic Creeper immediately, then defeat all three Devouring Brutalizers before Charonus. Assign interrupts before the pull and reserve group defensives for Dark Bloom, Monstrous Roar, and the final boss orb overlaps instead of reacting after damage has already landed.
Once the group can execute that baseline cleanly, move into the riskier options one at a time: Raj'kess for Proof of Mastery, the poison-heavy Atroxus branch, or larger final-arena pulls. Keep the route tied to the current MDT mapping and live client behavior, because Voidscar Arena has already received Season 2 pack and event corrections. A consistent 30-minute plan with clean positioning will outperform an aggressive route that depends on old groupings, unverified return points, or perfect utility every pull.