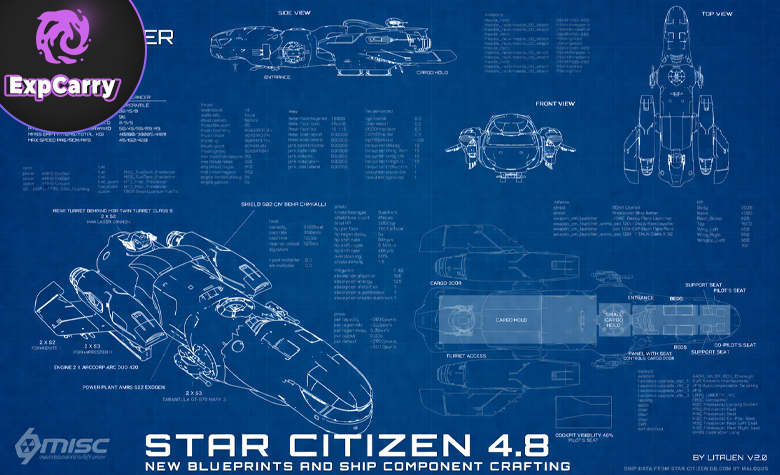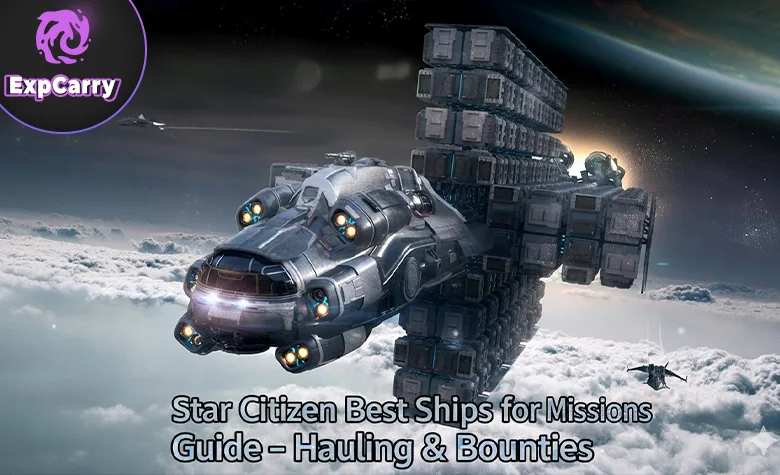
The best ships for missions in Star Citizen Alpha 4.10.2 depend on what the contract requires and how many players are available. The Constellation Mk IV Taurus is an excellent solo hauling and cargo-recovery platform, the Gladius is a strong dedicated fighter for smaller bounties, and the C8R Pisces Rescue is particularly useful for FPS missions. Industrial careers require different equipment: the Vulture remains a versatile solo salvage ship, while the Drake Golem and MISC Prospector serve different levels of ship mining. Larger contracts favor ships such as the C2 Hercules, Hull B, Argo MOTH or MOLE when their capacity and crew requirements justify the extra work. This guide compares ships by actual mission workflow, including loading, combat, extraction, repair and operating costs. It covers the current Alpha 4.10.2 LIVE build, released on October 9, 2026, rather than the outdated Alpha 4.8 recommendations.
Short answer: Choose the Avenger Titan for inexpensive mixed missions, the Cutlass Black for flexible solo gameplay and the Constellation Taurus for advanced cargo or bounty-looting. Use dedicated ships for industrial work: Vulture for solo salvage, Prospector for configurable mining and MOLE or Reclaimer for organized crews.
How the Best Mission Ships Are Ranked
The most useful mission ship is not necessarily the one with the highest cargo capacity, weapon damage or shield strength. A contract can involve several separate tasks, and delays during any of them reduce the value of the ship's strongest features. A large freighter may carry considerably more cargo than a compact hauler but complete fewer small contracts in the same period because of loading and landing requirements.
The recommendations use six practical criteria:
- Mission compatibility: Whether the ship has the weapons, cargo grid, medical facilities or specialized equipment required for the contract.
- Solo usability: Whether the pilot can operate the important equipment without leaving the flight seat or relying on another player.
- Travel and handling: Flight performance, landing footprint, access points and the time needed to move between objectives.
- Survivability: Protection against enemy fire, available defensive equipment and the ability to recover from damage.
- Cargo handling: Practical loading access, supported container sizes, tractor equipment and the ability to secure recovered goods.
- Operating efficiency: Fuel, repairs, claim delays, loading time, crew requirements and the consequences of losing the ship or its cargo.
These are editorial recommendations based on ship specifications and the requirements of the corresponding gameplay loops, not an official CIG ranking or a measured universal earnings-per-hour leaderboard.
The current Resource Network and engineering systems also influence ship selection. Larger vessels have more components and internal systems to manage, and damage can create repair work that interrupts the mission. A ship that operates comfortably with one pilot during a short contract may benefit substantially from additional crew during prolonged combat.
Best Star Citizen Ships by Mission Type
The table provides a practical starting point for the main mission categories. It distinguishes ships intended for solo operation from larger platforms that benefit from dedicated gunners, cargo handlers or industrial operators. Entry-level recommendations prioritize manageable costs and straightforward workflows rather than maximum capacity.
| Mission Type | Recommended Solo Ship | Group or Large-Scale Option | Accessible Alternative |
|---|---|---|---|
| Cargo hauling | Constellation Mk IV Taurus | C2 Hercules, Hull B or Hull C | Hull A, C1 Spirit or Cutlass Black |
| Low-tier ship bounties | Gladius | Hurricane or Scorpius | Avenger Titan |
| High-tier ship bounties | Constellation Mk IV Andromeda or Vanguard | Crewed gunship or coordinated fighter group | Vanguard series |
| Bounty hunting with cargo recovery | Constellation Taurus or Andromeda | Crewed Constellation or dedicated recovery team | Cutlass Black |
| FPS insertion and medical recovery | C8R Pisces Rescue | Cutlass Red or Valkyrie | C8 Pisces or Avenger Titan |
| Solo salvage | Drake Vulture | Argo MOTH or Aegis Reclaimer | RSI Salvation |
| Solo ship mining | MISC Prospector | Argo MOLE | Drake Golem |
| ROC gemstone mining | Cutlass Black | Larger vehicle-capable carrier | Nomad |
| General solo missions | Cutlass Black | Constellation or another crewed multirole ship | Avenger Titan |
A dedicated industrial ship cannot be replaced by a general cargo vessel simply because the latter has more storage. Likewise, a fast fighter may complete a bounty kill efficiently but become unsuitable when the player also wants to recover containers, components or FPS equipment from the target.
For a broader comparison of fighters, cargo ships and specialized vessels without tying each choice to a mission workflow, see the Star Citizen Ship Tier List. This article focuses on choosing a ship for a contract you actually intend to complete.
Best Ships for Hauling Missions
Hauling rewards ships that can accept the required containers, reach the delivery location and unload without unnecessary delays. Capacity matters, but freight elevator access, cargo-grid layout and loading equipment determine whether that capacity is practical. External spindle haulers, enclosed cargo ships and multirole vessels should therefore be evaluated differently.
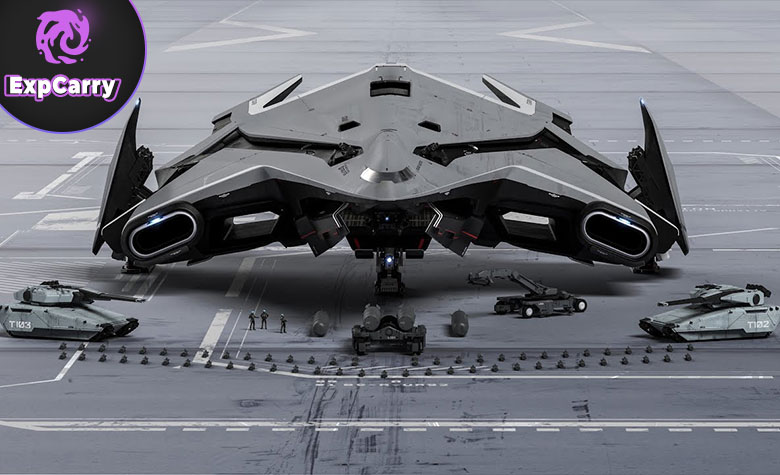
Constellation Mk IV Taurus — Best Advanced Solo Cargo Ship
The Constellation Taurus carries 174 SCU and combines a substantial freight hold with pilot-controlled weapons and tractor-beam utility. It is particularly useful for players who alternate between hauling contracts, recovering valuable cargo and completing occasional combat assignments.
Alpha 4.10.2 updated the Constellation Mk IV family, including the cargo lifts, engineering interactions and interior access. The Taurus received a rebuilt cargo bay appropriate to its freight role, making its current loading workflow more relevant than older guides based on the previous interior.
Best use: medium-sized hauling contracts, cargo recovery and mixed missions where carrying goods and defending the ship are both important.
Main limitation: the Taurus occupies more space and requires more management than a small hauler. Its substantial weapon capability does not make it as agile as a dedicated fighter.
C2 Hercules and Hull B — Best High-Volume Freight Options
The C2 Hercules Starlifter has a listed 696-SCU cargo capacity, a large enclosed hold and front and rear ramps. It is well suited to missions involving considerable freight volume, bulky containers or vehicle transport. The open internal layout makes it more flexible than ships whose entire cargo capacity is carried on external spindles.
The MISC Hull B is a newer dedicated freight alternative with 512 SCU of external cargo capacity. It is useful for players who want considerably more volume than the Taurus without moving directly to the operating scale of the largest freighters. Its spindle system is designed for freight, however, not for general vehicle transport or combat recovery.
Choose the C2 when you need enclosed cargo space, flexible loading and vehicle compatibility. Choose the Hull B when dedicated cargo capacity matters more than a large multirole interior.
Hull C — Best Specialized Bulk Freight Ship
The Hull C carries up to 4,608 SCU in the current ship data and is designed for extremely large shipments. Its external cargo system makes it fundamentally different from a smaller freight ship with an internal hold.
The Hull C is best suited to compatible station-based loading and delivery operations. It is not the correct ship for a contract requiring frequent planetary landings, smaller freight elevators or quick handling at outposts that cannot support its loaded configuration.
Its enormous capacity should not be mistaken for guaranteed higher income. Large-volume hauling can expose more cargo value to risk, and completing the loading and unloading process can take considerably longer than operating a medium-sized ship.
Hermes, Zeus Mk II CL and Smaller Haulers
The RSI Hermes offers 288 SCU in a faster medium-freight configuration. It is worth considering when shorter transit times or the ability to leave a dangerous location matter more than maximizing cargo per trip. Its tractor equipment also supports the intended loading workflow.
The Zeus Mk II CL carries 128 SCU and provides another useful step between compact multirole ships and larger haulers. The Hull A is more specialized, while the C1 Spirit and Cutlass Black remain attractive for pilots who need cargo space without abandoning other activities.
Alpha 4.10.2 also introduced the Constellation Mk V Centaurus, with 240 SCU and a multirole freight-and-gunship design. It is an additional option for players who have access to it, including through the RSI Discovery Month rental opportunity. Its arrival does not automatically replace the Taurus: the ships occupy different positions in cargo handling, firepower and crew expectations.
Hauling contracts and buying commodities for resale also have different risk profiles. Contract freight primarily requires completing the agreed delivery, while commodity trading exposes the player to the value of the goods purchased. Players comparing ship purchase budgets, repairs and operating capital may also encounter Star Citizen aUEC as a separate part of the game's ship economy; available credits alone do not determine whether a vessel is efficient for a particular route.
Explore services related to this guide, selected from our Star Citizen catalog.
View All Star Citizen Services
Best Ships for Bounty Hunting
Bounty hunting ships should be selected according to target difficulty, expected opposition and whether recovery matters after combat. Low-tier missions reward responsive flight controls and fast target elimination. Higher-tier contracts place greater demands on sustained damage, survivability and handling multiple opponents.
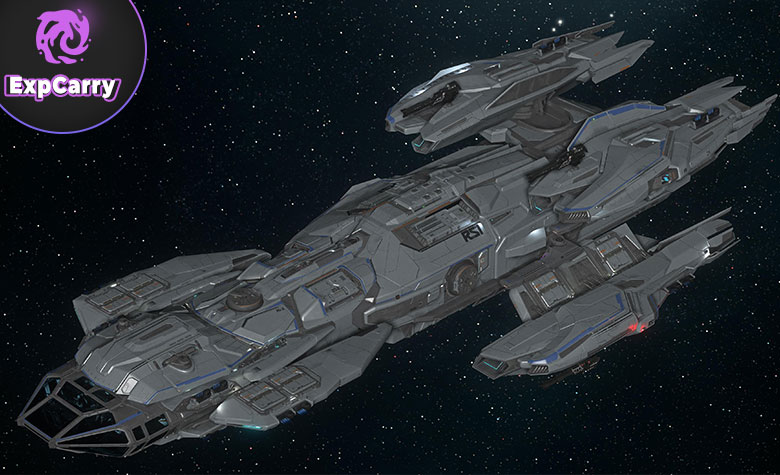
Aegis Gladius — Best Dedicated Light Fighter
The Gladius is a strong choice for pilots who want to complete lower-tier ship-combat contracts efficiently. Its compact size and responsive handling make it suitable for positioning around targets and learning the fundamentals of fighter combat.
The main drawback is that it has no useful cargo bay for mission recovery. When the contract ends with a destroyed target, this is not a major problem. When the player also wants to collect physical cargo or recovered equipment, a ship with an interior becomes more practical.
Best use: repeatable lower-tier bounty contracts and combat-focused reputation progression.
Avenger Titan — Best Beginner Bounty and Utility Ship
The Avenger Titan combines pilot-controlled weapons with an accessible rear cargo area. It can handle introductory combat assignments while also transporting delivery boxes, recovered equipment or a small amount of cargo.
Its value is flexibility rather than dominance in fighter combat. It does not have the sustained combat capacity of every dedicated heavy fighter, but it can complete several kinds of starter missions without forcing the player to retrieve a different ship.
For new players who want one vessel for early progression, that combination is often more useful than investing immediately in a specialized light fighter.
Aegis Vanguard — Durable Solo Combat Step-Up
The Vanguard series provides a heavier combat platform with an interior and significant forward weapon capability. It is less agile than a dedicated light fighter but can be more forgiving during extended PvE engagements against durable targets.
Its advantages are most relevant when a pilot can keep the target ahead of the ship and manage incoming damage without relying on tight fighter-style turns. Variants differ in equipment and role, so an individual Vanguard should be assessed by its current loadout rather than assuming every member of the series performs identically.
Constellation Mk IV Andromeda — High-Tier Bounties and Recovery
The Andromeda combines four substantial pilot-controlled weapon mounts, turrets, missiles and a 96-SCU cargo hold. Its revised Alpha 4.10.2 configuration makes it a practical gunship for players who want to fight larger PvE targets and recover valuable goods afterward.
The Taurus offers a cargo-focused alternative with 174 SCU, but the Andromeda is more explicitly oriented toward multirole combat. Bringing additional turret operators improves either vessel's ability to cover targets that move outside the pilot's forward firing arc.
Large ships should be flown according to their strengths. Trying to turn an Andromeda into a close-range light dogfighter wastes the advantages of its heavier weapons and protection while exposing its slower handling.
Hurricane, Scorpius and Crewed Gunships
The Hurricane and Scorpius become substantially more useful when their turrets are properly crewed. A gunner can maintain pressure as the pilot repositions, allowing the team to attack opponents that would otherwise move outside the forward firing arc.
For larger organized encounters, heavier gunships offer additional protection and overlapping fields of fire. Their efficiency depends on the number of players available and whether every crew member has a useful station.
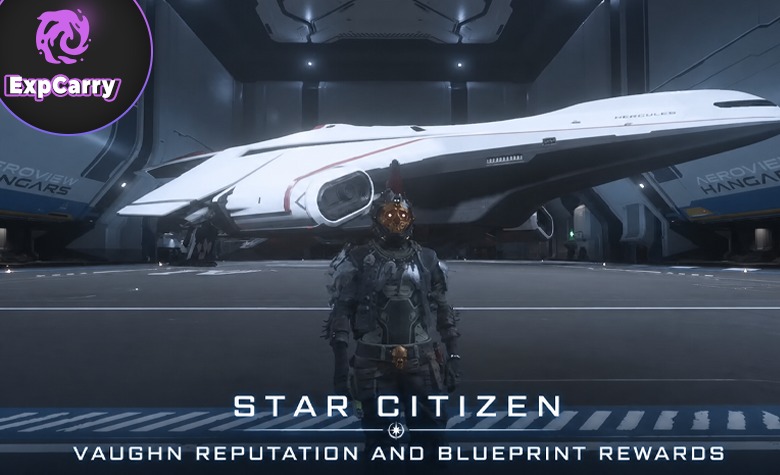
Bounty reputation can unlock more demanding contracts, but a higher reputation rank does not make every target appropriate for an under-equipped ship. See the Star Citizen Reputation Guide for the progression systems and organizations involved.
Weapon grouping, power distribution and movement become more important as targets grow harder. Those skills are also covered through Star Citizen coaching, but the practical objective during bounty missions remains to complete the contract reliably while limiting repair costs and ship losses.
Best Ships for FPS Insertion and Recovery
FPS missions reward compact ships, fast entry and exit, sufficient storage for recovered equipment and appropriate medical support. A powerful gunship can be inefficient when the actual task is to land near a bunker, travel to an objective on foot and return with mission items.
C8R Pisces Rescue — Best Solo FPS Support Shuttle
The C8R is a compact medical ship with a Tier 3 medical bed. Its small footprint makes it useful near bunkers, wrecks and locations where bringing a large vessel close to the objective would be difficult.
Current medical rules allow Tier 3 beds to fully treat minor injuries and stabilize moderate or severe injuries, which require Tier 2 or Tier 1 facilities respectively for complete treatment. A Tier 3 bed can also provide regeneration within a 50-kilometer range when configured as the player's regeneration point and supplied with sufficient MedGel.
This means the C8R is useful as a nearby recovery point, but it is not equivalent to a hospital or a higher-tier medical ship. If the vessel is destroyed, out of range or lacks the necessary medical supplies, its regeneration function cannot be relied upon.
Best use: solo bunker missions, medical response, corpse recovery and fast FPS insertion.
Cutlass Red — Best Small-Team Medical Transport
The Cutlass Red has more interior room than the C8R and carries two Tier 3 medical beds. It is a useful option for small teams that expect casualties, want onboard recovery facilities or need additional equipment space.
Its larger size creates more landing overhead than the Pisces, and its medical beds do not provide the treatment capabilities of a higher-tier hospital. They can stabilize more serious injuries but cannot fully heal them. The Cutlass Red is best understood as a medical transport and support platform rather than an all-purpose field hospital.
Cutlass Black — Best Vehicle-Capable FPS Transport
The Cutlass Black has no medical bed, but its cargo area, rear ramp and side access make it useful for deploying players, mission equipment and compatible ground vehicles.
It is particularly attractive when an FPS assignment involves traveling from a safer landing position or transporting loot and mission objects afterward. Compared with the C8R, the main advantage is logistical flexibility rather than medical treatment.
Anvil Valkyrie — Best Dedicated Squad Dropship
The Valkyrie is designed for transporting troops and vehicles during organized operations. It becomes useful when multiple players need coordinated entry and extraction rather than simply transporting one person to a bunker.
The drawbacks are crew and operating requirements. A dedicated dropship offers little benefit over a compact shuttle when the mission only involves one or two players and a short walk to the objective.
Best Ships for Salvage Missions
Salvage requires compatible equipment and an appropriate target. Hull scraping recovers Recycled Material Composite (RMC), while structural salvage produces raw construction material that may require refining before becoming saleable Construction Materials. Current salvage ships differ in target-size limitations, cargo handling and whether the operation benefits from multiple crew members.
Drake Vulture — Best Versatile Solo Salvage Ship
The Vulture remains a strong solo recommendation because the pilot can operate its salvage equipment without requiring a separate crew station. Its listed secured cargo capacity is 12 SCU, making it suitable for smaller wrecks and repeatable independent salvage sessions.
Its main limitation is cargo handling. The operator must account for generated containers, available storage and unloading time. A productive wreck does not translate into an efficient session if the ship repeatedly reaches its handling limits and spends too long moving boxes.
Choose the Vulture when you want to learn both hull scraping and structural salvage while retaining reasonable flexibility over different small and medium targets.
RSI Salvation and MISC Fortune — Compact Solo Alternatives
The Salvation and Fortune expand the solo salvage choices beyond the Vulture. The Salvation has a listed 6-SCU cargo capacity, with an automatic container-handling system that allows the pilot to remain seated during normal production until storage fills. The Fortune carries 16 SCU and offers a different cargo-handling arrangement that can reduce some manual work.
Both can be attractive depending on the price, workflow and type of target available. The Salvation has stricter structural salvage limitations than the Vulture, while the Fortune provides more listed storage but remains a light salvage ship.
The correct choice depends on whether the player values a small entry price, handling convenience or flexibility across different wreck sizes. None of these factors establishes a guaranteed profit per hour without considering target availability and the complete selling process.
Argo MOTH and Aegis Reclaimer — Group Salvage
The Argo MOTH fills the medium-scale salvage role. It has pilot-controlled salvage arms alongside three manned salvage turrets, allowing limited independent work while benefiting substantially from additional operators. Its substantial cargo storage makes it useful for coordinated crews working on larger wrecks than the smallest salvagers can handle.
The Aegis Reclaimer remains the dedicated heavy salvage option. It supports the largest structural targets and offers extensive storage, but its equipment stations and internal logistics are intended for several crew members.
| Ship | Listed Cargo | Main Role | Limitation |
|---|---|---|---|
| RSI Salvation | 6 SCU | Entry-level solo salvage | Small hold and limited structural target size |
| Drake Vulture | 12 SCU | Versatile solo salvage | Frequent container handling |
| MISC Fortune | 16 SCU | Solo salvage with convenient loading | Light-salvage target limitations |
| Argo MOTH | 224 SCU advertised cargo grid; 320 SCU in Ship Matrix | Medium multicrew salvage | Full use of its three manned turrets requires additional operators |
| Aegis Reclaimer | 420 SCU | Heavy multicrew salvage | High crew and logistics overhead |
These cargo figures represent ship storage specifications, not guaranteed extraction yield. The MOTH's official promotional specifications list 224 SCU, while the current RSI Ship Matrix displays 320 SCU; these figures should not be treated as interchangeable without checking the usable cargo arrangement in the live game. The amount of saleable RMC or finished Construction Materials depends on the target and, for structural salvage, the refining process.
Some RSI Discovery Month Collection contracts also involve salvage work, but their availability and requirements are event-specific. They should not be confused with permanent Adagio Holdings progression.
For salvage rights, material processing, refinery requirements and contract selection, use the Star Citizen Salvage Guide.
Best Ships for Mining Missions
Mining ships should be selected according to the type of deposit and available crew. Ship mining requires compatible mining lasers and extraction equipment. ROC mining instead uses a ground vehicle carried by a suitable transport ship. Those are different workflows even when both produce valuable minerals.
Drake Golem — Accessible Solo Ship Mining
The Drake Golem offers a relatively compact entry into ship mining. Its current listed configuration includes one Size 1 mining laser mount and a 16-SCU mining pod. Since Alpha 4.10, its mining head supports compatible Size 1 laser changes rather than being limited to the original fitted equipment.
The Golem is appropriate for players learning deposit scanning, fracturing and extraction without immediately moving to a larger industrial ship. Its limitations are the smaller storage capacity and narrower overall operating profile.
MISC Prospector — Best Configurable Solo Miner
The Prospector is the stronger general-purpose solo recommendation for players who intend to spend substantial time on ship mining. It has a pilot-operated Size 1 mining laser and a listed total of 32 SCU across its ore pods.
Its configurable mining equipment allows players to adapt to different deposit properties, while the larger extraction capacity gives it more flexibility than the Golem during longer sessions.
The Prospector still has limits. Difficult rocks may require suitable laser equipment, modules or external assistance, and its storage must eventually be emptied or transferred into the refining and selling workflow.
Argo MOLE — Best Coordinated Mining Platform
The Argo MOLE provides three Size 2 mining laser turrets and a listed total ore capacity of 96 SCU. Its equipment is designed for several players, with one pilot handling movement while others operate mining stations.
The advantage is the ability to coordinate multiple lasers on challenging deposits and process a larger amount of ore. The disadvantage is that the pilot does not control the main mining lasers directly, making routine solo operations much less convenient than in a Golem or Prospector.
Choose the MOLE when a reliable crew is available and the target deposits justify using the additional equipment.
Cutlass Black and Nomad — Best ROC Mining Carriers
The Greycat ROC is a ground mining vehicle rather than a ship mining laser. A carrier must transport it to appropriate surface deposits, and the operator then uses the ROC to collect gemstone resources.
The Cutlass Black is a strong all-around carrier because it can transport compatible ground vehicles and switch to other mission types after mining. The Nomad provides a more compact option with an external vehicle and cargo area.
Choose the Nomad when compact operation is the priority. Choose the Cutlass Black when you want additional interior space and the ability to continue with deliveries, FPS work or other missions during the same session.
The Star Citizen Mining Guide covers deposits, laser modules, ore selection and refinery decisions. Mining also intersects with Star Citizen mining resources used for crafting and material-delivery objectives, but the material requested by a mission must match its exact quality and processing requirements.
Best Ships for Solo Players
The best solo ship is the one that lets the pilot complete the intended activity without routinely abandoning important systems or paying for unnecessary capacity. Larger ships can be flown alone, but pilot-controlled weapons, accessible cargo areas and engineering workload determine whether that is efficient.
Avenger Titan — Best Starter Progression
The Titan is suitable for a player who wants to learn deliveries, introductory ship combat, FPS transport and basic cargo recovery with one vessel. Its manageable size and rear cargo access make it useful for short sessions involving several different contract types.
It becomes less effective when a player starts specializing in substantial freight volume, larger combat encounters or industrial careers requiring dedicated tools.
Cutlass Black — Best Flexible Solo Multirole Ship
The Cutlass Black combines a useful cargo area, vehicle transport, pilot weapons and access for several players. It is particularly attractive when a session moves between FPS contracts, smaller hauling assignments and vehicle-based activities.
It is not a replacement for a Vulture or Prospector. Its advantage is being able to complete several unrelated missions without returning to a station to change ships.
Constellation Taurus — Best Advanced Cargo-Focused Solo Ship
The Taurus is a natural progression for players who already know that hauling and cargo recovery will occupy much of their time. Its large hold and pilot weapons make it useful beyond pure freight transport.
The extra size introduces operating overhead, so upgrading from a Cutlass is worthwhile when the additional capacity or combat performance is regularly needed, not simply because the Taurus is more expensive.
C8R, Vulture and Prospector — Best Solo Specialists
The C8R is useful for repeated FPS and recovery missions. The Vulture handles solo salvage, while the Prospector provides a dedicated ship mining platform. Each performs a specific job that a conventional multirole ship cannot replicate with cargo capacity alone.
For players who already have a good general-purpose vessel, adding one specialist can be more useful than replacing the entire fleet with a much larger multirole ship.
Best Mission Ship Progression Paths
Ship progression should follow the activity a player intends to repeat. Buying a much larger vessel does not guarantee better results if its required crew, cargo volume or specialized equipment is not actually used.
| Career | Suggested Progression |
|---|---|
| General solo missions | Avenger Titan → Cutlass Black → Constellation Taurus |
| Hauling | Hull A or C1 Spirit → Taurus or Hermes → Hull B or C2 → Hull C for compatible bulk routes |
| Bounty hunting | Avenger Titan → Gladius or Vanguard → Constellation Andromeda or coordinated gunship |
| FPS and medical | C8 Pisces → C8R → Cutlass Red for larger team operations |
| Salvage | Salvation or Vulture → Fortune if desired → MOTH with crew → Reclaimer for heavy operations |
| Ship mining | Drake Golem → MISC Prospector → Argo MOLE with crew |
| ROC mining | Nomad → Cutlass Black → larger compatible carrier if needed |
These paths are not mandatory upgrade chains. A dedicated mining or salvage player may never need a large combat ship, and a pilot focused on bounty missions may prefer keeping a smaller fighter instead of moving to a Constellation.
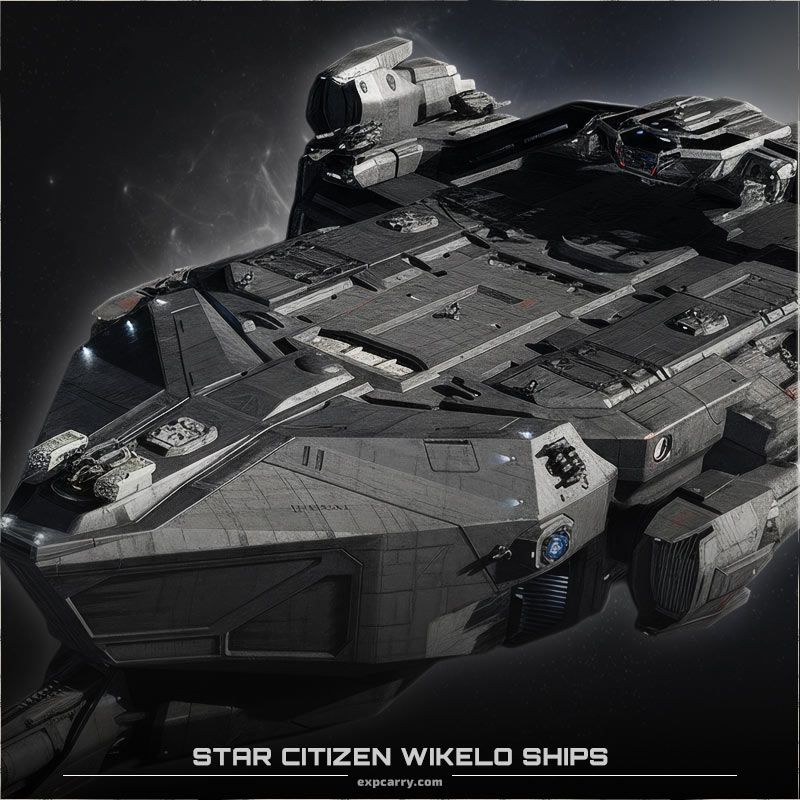
Some ships also have acquisition methods outside normal ship dealerships. Wikelo contracts can award selected vehicles in exchange for specific materials, Favors and other requirements. That creates a separate progression route from ordinary aUEC purchases and is relevant to Star Citizen Wikelo ships earned through those exchanges. Availability and ingredients must be checked against the active contract.
Before investing in a specialist, consider renting a compatible ship when the current rental system offers one. Rental availability changes, and rented ship loadouts generally cannot be customized in the same way as owned vessels. This is particularly important when evaluating the mining equipment needed for a specific type of deposit.
Common Mission Ship Mistakes to Avoid
Many expensive ship choices fail because the vessel is evaluated by its strongest advertised statistic instead of the work involved in completing the mission. These mistakes affect both new players and experienced pilots changing careers.
Choosing a Hauler Only by SCU Capacity
A large cargo hold does not help when the contract's freight cannot be loaded efficiently or the destination does not support the ship's workflow. Compare loading access, container dimensions and the actual route before purchasing a larger hauler.
Flying Multicrew Industrial Ships Without Operators
The MOLE and Reclaimer can be flown by one pilot, but their primary industrial systems are designed around separate operator stations and substantial cargo handling. The MOTH has pilot-operated salvage arms, yet its manned turrets need additional crew for full productivity. A smaller solo ship may still complete an entire operation faster when no crew is available.
Using Fighters for Cargo-Recovery Contracts
A Gladius can finish a combat objective without difficulty in an appropriate encounter, but it cannot transport substantial recovered freight. If loot recovery is central to the mission, an Avenger, Cutlass or Constellation becomes more practical.
Ignoring Medical Bed Limitations
A Tier 3 medical bed does not provide unrestricted treatment or regeneration across an entire star system. It can fully heal minor injuries and stabilize more serious ones, but complete treatment of moderate and severe injuries requires higher-tier facilities. Regeneration distance, MedGel and ship availability also determine what the bed can do. A C8R is an excellent local recovery tool, not an unlimited replacement for medical facilities.
Ignoring Engineering and Component Damage
Larger ships can suffer interruptions when power, cooling or other important components are damaged. The Resource Network makes maintenance and repair part of vessel operation. A solo pilot who frequently loses access to critical systems may benefit from a smaller ship or additional crew.
Confusing Salvage Cargo With Finished Construction Materials
RMC recovered through hull scraping is not the same as raw structural salvage. Construction Rubble, Pieces and Salvage have their own processing requirements before producing finished CMAT. Cargo capacity alone cannot establish how much saleable material a wreck will yield.
Assuming Every Larger Contract Pays Better
Higher reputation and more difficult missions can introduce greater rewards, but they can also require longer travel, more cargo handling or increased combat risk. Evaluate the time spent completing the entire mission, including delivery or sale, rather than comparing reward figures in isolation.
What Changed for Mission Ships in Alpha 4.10.2?
The main reason to update an older mission-ship guide is that the available fleet and its supporting gameplay have changed substantially since Alpha 4.8.2. Alpha 4.10.2 is the current LIVE build, and its most relevant addition for this topic is the renewed Constellation family together with RSI Discovery Month.
The Constellation Mk IV ships received updated interiors, cargo-handling systems, engineering interactions and associated balancing. The Constellation Mk V Centaurus also became available during the update period, adding another medium-freight and gunship option.
Earlier releases expanded the available industrial and cargo choices. Newer ships such as the Drake Golem, MISC Hull B, RSI Hermes, RSI Salvation and Argo MOTH mean that an old comparison limited to Prospector, MOLE, Vulture and Reclaimer no longer covers the entire live industrial fleet.
RSI Discovery Month also introduces temporary Defense, Transport and Collection assignments. These contracts combine several gameplay loops already discussed in this guide, but their event availability and specific rewards should not be presented as permanent mission progression.
For the official release context, see the RSI Development Hub and RSI Service Status. The development hub separates current patch information from future roadmap content, and the status page confirms when a LIVE deployment has occurred.
Best Star Citizen Mission Ships FAQ
These answers address the most common questions when choosing a ship for the current LIVE mission system.
What is the best overall mission ship in Star Citizen? The Cutlass Black is a strong flexible choice for players combining deliveries, FPS missions, ground vehicles and some combat. The Constellation Taurus is better suited to advanced cargo-focused gameplay, while dedicated fighters or industrial vessels outperform both in their respective specialist roles.
What is the best solo hauling ship? The Constellation Mk IV Taurus is an excellent choice for substantial solo freight and cargo recovery. Smaller contracts may be more efficient in a Hull A, C1 Spirit or Cutlass Black. For larger dedicated loads, consider the Hull B, Hermes or C2 according to the route.
Which ship is best for solo salvage and mining? The Vulture is a versatile solo salvage ship. For mining, the Drake Golem provides an accessible entry point, while the Prospector offers more capacity and equipment flexibility. These careers require different specialized ships.
Does the C8R Pisces allow respawning? Yes. Under the current medical system, a configured Tier 3 bed can provide regeneration within its 50-kilometer range if the required MedGel and other conditions are satisfied. The bed fully treats only minor injuries; moderate and severe injuries can be stabilized but require higher-tier facilities for complete treatment.
Final Recommendations
For mixed solo missions, start with the Avenger Titan and move to the Cutlass Black when additional capacity and flexibility become useful. Choose the Constellation Taurus when hauling and cargo recovery become major activities. For dedicated combat, the Gladius and Vanguard serve different target difficulties, while the Andromeda offers heavier firepower and recovery capacity.
Industrial missions are better served by their specialist ships: Vulture or Salvation for solo salvage, Prospector or Golem for solo mining, and MOTH, MOLE or Reclaimer when an organized crew can use their equipment effectively. Select the smallest vessel that reliably completes your intended contract, then upgrade when greater capacity, combat capability or crew availability creates a meaningful advantage.