Murder Row rewards a group that agrees on its jobs before the first pull. This World of Warcraft Midnight Murder Row Mythic+ guide gives you a shared route, enemy-forces checkpoints, interrupt assignments, and a practical plan for Kystia Manaheart, Zaen Bladesorrow, Xathuux the Annihilator, and Lithiel Cinderfury. The aim is to make the next decision obvious even when nobody in the party has played together before.
The current requirement is 655 enemy forces, and the timer is 34 minutes. The route below reaches a planned 658/655, or 100.46%, without requiring a coordinated invisibility or death skip. Its important decisions are when to split a dangerous pack, when to save damage for a boss vulnerability, and when to stop attacking long enough to complete an encounter mechanic.
Murder Row Entrance and Group Preparation
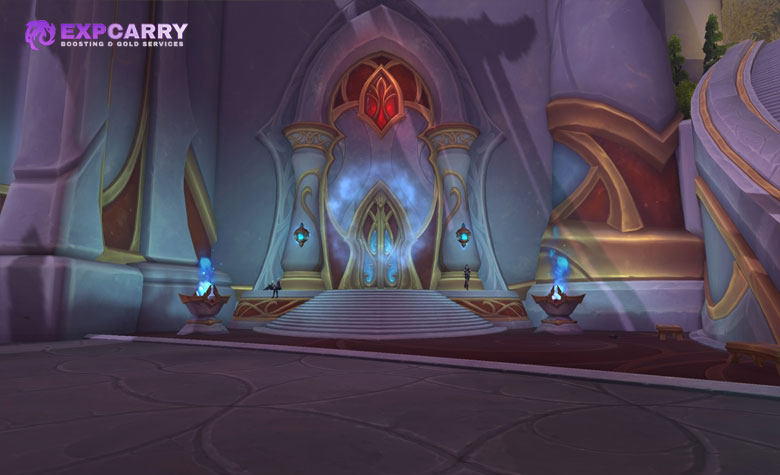
The dungeon entrance is in Silvermoon City, at approximately 56.2, 61.1 on the city map. For a Mythic+ run, assemble a level 90 group and travel to the instance with the appropriate keystone. Murder Row belongs to Midnight Season 2; the separate Midnight Season 2 dungeon guide covers the wider rotation and seasonal progression.
Before inserting the key, ask each player to confirm their interrupt and useful dispels. This dungeon gives particular value to magic dispels, poison removal, curse removal, and an enrage dispel. A missing utility does not automatically make the dungeon impossible, but it changes which mistakes the group can recover from and how aggressively the tank should combine enemies.
- Tank: share the route and mark the primary caster before each mixed pull. Decide where the group will stand before collecting additional enemies.
- Healer: name the dispels you can provide and identify who can cover the others. Ask for personal defensives before predictable party damage.
- DPS: assign separate interrupt targets. Keep one player available as backup instead of having everyone kick the first visible cast.
- Bloodlust: plan the first use around Kystia's vulnerability. Decide the later use from the actual cooldown and remaining encounters.
- Recovery: agree that dead players will wait for a resurrection or release call while a pull remains recoverable.
For players arranging a specific completion with assistance, the Murder Row Mythic+ run options distinguish the dungeon, key level, and timed or completion objective. The same distinction helps a normal group listing: say whether the party is learning the route or expects an experienced timed attempt.
Murder Row Route and Enemy Forces Percentages
Use the map in Tactyks' PUG-friendly Murder Row route as a visual reference for enemy locations and linked packs. The 18 stages in the table below form this article's separate 658-point route variant, calculated against the current 655-force requirement; do not treat the table as a point-for-point copy of the current Wago import, which can change independently. These are planner totals, not measurements from a run completed for this article. Boss stages retain their route numbers and add no enemy forces.
Update Mythic Dungeon Tools before importing. The project's official release history includes Murder Row map-placement and grouping fixes, and newer builds can change how imported pulls are represented. A remembered pull number is insufficient if two players imported different versions; compare the selected enemies and the final total.
| Stage | Selected enemies or encounter | Added forces | Cumulative forces |
|---|---|---|---|
| 1 | 2 Felwyrms, 2 Row Hooligans, 2 Felonious Mages, 1 Bribed Guard, 1 Bribed Captain | 82 | 82/655: 12.52% |
| 2 | 4 Felwyrms, 2 Felonious Mages, 2 Seductive Sayaads | 30 | 112/655: 17.10% |
| 3 | 1 Felwyrm, 2 Row Hooligans, 1 Felonious Mage, 4 Street Sneaks | 26 | 138/655: 21.07% |
| 4 | 6 Felwyrms, 2 Row Hooligans, 2 Felonious Mages, 1 Bribed Guard | 51 | 189/655: 28.85% |
| 5 | 5 Felwyrms, 4 Row Hooligans, 2 Felonious Mages, 1 Massive Felwyrm, 2 Street Sneaks | 49 | 238/655: 36.34% |
| 6 | Kystia Manaheart and Nibbles | 0 | 238/655: 36.34% |
| 7 | After the cantina: 6 Warehouse Workers, 2 Keen Taskmasters | 26 | 264/655: 40.31% |
| 8 | Zaen Bladesorrow | 0 | 264/655: 40.31% |
| 9 | 2 Unleashed Imps, 1 Fel Invoker, 2 Wrathguard Flayers, 1 Shivan Punisher | 46 | 310/655: 47.33% |
| 10 | 2 Wrathguard Flayers, 1 Corrupted Warlock, 8 Demon Flies | 43 | 353/655: 53.89% |
| 11 | 2 Fel Invokers, 8 Demon Flies, 1 Shivan Punisher | 47 | 400/655: 61.07% |
| 12 | 2 Trained Felhunters, 1 Felmaster Lucsei | 40 | 440/655: 67.18% |
| 13 | Xathuux the Annihilator | 0 | 440/655: 67.18% |
| 14 | 6 Unleashed Imps, 2 Wrathguard Flayers, 1 Defiled Golem | 57 | 497/655: 75.88% |
| 15 | 5 Unleashed Imps, 2 Trained Felhunters, 1 Fel Invoker, 2 Wrathguard Flayers | 37 | 534/655: 81.53% |
| 16 | 3 Trained Felhunters, 1 Corrupted Warlock, 1 Shivan Punisher | 65 | 599/655: 91.45% |
| 17 | 2 Trained Felhunters, 2 Fel Invokers, 1 Defiled Golem | 59 | 658/655: 100.46% |
| 18 | Lithiel Cinderfury | 0 | 658/655: 100.46% |
The four useful checks are 36.34% before Kystia, 40.31% before Zaen, 67.18% before Xathuux, and 100.46% before Lithiel. Check after the selected enemies have fully died and the counter has updated. The three-point surplus is small: it is not permission to omit a pack or assume encounter summons will repair a shortage.
How to Split the Route for an Unfamiliar Group
Treat each numbered stage as an enemy selection, not an instruction to fight every listed creature simultaneously. Stage 1 includes both a Captain and a Guard; stage 5 combines a Massive Felwyrm with several smaller enemies. For a learning party, use the map to identify the linked groups and engage those groups separately. Keep the same overall selection so the checkpoints remain useful.
The tank should announce a split before moving. DPS wait until the chosen pack reaches the fighting position, then use their assigned stops. If the first group already demands an emergency defensive, finish it before adding the next. This costs some potential damage efficiency but makes the route repeatable without depending on perfectly synchronized cooldowns.
After an accidental pull, record the actual counter and recalculate the remaining requirement. For example, arriving at Xathuux with 430 points leaves 225 to reach 655; the planned last section supplies 218, so the group is seven short. This is an arithmetic example, not an alternative route. Resolve the missing selection while the relevant area is accessible.
Mandatory Interrupts and Other Trash Responsibilities
The interrupt plan should distinguish a cast that must be prevented from damage that must be healed or avoided. Assign by enemy name and marker. On a two-caster pull, one player owns each caster and a third covers a missed kick; an area stop is useful insurance, but it should not be the entire plan.
| Enemy | Priority ability | Group assignment |
|---|---|---|
| Seductive Sayaad | Seduction | Interrupt or control the caster. With two Sayaads in stage 2, give each a different owner. |
| Felonious Mage | Fel Missiles | Interrupt or stop the channel; reserve coverage when another priority caster is present. |
| Kystia's Mirror Images | Felstorm | Spread interrupt and crowd-control coverage across the images instead of duplicating stops. |
| Wrathguard Flayer | Fel Rage | Prevent the cast. If it succeeds, assign enrage removal where available. |
| Fel Invoker | Health Funnel | Interrupt or stop the channel to prevent the heal from extending the pull. |
| Doomguard | Doom Bolt | If Curse of Doom kills a player and summons a Doomguard, keep a spare interrupt available for its Doom Bolt casts. |
| Lithiel Cinderfury | Chaos Bolt | Use a named rotation throughout the fight, including after gateway movement. |
Fel Rage gives its caster 60% damage reduction and crowd-control immunity for a minute. Letting it finish can turn the end of a pull into an extended cleanup. A party with no enrage removal should be especially conservative about combining Flayers with other casters. Save an interrupt before the cast begins instead of trying to solve the buff afterward.
Health Funnel repeatedly restores a target's health. Interrupting it protects the damage the group has already invested. When two Invokers are selected together, mark both; repeatedly stopping one while the other heals is an assignment failure even if the interrupt meter looks busy.
Opening-area Guards and Captains need tank mitigation and careful facing. Poison and bleed pressure also makes an oversized first pull dangerous before the healer has established control. Later, reserve healing for Shivan Punisher pressure, Lucsei's Blade Dance, and Defiled Golem damage. Do not budget an ordinary kick as the answer to every large enemy's dangerous ability.
Corrupted Warlocks require their own plan: dispel Curse of Doom whenever possible; if it cannot be removed, group appropriately to split its damage and make sure nobody dies to it, because a death caused by the curse summons a Doomguard. Continue damage through Dark Pact and be ready for the shield when the Warlock reaches 50% health. The August 25 tuning reduced Dark Pact's shield to 30% of health from 35%, not 50%. The live tuning report separates that confirmed shield change from possible health adjustments, which should not be treated as confirmed numerical nerfs.
Explore services related to this guide, selected from our World of Warcraft catalog.
View All World of Warcraft Services


Kystia Manaheart: Nibbles, Images, and the Burn Window
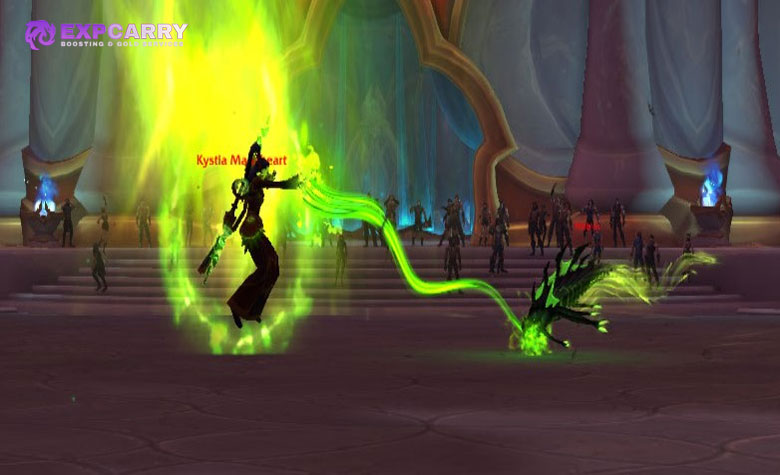
Kystia begins protected by Felshield. Focus Nibbles until the creature reaches 20% health and triggers the transition that exposes Kystia. Spending the group's largest offensive cooldowns into the protected boss wastes the main advantage of the encounter: a clearly defined window when everyone can attack the same vulnerable target.
Destabilized lasts 20 seconds, stuns Kystia, increases her damage taken by 115%, and weakens Felshield. It also produces repeated party damage. The damage window therefore needs a healing plan: call the approaching Nibbles threshold, stabilize the group, then use Bloodlust and offensive cooldowns once Kystia is actually vulnerable.
- Tank: keep the encounter positioned so the group can reach Nibbles and respond to images. Watch the direction of Fel Spray and keep the party out of the frontal.
- Healer: dispel Corroding Spittle and prepare sustained group healing for Destabilized. Ask for personals while everyone is concentrating on damage.
- DPS: prioritize Nibbles before the transition, stop different images, then switch decisively to Kystia when the vulnerability begins.
- Everyone: move out of Fel Nova and track the spray rather than assuming the tank can make every patch of ground safe.
The Corroding Spittle effect is a magic debuff. Calling it a poison can leave it untreated when the wrong player assumes responsibility. Likewise, assign image coverage before the spawn: players can take different sides of the arena, with the backup handling an image that remains active after the initial stops.
A useful call sequence is "Nibbles low, get ready; images covered; boss vulnerable, lust." Avoid announcing the burn solely because Nibbles is almost at the threshold. If the group spends several seconds changing targets, finding range, or recovering a player, that time comes directly out of the vulnerability.
Snitches, Optional Buffs, and the Cantina Event
The opening route includes four Row Snitch interactions before the first boss becomes accessible. Track this objective as the group clears; nobody should independently rush into another pack to click a contact. Have one player confirm the objective is complete while the tank prepares the next stage.
The district also offers optional consumable benefits purchased with Faceted Crystalline Fel. Agree who will handle these before the key. The route's enemy-forces total does not require their damage, and a learning group should avoid turning a quick purchase into several players wandering off. If using an extra-action damage benefit, assign its target and timing explicitly.
After Kystia, the cantina changes the group's job from fighting to completing the service event. All five players must speak to Selenar Sunshy to clock in; each player then receives a role and performs that role until the rating reaches five stars. Servers deliver requested items, entertainers follow the music-note task, cleaners remove messes, and bouncers deal with rowdy patrons. Influential Reviewers can also appear and channel Scathing Review at a player; interrupt or crowd-control them to stop the cast.
The resulting Five Star Review gives 10% damage and healing for five minutes. Decide the warehouse pull before the event ends so the group can use the buff promptly. Stage 7 contains six Warehouse Workers and two Keen Taskmasters; do not assume the temporary damage increase replaces the need to control the pull.
If repeated attempts stall because players misunderstand their job or target assignment, a focused Mythic+ coaching or VOD review can examine that specific section. For a self-directed review, record the moment progress stopped, identify the missing action, and give one player responsibility for calling it on the next run.
Zaen Bladesorrow: Preserve Cover and Place Fire Bombs
Zaen turns the freight around the arena into both protection and a hazard. Same-Day Delivery adds freight, Murder in a Row requires line-of-sight cover, and Fire Bomb can destroy freight. The party needs to preserve usable cover while removing the dangerous fel-infused shipment.
When Murder in a Row begins, move behind freight that blocks Zaen's view of your character. Choose your own usable cover early rather than following another player at the last moment. After the shot, leave the freight that is about to explode; successfully hiding does not make that position safe for the rest of the fight.
Fire Bomb explodes after six seconds within six yards. Its target should separate from teammates and use the blast to remove Fel-Infused Freight. Check what else the blast will destroy before settling into position. Removing every nearby piece of cover can solve the current bomb while creating a problem for the next shot.
- Tank: position Zaen with reachable cover and use mitigation for Envenom. Keep a poison-removal plan for Heartstop Poison.
- Healer: prepare group healing for Killing Spree and account for players moving out of line of sight to hide.
- DPS: handle bombs immediately, preserve a path to cover, and avoid arriving at another player's barrel as the shot resolves.
- Everyone: dodge falling freight, hide for the aimed shot, then move away from the resulting explosion.
Killing Spree deals repeated physical damage that ignores armor. Standing behind freight is the answer to Murder in a Row, not a general answer to all of Zaen's damage. Schedule a healing cooldown or personals for the spree instead of discovering during the channel that everyone expected the barrels to protect them.
Xathuux the Annihilator: Axe Placement and Demonic Rage
Xathuux is a positioning encounter with a priority target. Keep the boss near the arena edge, face Legion Strike away from the party, place the axe where DPS can reach it, and move consistently through Demonic Rage. Before pulling, agree on a direction around the edge and identify the clean space reserved for the next movement.
Axe Toss hits the party and leaves an axe that emits Fel Lightning until destroyed. The targeted player should place it near the boss's side or rear where it can be attacked safely. Running it to the opposite end of the arena increases travel time and delays the kill. Once the axe appears, make it the damage priority rather than relying on incidental cleave.
The September 1 fix addressed Axe Toss sometimes doing less damage than intended. In the same current Blizzard hotfix record, the August 18 changes reduced forces from 690 to 655 and removed a Corrupted Warlock with two Wrathguard Flayers before Xathuux. A video in which the axe barely hurts, or that includes the removed pack, is an unreliable baseline for the present run.
Tasks During Demonic Rage
Demonic Rage lasts 15 seconds, increases Xathuux's attack speed by 75%, and makes him take 30% more damage. Burning Steps complicates the floor during the same window. The tank must preserve safe movement while DPS exploit the vulnerability; a frantic sprint can make the damage bonus much less useful.
Tank: move gradually along the agreed edge, leaving the dangerous ground behind. Keep Xathuux's frontal away from the group and avoid abruptly cutting across the center. Legion Strike applies a severe healing-received penalty if it hits, so the plan is to avoid the swing rather than ask the healer to repair its consequences.
Healer: prepare for the Rage damage and any nearby Axe Toss or Infernal Crush overlap. Call for individual defensives before a spread forces players apart. Keep a sightline to the tank as the boss moves; if you must relocate, announce it before the tank reaches the limit of your range.
DPS: maintain safe access to Xathuux during Rage, but kill an active axe promptly. Spread for Infernal Crush without crossing the frontal or the tank's next patch of safe ground. Ranged players should avoid using the entire arena simply because they can attack from far away.
The repeatable call is "axe beside boss, kill axe; spread; move with tank." Damage cooldowns can be held briefly for Rage when the timing is clear, but surviving a current axe or movement overlap takes precedence. The encounter becomes much more stable when each player preserves the next safe position instead of optimizing only the current cast.
Lithiel Cinderfury: Interrupt Rotation and Gateway Movement
Reach 100% forces before beginning Lithiel so the party can finish at the final boss. Her encounter combines a regular interrupt, killable summons, an unkillable Infernal to kite, and a gateway used to cross Malefic Wave. Assign the interrupt rotation and gateway caller before the pull; these jobs remain active while everyone is moving.
Reserve named kicks for Chaos Bolt. If the next assigned player has to move or cannot reach the boss, call the backup immediately. Other players can control Wild Imps, but the party should not spend all its available interrupts on adds and leave the boss uncovered.
Following the September 4 hotfix, Fingers of Gul'dan prefers non-tanks, selects four targets, and produces four Wild Imps from each impact. Keep players outside each other's six-yard damage areas while placing those impacts close enough that the resulting imps can be grouped efficiently. Excessive spreading scatters the imps; overlapping targeted players causes avoidable damage. Agree on a compact spread and collapse onto the adds after the impacts resolve.
The tank collects the killable summons while managing the Infernal's position. Do not spend the group's damage trying to kill the Infernal; it cannot be killed and continues to fixate the tank until the encounter ends. Keep it away from the party's travel path and gateway endpoints. Finish Wild Imps and the Vilefiend efficiently so the next transition does not begin with unnecessary enemies still active.
- Tank: preserve a safe route for the Infernal movement and keep the gate landing area usable.
- Healer: cover the impact damage and ongoing pressure, then move with the group through the gateway.
- DPS: spread impact centers, kill the manageable summons, and keep the Chaos Bolt rotation intact.
- Gateway caller: identify the boss-created gate, watch Malefic Wave, and call the crossing once the destination is safe.
The encounter's Demonic Gateway transports players and protects against the wave's initial hit and Fire vulnerability. Do not immediately chase Lithiel through it when she teleports; watch the wave and cross with the mechanic. This is a boss-created tool, so the strategy does not require a Warlock in the party.
Malefic Wave also empowers demons it hits. Killing the manageable adds before that happens reduces the pressure after the crossing. Re-establish the interrupt order as soon as the group arrives; reaching the correct side and then allowing Chaos Bolt through can undo a clean transition.
Death Recovery, Runbacks, and Finishing the Key
Agree on release behavior before the run. If the tank and healer can finish a trash pull, wait for the recovery call instead of automatically releasing. After a full wipe, release together and regroup using the cleared route shown by the current instance state. Do not turn one wipe into several separate deaths by sending players back through surviving enemies alone.
The exact Murder Row respawn unlocks and runback times are not independently confirmed here. Use the active respawn location shown in the client; do not assume every boss kill creates a checkpoint or promise a return beside the last boss. This route's count and completion plan do not rely on a particular resurrection point or an intentional death skip.
Before restarting a boss, restore the part of the plan that failed. On Kystia, reassign the image that escaped control. On Zaen, choose cover before the shot. On Xathuux, reset the direction and axe position. On Lithiel, name the next Chaos Bolt kicker and gateway caller. One specific correction is easier for a PUG to execute than a general request to play better.
After a completed attempt, distinguish a routing issue from a progression goal. The Mythic+ rating explanation helps assess which result improves your score. If the objective is several weekly completions with an organized team, Mythic+ run bundles cover that separate need. Neither a higher key nor more attempts replaces reviewing the mechanic that repeatedly ends the run.
For the next attempt, record only the useful details: the stage where forces diverged, the unhandled cast, the unused defensive, or the failed movement. Keep the enemy selection stable while correcting one recurring problem. Once the party can repeat a clean run, combine selected pulls gradually and compare the time gained with the extra recovery risk.
Conclusion
A dependable Murder Row Mythic+ run starts with a shared map and clear responsibility. Follow the selected enemies to 36.34% before Kystia, 40.31% before Zaen, 67.18% before Xathuux, and 100.46% before Lithiel. Complete the Snitch and cantina objectives as the route reaches them, and split large stages when the group's control or mitigation cannot support the combined pull.
Each boss then has a practical priority: prepare Kystia's vulnerability, preserve Zaen's cover, kill Xathuux's axe while managing Rage movement, and keep Lithiel's interrupts and gateway crossing organized. Before starting your next key, assign those jobs and confirm the route version. Reliable execution gives the group a foundation for faster pulls and higher keys without rebuilding the plan after every death.