Fast gearing in Path of Exile 2 follows a simple order: finish the campaign with a functional setup, repair the weakest gear slots before entering the Atlas, clear Waystones your build can handle consistently, and convert drops into targeted upgrades through crafting or trade. The fastest route is not a fixed number of maps or one mandatory league mechanic. It is a repeatable loop in which every purchase or craft removes a measurable bottleneck.
This guide covers the complete transition from the end of the campaign to Pinnacle content. It focuses on upgrade priorities, Waystone progression, crafting and trading decisions, and the point at which a character is ready to leave early mapping behind.
PoE 2 Fast Gearing Priorities
Before spending currency, identify whether the build is limited by damage, survival, recovery, or movement. Replacing an item that does not address the current limit may improve the character sheet without improving clear speed or boss consistency. Use the following order as a starting point, then move the category causing the most failures to the top.
| Priority | What to check | Upgrade goal |
|---|---|---|
| Main damage source | Weapon damage for attacks, relevant gem levels and offensive modifiers for spells or minions | Normal packs die without repeated setup and map bosses do not exhaust your recovery resources |
| Elemental resistances | Fire, Cold, and Lightning values shown in the area where you are progressing | Reach the current cap after campaign penalties and gear changes |
| Primary defence | Life or Energy Shield plus the mitigation or avoidance layer used by the build | Survive ordinary map hits without relying on perfect play |
| Recovery | Flasks, regeneration, leech, recoup, or another build-specific source | Recover between dangerous hits and sustain the main skill during bosses |
| Movement and attributes | Movement speed, skill requirements, and missing Strength, Dexterity, or Intelligence | Keep the build responsive without breaking other gear slots |
Do not attempt to solve every category with one item. Rings and amulets are flexible places for resistances and attributes, boots are the natural movement slot, and the weapon or offensive focus should carry a meaningful share of the build's damage. This division makes later replacements easier.
Finish the Campaign With an Endgame-Ready Base
The current Early Access campaign consists of Acts 1 through 4 followed by three Interludes, which replace the former Cruel Difficulty and lead into the Endgame around level 65. Before leaving the campaign, complete objectives that grant permanent character power and check the map for missed rewards. A permanent bonus is more valuable than a temporary rare item and applies to every later upgrade.
Run a final campaign gear check
Open the character panel in a late campaign or Endgame area and review your actual defensive values there. Story progression applies resistance penalties, so values seen in an earlier act may not represent the character that enters the Atlas. Recheck resistances whenever a ring, amulet, body armour, or shield is replaced.
Your campaign setup is ready to move forward when the main skill has appropriate supports, its resource cost is sustainable, and the character can kill late campaign bosses without depending on repeated lucky attempts. If a boss takes too long, upgrade the main damage source first. If ordinary enemies cause deaths, repair resistances, Life or Energy Shield, and the build's primary defensive layer before buying more damage.
Keep only gear with a clear purpose
A rare item is not useful merely because it has many modifiers. Equip pieces that solve a specific need and sell, salvage, or store the rest according to their value. During the campaign, a two- or three-mod item with the correct stats can outperform a visually impressive rare filled with irrelevant affixes. This remains true in early mapping.
- Attack builds: compare the weapon's relevant damage, attack speed, and modifiers that support the skill's damage type.
- Spell builds: prioritize modifiers that scale the chosen spell, including relevant skill levels when the build benefits from them.
- Minion builds: value minion-specific levels and modifiers instead of personal weapon damage.
- All builds: preserve enough attributes to equip every active and support gem after a gear swap.
Make the First Atlas Upgrades in the Right Order
Early Atlas gearing should remove the largest failure point with the smallest commitment. Start with inexpensive items that stabilize the build, not a long-term chase item that consumes the entire budget. A character that clears reliably generates more bases, currency, and trade options for the next upgrade.

Replace the bottleneck slot first
Use outcomes rather than item rarity to identify the bottleneck. Slow rare monsters and bosses usually point to the main weapon, offensive focus, gem setup, or a missing damage interaction. Sudden deaths usually point to uncapped resistances, a weak Life or Energy Shield total, insufficient mitigation, or a dangerous Waystone modifier. Constant flask pressure points to weak recovery or a resource problem.
Buy or craft the cheapest item that fixes that problem without creating another one. A new weapon that removes required attributes from an amulet can force several additional purchases, while a resistance upgrade can become a downgrade if it breaks the main skill's attribute requirements. Check the complete setup before confirming a trade or consuming a valuable currency item.
Use an upgrade ladder instead of chasing perfect gear
Separate upgrades into three levels. A repair item fixes an immediate weakness and should be cheap. A stable item combines several useful modifiers and can remain equipped through early Atlas progression. A finish item has the correct base, strong modifier tiers, and enough room for the build's intended endgame setup. Most early purchases should be repair or stable items.
The broader Path of Exile 2 guides cover individual systems in more depth, but this page should remain the checklist that decides which system to use next.
Explore services related to this guide, selected from our Path of Exile 2 catalog.
View All Path of Exile 2 Services


Choose Crafting or Trade for Each Upgrade
Crafting and trade solve different problems. Crafting is efficient when you already have a suitable base and can create a useful item with a controlled, limited sequence. Trade is usually faster when the slot needs several exact modifiers at once. In Solo Self-Found, the same decision becomes whether to spend resources now or continue farming for a stronger base.
| Situation | Best route | Stop condition |
|---|---|---|
| One weak campaign or early Atlas slot | Cheap craft on an immediately usable base | Stop when the item no longer has a realistic path to an upgrade |
| Several exact resistances or attributes are required | Search trade for the complete combination | Do not pay for extra modifiers that the build does not use |
| A strong base already has useful modifiers | Use a limited finishing step | Do not risk the item unless the possible loss is acceptable |
| The slot is functional and the gain is minor | Keep farming | Upgrade only when the result changes clear speed, survival, or boss consistency |
Craft with a base rule and a stop rule
The base rule is simple: do not spend on an item you would refuse to equip after one good result. Item level controls which modifier tiers are available, while the base type controls the item's inherent defensive or offensive profile. A low-value base does not become efficient because more currency is invested in it.
The stop rule prevents rescue crafting. Use common currency to test a promising base, evaluate after every step, and reserve expensive actions for an item that is already strong. Current crafting also limits how targeted modifiers can be combined, so check the complete process before committing Essences, Alloys, Desecration, Omens, or other specialized resources. The PoE 2 crafting guide explains the low-cost sequence and safe stopping points without turning this gearing page into a second crafting guide.
Trade by total upgrade value
Search for the modifiers that solve the slot, then compare the full character before and after the swap. The in-game market search can populate filters from an item, but rare-item pricing still depends on the modifiers included in the search. Disable irrelevant filters and compare several listings instead of treating the first price as authoritative.
Do not spend the whole budget on one offensive purchase while several defensive slots remain broken. Keep enough liquid currency for Waystones, smaller repairs, and the next obvious upgrade. Players who prefer assistance with a specific campaign, Atlas, or boss bottleneck can find contextual Path of Exile 2 progression options without changing the self-play gearing route described here.
Use Waystones to Build a Reliable Upgrade Loop
Waystones are both progression items and difficulty choices. In the current Endgame, they must be identified before the Map Device will accept them. Read every modifier before opening a map and set aside combinations that directly counter the build. A higher tier does not improve progression if the map takes too long, repeatedly kills the character, or cannot be completed.
Progress the Atlas quests while farming gear
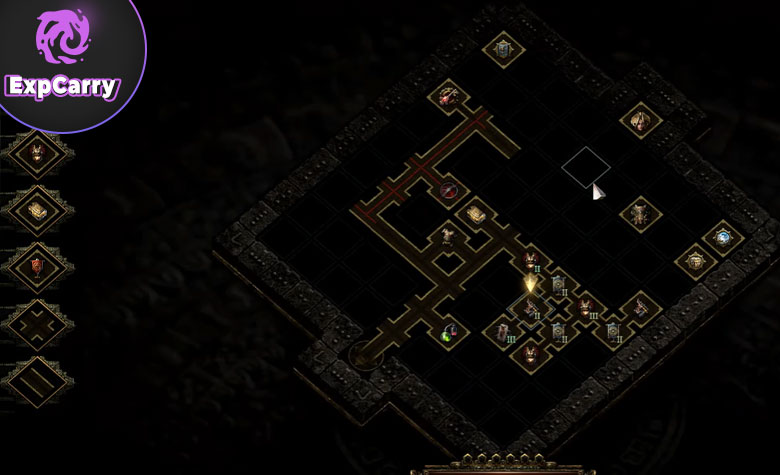
The reworked Atlas contains fixed points of interest and questlines that introduce its major mechanics and lead toward their Pinnacle encounters. Follow these objectives while clearing nearby maps instead of treating every Waystone as an isolated farm. Completing the first tower causes the Fortress to appear, and Fortress maps become a source of Atlas Passive points. Those points strengthen future mapping and should not be postponed for a low-value side route.
Choose one content path that matches the build's strengths after the basic Atlas route is stable. Fast clearing builds can favor dense encounters, while characters with stronger single-target damage may progress comfortably through boss-focused objectives. Temple of Atziri is one available branch, not a universal gearing requirement.
Batch the loop and evaluate results
Prepare several suitable Waystones, clear them without interrupting every run for minor inventory decisions, then sell and evaluate the session in one batch. No fixed batch size fits every player. Stop when the inventory requires attention, a gear slot has enough budget for a real upgrade, or the current difficulty exposes a repeatable failure.
- Identify suitable Waystones and reject modifiers the build cannot handle.
- Clear maps at the highest difficulty that remains consistent.
- Collect useful bases, liquid currency, and rewards from the chosen Atlas objective.
- Price valuable items and convert unwanted drops into spendable resources.
- Upgrade the current bottleneck, then test the same difficulty again.
- Raise difficulty only after the previous loop remains stable.
Move From Early Mapping to Pinnacle Preparation
The current Endgame provides quest versions of Pinnacle Bosses through their associated storylines, alongside harder repeatable versions. This creates a clear preparation target: progress the relevant quest, learn the encounter in its intended sequence, and avoid paying for speculative endgame gear before the character has demonstrated a specific weakness.
There is no universal gear score for Pinnacle readiness. A build is ready to begin boss progression when it can clear the required maps consistently, sustain its main skill and recovery during long fights, survive non-telegraphed routine damage, and deal reliable single-target damage without depending on rare temporary conditions. The exact defence total and damage target vary by archetype.
Before an important attempt, verify the following:
- Elemental resistances remain capped after the final gear swap.
- The build's primary defensive layer is present on every intended weapon set.
- Life, Mana, and utility flasks match the encounter rather than the mapping setup.
- The main skill, support setup, Spirit reservation, and attributes remain valid.
- Single-target recovery works without a constant supply of normal monsters.
- The Waystone or encounter modifiers do not disable a core defence or recovery mechanic.
If access is the confusing part rather than the gear, use the PoE 2 boss access guide for the current quest chains and repeat-fight routes. Keep encounter navigation separate from the gearing decisions on this page.
Fast Gearing Mistakes That Slow Progress
Most gearing delays come from incorrect spending rather than a lack of drops. The following mistakes turn usable currency into small character-sheet gains that do not improve completion rate.
- Pushing tiers after repeated failures: lower the difficulty, restore the loop, and return after fixing the exposed weakness.
- Buying isolated stats: evaluate attributes, resistances, reservations, and both weapon sets before replacing a linked slot.
- Crafting on the wrong base: correct affixes cannot repair an unsuitable base type or unavailable modifier tier.
- Rescue crafting: stop when an item no longer has a cost-effective path to an upgrade.
- Finishing temporary gear: reserve expensive sockets, runes, quality, and risk-heavy steps for items that will remain equipped.
- Copying a farm the build cannot execute: choose Atlas content according to clear speed, boss damage, and survivability.
- Counting unsold items as budget: an upgrade can only be purchased with resources that are liquid or realistically tradable.
When progression stalls, change one variable at a time. Lower Waystone difficulty, replace the weakest slot, or switch the chosen Atlas objective. Testing several changes together makes it harder to identify which investment solved the problem.
Conclusion
Fast gearing in PoE 2 comes from disciplined sequencing. Complete the campaign bonuses, stabilize the character before entering the Atlas, use Waystones that preserve reliable clears, and spend only when an upgrade fixes a demonstrated weakness. Craft when a good base and a short stopping rule make the outcome efficient; trade when the slot needs a precise combination that would be expensive to force.
The loop is working when each upgrade increases completion rate, shortens difficult fights, or opens the next Atlas objective. Once those gains become consistent, the same process naturally carries the character from early mapping into Pinnacle preparation without relying on a single league mechanic or a lucky drop.