
Star Citizen Trading Guide 2026: Best Cargo Routes, Cargo Hauling and aUEC Profit Tips
Star Citizen trading is one of the most practical ways to make aUEC, but the best cargo route is never permanent. Commodity prices, stock, demand, server conditions, freight elevators, player traffic, patch changes and piracy risk can all change how profitable a route feels from one session to the next. That is why the best Star Citizen trading guide in 2026 is not just a list of “best routes.” It is a system for choosing routes, testing profit, reducing risk and switching quickly when the market stops working.
This updated guide explains how to approach cargo hauling in Star Citizen, how to score trade routes, which commodity patterns are worth testing, how to use Stanton and Nyx/Levski routes, and when it makes sense to buy aUEC instead of grinding trade loops manually. Use this as a practical framework, not a fixed spreadsheet. Always check current terminal stock, sell demand and live route data before loading a valuable ship.
If you want faster progress without spending every session testing cargo routes, ExpCarry can help with Star Citizen aUEC, Star Citizen hourly boosting, mining resources and other Star Citizen boost services.
How Star Citizen Trading Works in 2026
Trading profit in Star Citizen comes from buying commodities at one location and selling them at another location for a higher price. The real profit is not only the margin per SCU. Your result depends on how fast you can buy, load, travel, land, sell and repeat the loop. A route with a high margin can become weak if stock is low, sell demand is capped, freight elevators are slow, or the route is crowded by other players.
The most important trading factors are:
- Buy price: How much you pay for the commodity at the source location.
- Sell price: How much the destination terminal pays for that commodity.
- Available stock: Whether you can fill your ship quickly or waste time waiting for supply.
- Sell demand: Whether the destination can buy your cargo volume without long delays.
- Cycle time: The total time from takeoff to completed sale and ready-to-repeat status.
- Risk: Piracy, interdiction, server instability, landing difficulty, terminal issues and cargo loss.
Best Star Citizen Trading Rule: Profit Per Hour Beats Profit Per Run
Many players choose routes by looking only at theoretical profit per SCU. That is a mistake. A route only matters if you can run it repeatedly, sell reliably and survive the trip. A smaller margin route with fast loading and stable selling can beat a high-margin route that takes too long or fails often.
| Metric | What to Check | Why It Matters |
|---|---|---|
| Margin per SCU | Sell price minus buy price | Shows the theoretical value of the route |
| Cycle time | Total time from buy to sell completion | Controls real profit per hour |
| Stock reliability | How often you can fill your cargo hold | Prevents wasted terminal time |
| Sell reliability | How fast you can unload and sell | Prevents getting stuck with cargo |
| Route risk | Piracy, interdictions, bugs and traffic | Determines whether the margin is worth the danger |
A practical rule: if a route does not beat your safer alternative by a meaningful amount, do not run it with expensive cargo during unstable server conditions or high player activity. Keep your capital liquid and switch routes early when a loop stops working.
Quick Route Scoring Method
Use this lightweight scoring method every time you test a trade route:
- Step 1: Record the commodity, buy location, sell location and ship used.
- Step 2: Record how much cargo you actually bought, not only what you wanted to buy.
- Step 3: Track total cycle time from departure to completed sale.
- Step 4: Note whether the destination bought the full load quickly.
- Step 5: Mark the risk level: low, medium or high.
| Route Score | Meaning | Action |
|---|---|---|
| Strong | Good margin, fast cycle, reliable stock and sell demand | Repeat while conditions stay stable |
| Average | Works, but depends on stock, timing or low traffic | Run only with moderate cargo value |
| Weak | Low stock, slow selling, high risk or poor uptime | Switch route or commodity |
| Dangerous | High cargo value plus unstable server or pirate pressure | Avoid unless you have escort or backup plan |
Best Cargo Route Types in Star Citizen
Instead of relying on one fixed route, use route categories. This makes your trading strategy more stable because you can swap commodities and locations without rebuilding your whole plan.
| Route Type | Best For | Main Risk |
|---|---|---|
| Outpost to City Hub | High-value commodities and classic trade loops | Low stock or sell caps |
| Same-Planet Short Loops | Fast repeat runs with lower travel time | Lower margin per run |
| Station to Hub Routes | Lower complexity and faster cycle testing | Competition from other traders |
| Nyx / Levski Hauling | Frontier routes, interstellar hauling and higher-risk activity | Longer travel, player contact and route uncertainty |
| Event-Driven Cargo | Temporary high-value opportunities | Market crowding and unstable availability |
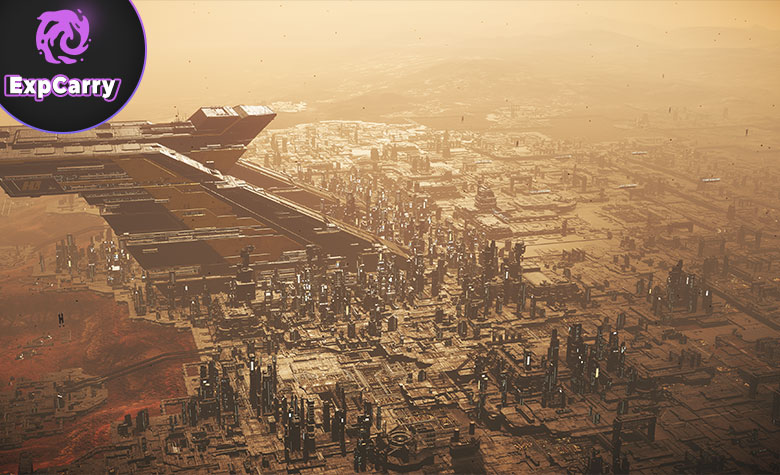
Best Stanton Cargo Routes to Test First
Stanton is still the easiest system for most cargo traders because it has major city hubs, outposts, mining facilities, predictable services and many fallback options. It is the best place to test trade basics before risking larger cargo values in more dangerous routes.
Good Stanton route patterns usually connect an outpost or mining location with a major city trade district. The exact best route can change, but the pattern remains useful: buy where supply exists, sell where demand is strong, and keep backup commodities ready.
| Commodity Focus | Buy Locations to Check | Sell Hubs to Test |
|---|---|---|
| Laranite | Arial HDMS Bezdek, Arial HDMS Lathan, selected moon trade points | Area18 TDD, Lorville CBD, Orison, New Babbage |
| Agricium | Lyria, Daymar and selected mining facilities depending on stock | Major city trade districts and high-demand terminals |
| Titanium / Industrial Goods | Mining and industrial facilities with stable supply | City hubs or stations with consistent demand |
| Medical / Processed Goods | Use current terminal data to confirm source and sell location | High-demand hubs with reliable sell throughput |
| Event or Patch-Driven Goods | Current high-demand source locations | Terminals currently accepting strong volume |
Do not treat the table as a promise. Treat it as a shortlist for testing. Before loading a large ship, always confirm stock, price, demand and sell capacity in the current server state.
Nyx and Levski Cargo Hauling
Nyx and Levski changed how many players think about interstellar hauling. Levski gives Nyx a strong frontier hub, while Glaciem Ring and system-to-system travel create longer, riskier routes. This can be profitable, but it also requires more planning than short Stanton loops.
Nyx hauling is best for players who understand route risk and do not put all their aUEC into one run. The system can attract haulers, pirates, mission groups and explorers into the same corridors, so you need a route plan and a fallback sell option.
Nyx Hauling Checklist
- Check your fuel and repair status before committing to a long route.
- Keep backup aUEC for recovery, repairs and replacement cargo.
- Use dogleg routing if you suspect predictable interdiction paths.
- Avoid full-risk cargo loads until you know the route and sell conditions.
- Have a fallback hub in case Levski or a destination terminal is crowded or unstable.
Dogleg Routing for Safer Cargo Runs
Dogleg routing means avoiding a perfectly direct line between your source and destination. Instead of flying straight from buy point to sell hub, set an intermediate point, travel partway, drop out, and then continue toward the real destination. This can reduce the chance of meeting players who camp predictable routes.
Dogleg routing does not make cargo safe. It only reduces predictability. Combine it with conservative cargo value, fast landing discipline and a reserve fund so one bad run does not destroy your whole trading budget.
Loading Workflow That Protects Profit Per Hour
Loading and selling are part of your profit calculation. A route with slightly lower margins can be better if it loads quickly, sells quickly and avoids repeated terminal problems. If you are trading solo, use simple routes with predictable terminal access and fewer cargo handling steps.
- Before buying, confirm your ship is recognized by the commodity terminal.
- Do not invest all your aUEC into one cargo load.
- Buy in manageable chunks if stock is limited or the server feels unstable.
- Do not mix too many unrelated cargo plans in one run unless you are organized.
- If a location repeatedly fails, switch routes instead of forcing the same loop.
Best Trade Strategy by Ship Size
Your ship size changes what “best cargo route” means. Small ships need fast, high-margin runs. Medium ships need flexible stock. Large ships need reliable volume and sell demand. A route that is excellent for a small ship can be bad for a large hauler if you cannot fill or sell enough cargo.
| Ship Size | Best Strategy | Avoid |
|---|---|---|
| Small Cargo Ships | Short high-value loops with fast landing and selling | Low-margin bulk cargo that wastes limited cargo space |
| Medium Cargo Ships | Two or three commodities on the same route pattern | Waiting too long for one perfect commodity |
| Large Cargo Ships | Reliable stock, strong demand and lower route friction | Routes where you regularly leave half-empty or cannot sell full volume |
| Hull / Heavy Haulers | Volume-focused planning, escort consideration and stable terminals | High-risk direct routes without fallback sell options |
Common Cargo Hauling Problems
Cargo hauling can be profitable, but it is also sensitive to patch behavior, server stability and location-specific problems. Freight elevators, inventory handling, commodity kiosks and ship recognition can all affect your profit per hour.
| Problem | What It Means | Practical Response |
|---|---|---|
| Ship not visible at terminal | You cannot buy or sell cargo with the selected ship | Store and retrieve the ship, change location or avoid forcing the route |
| Low stock | You cannot fill enough cargo | Switch commodity or use a smaller ship |
| Low sell demand | You cannot unload quickly | Move to fallback hub or sell in smaller batches |
| Freight elevator delay | Loading workflow becomes slow | Use routes with fewer handling steps when server performance is weak |
| Player piracy | Your cargo value is exposed | Use dogleg routes, escort, lower cargo value or safer timing |
How to Make More aUEC with Trading
The fastest way to improve your trading profit is to stop chasing one magic route and start tracking your own results. After a few runs, you will know which routes actually work for your ship, schedule and risk tolerance.
- Track cycle time: A 15-minute route can beat a better-margin 45-minute route.
- Keep backup commodities: Do not depend on one item being in stock.
- Use live route tools carefully: Dynamic trade websites can help, but always verify terminal data in-game.
- Protect capital: Never put all your available aUEC into one load.
- Know when to stop: If servers are unstable, switch to missions, mining, hourly support or buy aUEC directly.
Trading vs Buying aUEC vs Hourly Boosting
Cargo trading is satisfying when it works, but it is not always the fastest path to a specific goal. If you need credits now for a ship, components, gear or post-wipe recovery, buying aUEC can be more direct. If you want reputation, missions, loot, cargo support or custom progression, hourly boosting may be better.
| Option | Choose It When | Useful Page |
|---|---|---|
| Cargo Trading | You enjoy hauling, route testing and market risk | Current guide |
| Buy Star Citizen aUEC | You need credits quickly for ships, components or recovery | Buy Star Citizen aUEC |
| Hourly Boosting | You need custom help with missions, hauling, cargo, reputation or farming | Star Citizen Hourly Boosting |
| Mining Resources | You need specific materials for Wikelo, crafting or turn-ins | Star Citizen Mining Resources |
Best Cargo Routes FAQ
What is the best cargo route in Star Citizen?
There is no permanent best cargo route. The best route depends on current commodity prices, stock, demand, ship size, cycle time, server stability and piracy risk.
What is the safest way to trade cargo?
Use short routes, avoid investing all your aUEC in one load, keep backup sell locations, avoid predictable direct lines in risky areas and test terminals before loading expensive cargo.
Is Stanton still good for trading?
Yes. Stanton remains one of the best places to test trade loops because it has many hubs, outposts, trade districts and fallback options.
Is Nyx good for cargo hauling?
Nyx can be useful for frontier hauling and interstellar routes, but it usually requires more planning because of longer travel, player traffic and higher route uncertainty.
Which commodities are best for trading?
High-value commodities such as Laranite and Agricium can be profitable, but only when stock and sell demand are reliable. Always check live terminal data before buying.
How much aUEC should I keep in reserve?
A safe approach is to keep at least 30-50% of your available aUEC outside cargo investment. This helps you recover if a route fails or cargo is lost.
Is cargo trading better than missions?
Cargo trading can be better when routes are stable and demand is strong. Missions can be better when trade terminals are unstable, stock is low or piracy risk is high.
Can ExpCarry help with cargo hauling?
Yes. ExpCarry can help with Star Citizen aUEC, hourly boosting, resources, reputation and custom progression goals depending on availability.
Related Star Citizen Guides and Services
- Buy Star Citizen aUEC
- Star Citizen Hourly Boosting
- Star Citizen Mining Resources
- reputations">Star Citizen Reputation Boost
- Star Citizen Wikelo Ships
- Star Citizen Nyx System Guide
- All Star Citizen Boost Services
Final Thoughts: The Best Star Citizen Trade Route Is the One You Can Repeat
The best Star Citizen cargo routes in 2026 are not fixed forever. They are the routes that work in your current patch, on your current server, with your current ship and risk level. Start with reliable Stanton loops, test high-value commodities carefully, use Nyx and Levski routes with preparation, and always measure profit by time, not only by margin.
If you want to skip unstable trading sessions and move straight to your next ship, component setup or post-wipe rebuild, use Star Citizen aUEC. If you need custom help with missions, hauling, reputation or mixed goals, choose Star Citizen hourly boosting. For broader options, visit our main Star Citizen boost services hub.