
Arknights: Endfield base building is your long-term progression engine, and the AIC (Automated Industry Complex) is where that engine either runs smoothly or collapses into constant manual fixes. This guide explains factory automation and production with one priority: reliability. You will learn how the PAC and Depot output system actually controls item flow, how to build a power network that scales cleanly with Relay Towers and cable limits, how to design conveyors so lines do not jam, and how to scale production with modular blocks and blueprints instead of rebuilding your entire base every time you unlock a new tier.
The core idea is simple. Stable production comes from three decisions you make early and keep consistent later: a readable power spine with enough margin, a clean item-routing model based on PAC output ports feeding short conveyor runs, and production modules that can be duplicated without re-wiring the whole base. If you build around those constraints first, your AIC stops being a puzzle and becomes a predictable machine that feeds your crafting and upgrades while you do story and combat.
The AIC production loop and why most bases stall

Every production chain in Endfield is the same pattern repeated at different tiers. You extract raw resources, move them into storage, output specific items to machines, process into intermediates, and then consume intermediates to make end products. The common mistake is treating this as one giant belt network where everything goes everywhere. That approach feels flexible at first and becomes unfixable later, because when one input is missing you cannot tell whether the problem is supply, routing, or a downstream jam.
The reliable approach is layered and modular. Think in layers: raw intake, refinement, components, then end products. Each layer should have a clear source, a clear set of outputs, and a clear place where you can expand capacity by adding one more module instead of ripping out your belts. Once you adopt the layered model, troubleshooting becomes mechanical: you find the first empty belt segment or the first full output that cannot move, and you fix that one layer rather than randomly adding machines everywhere.
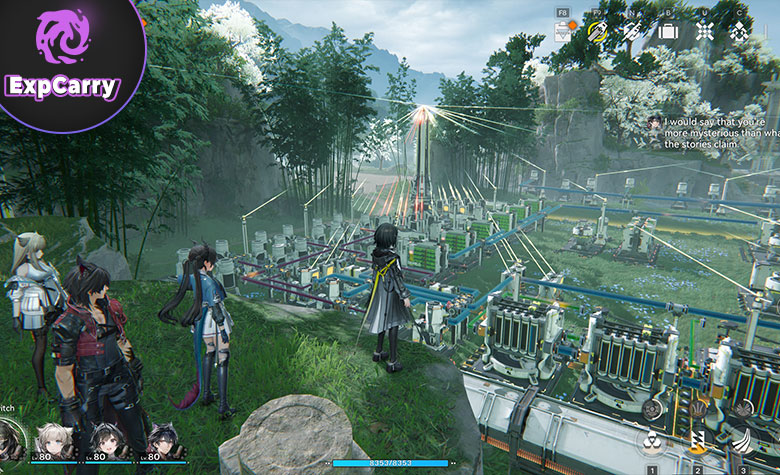
PAC output ports and Depot control are the real automation system
Automation starts at the PAC, not at the machine. The PAC has output ports that you can configure to output a specific item from your Depot, and when you attach a conveyor belt to a configured output port, it supplies that item into your production line as long as the Depot has stock and the output is not backed up. The tutorial-level design is explicit: you do not want to drag materials manually into machines as your default workflow, you want the PAC to push items out to conveyors and let the line run. This is the difference between an AIC that scales and an AIC that stays a small crafting corner forever.
The same logic applies to outpost setups that use Sub-PACs: treat ports as the source of truth for what a module receives, then keep routing short and readable so flow stays predictable.
The practical implication is that you should design your base around ports and short runs. Allocate ports by category and keep each belt readable. Remember that ports are a limited resource, so dedicate them to critical, high-traffic inputs first. When a line stops, your first question should be: is the PAC outputting the correct item, and is the belt moving it. If the answer is no, the fix is at the output assignment or at the belt segment. If the answer is yes, the fix is downstream at the machine or at an output jam. That single habit turns debugging from guesswork into a checklist.
Throughput and buffers: why perfectly tight chains fail
Factory chains fail in real sessions because demand is not perfectly synchronized. One machine finishes a batch, another machine is still processing, a third machine is idle because one component arrived late, and suddenly a chain that looked perfect on paper becomes unstable. The solution is not to rebuild the chain into something more complex. The solution is to design for buffer behavior: produce basics and key intermediates with surplus, keep your lines simple, and avoid overbuilding end products before your intermediate layer is comfortably ahead of demand.
When a chain stalls, do not add more end-product machines first. Follow the chain backward until you find the first empty belt segment and increase that stage only. In practice, most stalls are one missing intermediate that feeds multiple end products. Fix the intermediate layer once and the whole base becomes stable. Try to fix it at the end and you will chase the same shortage forever.
Power and infrastructure that scale without rewiring
Power is the first hard wall because every expansion adds load. If you expand production without expanding the grid, you get random offline clusters and you lose more time debugging than you gain from the new machines. The reliable strategy is to build a power spine first and then branch into production modules. A power spine is a backbone route of Relay Towers and cables that you expect to keep as the base grows, while production blocks connect as branches that can be expanded or moved without breaking the whole grid.
Endfield also enforces cable-length constraints depending on where the cable originates. That means you cannot treat power like an infinite extension cord. You must place Relay Towers at reasonable intervals and expand in steps. This is not busywork. This is the intended scaling constraint, and if you respect it early your future expansions become routine instead of painful.
Relay Tower cable limits and clean expansion steps
The game distinguishes cable reach depending on the source: cables from the Automation-Core and Relay Tower can reach up to 80 meters, while those starting from Electric Pylons can reach 30 meters. This matters because the fastest way to break your base is to extend too far from a weak source, then wonder why a new module never powers up. Build your spine so long runs originate from the Automation-Core or a Relay Tower, then use shorter pylon runs only for the last local hop inside a module. If you build with the 80m relay spacing in mind, you keep expansions predictable and you avoid dead zones that force rework later.
Expansion should be done in a fixed order. First add power margin. Then add miners or refinement. Then add components. Only after that add new end-product lines. If you add everything at once and the grid fails, you do not learn which change caused the failure and you waste time deleting machines instead of fixing the network design.
Power debugging order that prevents wasted time
When production stops, check power first. A powerless machine looks like an input shortage, but it is not. After power, check PAC output configuration and belt motion. Only then check the machine recipe and output path. This order works because power is global, output ports are the main flow choke point, and machine issues are local. If you debug in the reverse order, you will spend time moving belts and reassigning recipes while the real problem is a broken relay chain.
If you must move infrastructure, do it surgically. Keep the spine stable and adjust only the branch that feeds the failing module. A base that stays readable always scales faster than a base that becomes a maze of cables and belts.
Conveyors, routing, and jam-proof production lines
Belts do not fail because belts are hard. Belts fail because routing becomes unreadable. The most reliable belt system in Endfield is short runs from a dedicated PAC output port into a single module, then a clear output path back to storage or to the next module. When you try to share one belt bus across many unrelated recipes, you introduce silent failure modes: wrong item enters a split, one output backs up and blocks a critical input, or a line looks fed but is actually being starved by a competing consumer.
Your goal is not maximum compactness. Your goal is maximum clarity. Clarity is what lets you fix issues in seconds and keep the factory online. Compact builds often look impressive and then collapse when you need to change one recipe or add one extra intermediate.
Modules, ports, and short runs beat one giant belt bus
Build modules that you can describe in one sentence: this block turns raw ore into refined basics, this block turns basics into components, this block turns components into one end product. Each module gets dedicated input belts from specific PAC outputs and a clean output path. When you need more throughput, you duplicate the module and feed it the same way. That is scaling. Stretching one belt across the base and tapping into it everywhere is not scaling, it is building a future troubleshooting trap.
If you want additional flexibility, systems like the Depot Bus Port and Depot Bus Section (often unlocked as part of the Wuling Depot Bus progression) can help standardize routing, but the principle stays the same: expand ports and routing in a way that keeps flow readable and modular. A flexible port system helps only if the lines remain understandable and isolated enough that one change does not break everything.
The three jam patterns and the one fix that usually works
Most jams are one of three patterns. First, output has nowhere to go, so machines stop and it looks like an input problem. Second, two consumers fight over one input stream and both become unstable. Third, one wrong routing decision injects the wrong item into a line and the entire downstream chain becomes garbage. The fix is usually the same: isolate the module, shorten routing, dedicate a port to the critical input, and ensure outputs have a clear path back to storage or to the next stage.
If you keep modules separated, jams become local events. If you build a shared mega-network, one jam becomes a base-wide outage. Reliability comes from containment, not from cleverness.
What to automate first: a priority order that stays correct
Early automation is not about chasing every recipe. It is about removing repeated manual chores and stabilizing the inputs that unlock everything else. The safest order is always: raw intake first, refinement second, high-demand intermediates third, and only then one end-product line that saves you time every session. This sequence prevents the classic problem where you build a cool end-product chain that constantly stalls because the intermediate layer is underbuilt.
The table below is a framework, not a rigid checklist. Your exact recipe names vary by progression, but the logic does not change. If you follow this order, you will feel your base become more stable with each expansion instead of becoming more fragile.
| Stage | Automate | Why it comes first | Most common failure |
|---|---|---|---|
| 1 | Raw intake (miners to Depot) | All production depends on stable inputs | Power margin too low, routing too long and fragile |
| 2 | Refinement (raw to refined basics) | Basics feed most mid-layer recipes | No surplus on one critical basic, chain oscillates |
| 3 | Key intermediates (basics to components) | Components unlock and feed many end products | One missing component stalls multiple lines at once |
| 4 | One end-product convenience line | Eliminates repeated manual crafting daily | Overbuilding end products before intermediates are stable |
The rule that prevents most rebuilds
Do not scale end products until intermediates are comfortably overproduced. If you are empty on one component, adding more end-product machines is never the solution. The solution is upstream: add extraction, add refinement, or duplicate the intermediate module. This single rule is why modular factories feel effortless while improvised factories feel like constant firefighting.
Once the intermediate layer is stable, end products become easy. You can add one line, observe, then add another. Without stability, every new end-product line is just another way to expose the same shortage again.
Blueprints and scaling: repeat what works
Blueprints exist because Endfield wants you to scale by repetition, not by reinvention. You can save an AIC layout and reuse it elsewhere, and players share blueprint codes specifically to speed up base building. The important thing is how you use them. A blueprint is best as a module: a proven refinery block, a proven component block, or a proven power segment. When you need more throughput, you stamp the module again and connect it to the same power spine and the same port logic.
Blueprints also keep your base consistent. Consistency is what makes balancing power and throughput predictable. If every new block is invented differently, your base becomes impossible to reason about. If every new block is a copy of something you already tested, scaling becomes routine.
A workflow that keeps blueprints from breaking your base
Build one module manually first and run it long enough to prove it is stable in real play. Save it as a blueprint. Duplicate it only when you need capacity. If you import a blueprint from someone else, treat it as a template and validate it against your current power budget and unlocked tech. A build that is perfect for one progression stage can be fragile or unsupported in another stage. Reliability comes from testing and incremental expansion, not from copying the biggest layout you can find.
If something breaks after stamping a blueprint, do not panic-rebuild. Use the same debugging order: power, ports, belts, machines. Blueprints speed up construction, but they do not remove the need for a clear routing model.
Conclusion
Arknights: Endfield factory automation is a reliability game built on three pillars: a scalable power spine with Relay Towers and cable limits respected, a routing model where PAC output ports feed short readable conveyor runs, and modular production blocks that you can duplicate with blueprints. Automate raw intake and refinement first, stabilize intermediates, then add end-product lines only after the base is comfortably ahead on components. If you design for clarity and containment, your AIC stays online and quietly powers your progression while you play the rest of the game.