
TBC Classic Phase 1 Mastery: Karazhan, Gruul, and Magtheridon Tips is a practical raid guide built for the 2026 Burning Crusade Classic Anniversary environment. Phase 1 is where most guilds create their weekly rhythm, because Karazhan provides consistent 10 player upgrades and roster practice, while Gruul and Magtheridon deliver early 25 player epics that speed up your entire progression curve. This guide is written for repeatable clears, not one time hero moments, and it focuses on the habits that reduce wipe time, improve consistency, and keep raid nights calm. If you want to move from early clears to reliable farm, you need a plan that your roster can execute even when a few people are missing.
This article uses established The Burning Crusade raid mechanics and applies them to a 2026 WoW Classic mindset. The bosses are not new, but the way most modern Classic rosters approach preparation, assignments, and cooldown timing has evolved. The goal is to make your first month feel controlled: fewer chaotic pulls, fewer last second assignment changes, and faster recovery when something goes wrong. The best Phase 1 guilds are not the ones with the most perfect spreadsheets, they are the ones that standardize simple rules and follow them every week.
How Phase 1 Works in TBC Classic 2026
Anniversary (2026) quick rules to build your plan around:
1) Bloodlust and Heroism are raid wide, with a 10 minute Sated/Exhaustion debuff.
2) That Sated/Exhaustion only resets when a boss encounter ends: on kill and on wipe.
3) Raid attunements are account wide once your first character completes the attunement for that raid.
4) Tier 4 raids (Karazhan, Gruul, Magtheridon) are released in their post nerf state, so organization matters more than “perfect comps”.
5) Your Bloodlust policy should prioritize repeatability and clean timing, not saving it “for later”.
6) Magtheridon still demands perfect coordination: Blast Nova is stopped by five simultaneous cube channels, not improvisation.
7) The pre expansion patch for Anniversary arrives January 13, 2026, so set expectations and schedules early.
Phase 1 revolves around three raids that define the early expansion experience. Karazhan is a long 10 player raid that most guilds will run weekly on multiple teams, because it is loot dense and teaches discipline through repetition. Gruul's Lair is a short 25 player raid with two bosses that reward clear assignments, target control, and stable positioning. Magtheridon's Lair is a one boss 25 player raid that acts as a coordination check, because success depends on interrupts, add control, and a reliable cube plan.
Phase 1 mastery is not about being flawless, it is about removing repeat mistakes. Karazhan punishes bad pacing and sloppy trash more than almost any other raid in the tier, so the biggest improvement is learning how to move without pulling extra packs. Gruul punishes positioning and patience, especially during Shatter, so your raid must stay calm as the fight gets more dangerous over time. Magtheridon punishes improvisation, because cube failures can wipe the raid instantly no matter how geared you are. If you treat each raid as a different training tool, your roster improves faster than if you only chase loot.
In the Anniversary environment, the goal is to build a weekly system that clears cleanly, gears key roles, and keeps morale stable. Phase 1 is where your raid culture forms, so choose strategies that are easy to repeat, not strategies that only work on your best night. If your plan still works when a few people are missing, you are already ahead of most rosters.
Phase 1 Preparation That Actually Moves the Needle
Preparation that matters in Phase 1 is not about forcing everyone into perfect pre raid gear lists. It is about role stability, clear assignments, and habits that prevent unnecessary wipe cascades. Karazhan is a marathon, so the biggest time losses are usually trash chaos, slow recovery after deaths, and unclear responsibility for interrupts and crowd control. Gruul and Magtheridon are short, so a single unplanned mistake can waste more time than the entire raid should take. If you want faster clears, you need to reduce chaos, not chase tiny upgrades.
Build your prep around stability, clarity, and repeatability. Stability means tanks and healers who can attend consistently and communicate calmly. Clarity means every raid has written assignments before you zone in, especially for Magtheridon cubes, Maulgar add handling, and key interrupts. Repeatability means you choose a strategy that your roster can execute weekly even with substitutes, rather than a strategy that collapses the moment one specific class is missing. A simple plan that works every week is better than a complicated plan that only works on paper.
Use your guild organization to reduce downtime. Stock core consumables, keep emergency reagents available, and set clear rules for withdrawals so people are not arguing mid raid. Make sure everyone knows where they are supposed to stand before the first pull, because early wipes usually happen when players are confused, not when they are undergeared. Finally, decide your default Bloodlust policy for each raid and stick to it, because consistent timing makes your raid easier to coach. When everyone knows the plan, mistakes are faster to spot and fix.
| Raid | Best used for | Main risk in Phase 1 | What to standardize first | Leadership note |
|---|---|---|---|---|
| Karazhan | Weekly gear engine for mains and alts | Time loss from trash chaos and slow recovery | Fixed route, assigned interrupts, planned drink breaks | Keep pace calm, do not let pulls happen without a marker |
| Gruul's Lair | Fast 25 player upgrades and early roster momentum | Control failures on Maulgar and deaths to Shatter | Marked targets, strict kill order, spread pattern | Short raids feel easy until one sloppy pull wastes the night |
| Magtheridon's Lair | Coordination training and high value early epics | Cube failures and missed interrupts | Cube teams with backups, interrupt roster, positioning rules | Win by scripting the fight and running the script every week |
Karazhan Phase 1 Mastery Tips
Karazhan is the Phase 1 raid you will run the most, and it is where small efficiency improvements pay back every week. The instance is long and full of dangerous trash, so most groups lose time before they ever reach the bosses that drop the loot they want. Karazhan mastery is keeping pace without losing control, because long runs amplify small mistakes like accidental pulls, slow rezzes, unclear interrupt coverage, and unplanned breaks. If your raid can keep healers drinking, tanks stable, and DPS focused, Karazhan becomes a predictable farm that gears alts and strengthens weak roster roles. If you treat it like a casual dungeon night, it becomes a three hour morale drain.
Plan Karazhan around responsibilities, not just class names. You want two tanks who communicate clearly and understand when to swap targets, when to pick up adds, and when to hold a boss steady for healers. You want healers who manage mana proactively and call for drinks early, because the biggest wipe pattern in Karazhan is healer mana collapse after repeated trash damage. DPS should include reliable interrupts and at least one player who can handle emergency crowd control when something breaks. Most importantly, do not allow unmarked pulls, because one bad pull in Karazhan often turns into three deaths and a long reset.
Karazhan route and pacing that prevent burnout
A good route is one your team can repeat without debate. Pick a default order, write it down, and run it the same way until it becomes muscle memory. Use consistent break points after major boss clusters and let your raid leader call planned drink breaks instead of waiting for people to complain. Keep the raid together, because Karazhan punishes split pulls in tight corridors where accidental line of sight aggro happens easily. Treat crowd control as a normal tool, not a sign of weakness, because it saves healer mana and prevents random deaths that waste time. When you wipe, identify the one trigger that started the collapse and fix that, instead of having a long argument about every detail.
Karazhan is also where you should train your raid on clean communication. Keep callouts short and consistent, especially for interrupts, target swaps, and movement cues. A raid leader who speaks too much during Karazhan often causes the group to tune out, so the best approach is to only call what matters. If your group has multiple Karazhan teams, standardize the same route and the same rules across teams. That makes fill ins easier and reduces the learning curve for substitutes.
Boss priorities and the habits that win weekly
Karazhan bosses reward scripted execution more than fancy tricks. Attumen is a good early check for tank control and healer pacing, because sloppy positioning often creates unnecessary damage and chaos. Moroes is where assignments win the fight: mark targets, assign crowd control, and assign interrupts on dangerous casts so the room stays calm. Maiden punishes people who ignore basic positioning and cleansing priorities, so keep the plan simple and enforce it. Opera events vary, so your raid should know the key mechanic for each event and avoid trying to improvise mid pull. The Curator is a reminder that mana management and controlled damage windows matter, because overextending early can punish healers and cause a slow collapse.
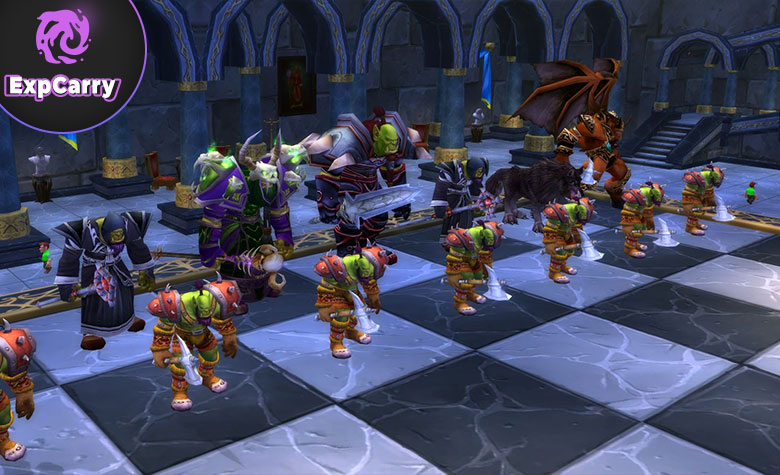
Shade of Aran rewards players who react to cues and respect safe zones, so your raid leader should call the key moments early and keep instructions short. Netherspite becomes easy when you assign beam roles and tell people exactly when and how to rotate, because random movement ruins the mechanic. The Chess event is often more about keeping everyone calm and following the simplest plan than it is about perfect play, so do not let it become an argument. Prince Malchezaar is a common wall for early groups because it punishes threat mistakes, sloppy movement, and panic when damage spikes. The fastest way to master Prince is to standardize where tanks stand, where ranged stand, and how the raid moves when repositioning is required.
Nightbane is an optional difficulty check that rewards discipline. If your group is learning, do not force Nightbane at the start of the night when people are cold and mana habits are not settled. Save it for later when the team is warmed up, assignments are clear, and you know whether healer mana is stable. Nightbane becomes consistent when you assign interrupts, assign who handles key moments, and keep positioning stable so healers can plan their ranges. Once you farm Nightbane weekly, most other Karazhan bosses feel easier because your roster has learned the basics of calm execution.
Karazhan leadership rules that cut clear time
Karazhan clear time usually drops when leadership enforces three simple rules. First, nobody pulls without a marker and a ready check, even if the pack looks easy. Second, every dangerous cast has assigned interrupts with a backup, because missed interrupts cause most of the random deaths that waste time. Third, every wipe gets a quick fix, not a long debate: identify the trigger, restate the rule, and pull again. Healers should be encouraged to call for drinks early, because a raid that drinks proactively clears faster than a raid that constantly runs on empty. Tanks should be coached to move at a stable pace, because rushing creates messy pulls and slow recoveries. When those rules are enforced, Karazhan becomes a reliable weekly engine that supports the rest of Phase 1.
Gruul's Lair Phase 1 Mastery Tips
Gruul's Lair is short, but it is not forgiving when a raid is unorganized. It includes High King Maulgar and Gruul the Dragonkiller, and both encounters punish sloppy assignments and poor positioning. Because the raid is small, some groups assume they can wing it, and most early wipes come from that mindset. If you treat Gruul like a serious raid with clear roles, you will clear it quickly every week and it becomes one of the most efficient uses of raid time in Phase 1. Your goal should be to turn Gruul into a predictable block that your roster stops fearing.
Gruul mastery is also about being consistent with burst timing. Standardize one Bloodlust moment for Maulgar and one for Gruul, and keep it stable so performance problems become easy to diagnose. Gruul gets more dangerous over time, so defensive and healing cooldowns matter more later than early. If your raid learns to stay calm after each Shatter, you will kill Gruul even with average gear.
High King Maulgar: control and interrupts win the fight
Maulgar is a multi target encounter, not a single boss target dummy. The easiest way to win is to assign each advisor to a tank or control player, mark them clearly, and set a kill order your raid agrees on before the pull. Confirm crowd control assignments and remind players not to break control with careless cleave unless you deliberately choose a cleave plan. The most common wipe pattern is control breaks, healers panic, and tanks fall because healing attention is split. This is why Maulgar can feel harder than it should when the raid is chaotic.
Interrupt discipline is the difference between a clean kill and a messy wipe. Assign at least two interrupters to the healer target and ensure they are in range and focused on the cast. Tanks should keep controlled targets separated enough that accidental cleave does not break them. Healers should pre plan who is covering which tank, because multiple damage sources hit at once and improvisation often fails. If you keep assignments stable and enforce the kill order, Maulgar becomes a quick weekly clear that builds confidence.
Gruul: spacing discipline and calm resets after Shatter
Gruul becomes more dangerous as the fight progresses, so Phase 1 mastery is about surviving cleanly as damage ramps up. Your goal is not to tunnel damage, it is to maintain clean spacing so Shatter does not delete players and force a recovery spiral. Use clear spread calls before Shatter and establish a standard spread pattern your raid uses every week. Place markers and tell players exactly where they should stand so spacing becomes automatic. Remind everyone that Shatter kills when people are close, so the fix is spacing and discipline, not panic healing.
Cooldown planning matters more than front loading everything on pull. Save major defensive and healing cooldowns for later, because that is when Gruul starts to overwhelm groups. After every Shatter, call a short stabilization moment so healers catch up and players return to their correct positions. If you choose to Bloodlust on Gruul, do it at a stable moment, not during chaos, because wasted Bloodlust often leads to more deaths. The raid that survives cleanly usually kills Gruul, because deaths are the most common failure mode, not damage output.
| Encounter | Primary assignments | What most groups forget | One mastery habit | When to use Bloodlust |
|---|---|---|---|---|
| High King Maulgar | Tank or control each advisor, interrupt the healer target | Control breaks from careless cleave and weak swaps | No cleave break unless called, stay on kill order | Use early if your group needs a cleaner opener |
| Gruul the Dragonkiller | Spread map, Shatter call timing, late fight cooldown plan | Players drift closer over time and forget spacing | Reset positions calmly after every Shatter | After a Shatter when the raid is stable and spread |
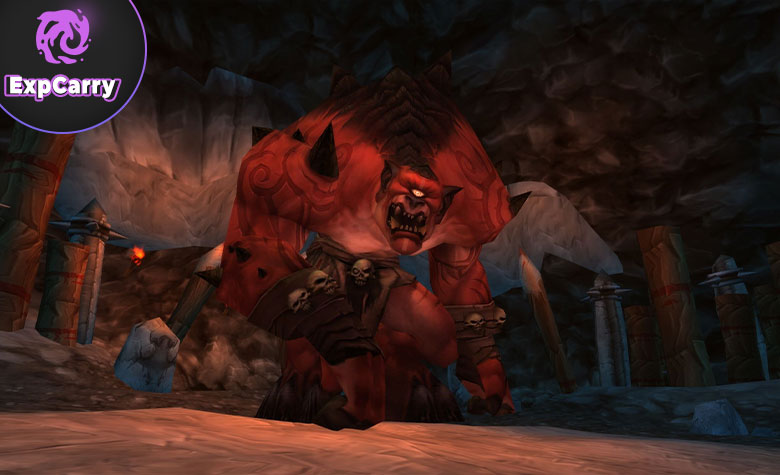
Magtheridon Phase 1 Mastery Tips
Magtheridon's Lair wipes more early rosters than Gruul because it is a coordination check disguised as a damage fight. The encounter begins with Hellfire Channelers and then transitions into Magtheridon, and most wipes happen because the raid fails interrupts, loses control of adds, or fails cube usage under pressure. This is the core truth of Magtheridon: if your cube plan is reliable, you win, and if your cube plan is unreliable, you wipe regardless of gear. That is why Magtheridon is also one of the best leadership training fights in Phase 1. A calm leader with clear assignments turns this raid into a quick weekly clear.
Magtheridon rewards preparation more than most raids. If everyone understands their job and knows where to stand, the fight becomes routine. If people are uncertain and waiting for someone else to act, it becomes a wipe chain. Your goal should be to script the fight, assign jobs clearly, and run the same script every week. Once you stop improvising cubes, Magtheridon stops being scary.
Phase one: channelers, interrupts, and add control
The opening phase is where you earn or lose the kill. Assign interrupters to each channeler group and identify who is responsible for every interruptable cast. Do not rely on vague calls like interrupt more, because that creates confusion. Tanks should position channelers so healers have line of sight and the raid can focus targets cleanly. DPS should follow the agreed kill order rather than free targeting. Crowd control is extremely valuable for learning groups, because uncontrolled adds create healer panic and cause deaths that later break cube teams.
Treat the channeler phase like a disciplined dungeon pull: mark targets, assign interrupts, and reduce chaos. If you handle this cleanly, you enter the Magtheridon phase with more players alive, more mana, and more confidence. If you handle it sloppy, you start the real boss phase already behind, and that is when cube failures happen because someone is dead or out of position. The fastest way to master Magtheridon is to make the first phase boring and repeatable. Boring is good.
Phase two: cube execution is the real boss
Once Magtheridon activates, Blast Nova and cube usage define the encounter. Your raid must use the cubes to stop the nova, and it must do it reliably while dealing with movement pressure and damage spikes. The key correction for most new rosters is simple: stopping Blast Nova requires five simultaneous cube channels, one player per cube, at the same time. This is not a “rotation of single clicks”, it is coordinated teamwork on every Nova.
The simplest mastery method is to build a fixed cube plan with two teams: Team A clicks the first Nova, Team B clicks the next Nova, and so on. Each cube should have a primary clicker and a backup. Backups should only click when the primary cannot, because random double clicks can cancel channels, desync the stop, and cause the next Nova to go off.
Your raid leader should call each Nova early, and clickers should treat the call as a mandatory job, not a suggestion. Do not swap cube assignments mid pull unless it is an emergency and everyone knows the swap. If someone cannot click reliably, replace them before the pull. Bloodlust does not fix cube failures, so do not use burst as a shortcut until the rotation is stable. Once cubes are consistent, Magtheridon becomes a controlled fight where the raid simply avoids avoidable damage and keeps tanks alive.
Positioning rules that prevent chain deaths
Magtheridon punishes panic movement because players drift out of healing range and chain deaths happen quickly. Set simple positioning rules: ranged spread with clear personal space, melee stay behind the boss unless avoiding a specific effect, and no one runs through other players unless there is no choice. When knock ups happen, return to your assigned spot rather than drifting randomly. If healers know where players should be, they can heal faster and waste less mana. Tanks should keep the boss stable so the room does not become chaos.
Another key Magtheridon habit is treating assignments as sacred. If a clicker says they cannot click, replace them before pull. If interrupters are missing, do not start anyway and hope it works. Use a ready check that includes quick confirmation from cube leaders and interrupt leaders. This takes seconds and saves a massive amount of time. When your raid treats Magtheridon like a coordination puzzle, it becomes one of the fastest raids in the tier.
Raid Wide Bloodlust Planning for Phase 1
Raid wide Bloodlust and Heroism change how you plan burst windows across Phase 1. The biggest advantage is simplicity: you no longer need to build parties around multiple Bloodlust groups or reshuffle groups mid raid for coverage. This makes leadership easier in 25 player raids, because the raid can focus on positioning and assignments instead of party micromanagement. The best approach is to standardize your Bloodlust usage by raid and by boss so your roster learns the rhythm and stops debating timing every week. Consistency is a multiplier, because it reduces confusion and makes performance problems easier to diagnose.
In Karazhan, the most practical Bloodlust usage is usually on your hardest boss of the night, because shortening a wall fight saves time and reduces frustration. In Gruul, Bloodlust is safest when used after a Shatter reset, when players are already spread and stable, because it avoids wasting burst during movement chaos. In Magtheridon, Bloodlust should only be used after cube execution is reliable, because burst does not fix missed clicks and can even amplify chaos if people panic. Your raid leader should call Bloodlust clearly, because the main waste pattern is players being out of position or saving cooldowns for a moment that never comes. A simple policy that you follow every week is better than a perfect policy that people forget.
| Raid | Simple Bloodlust policy | Best for | Avoid using it when | Why this policy works |
|---|---|---|---|---|
| Karazhan | Use on your hardest boss of the night | Turning a wall boss into a consistent kill | Your team is still messy on basic cues | Consistency matters more than perfect theoretical timing |
| Gruul's Lair | After a clean Shatter reset when positions are stable | Safe burst without losing players to spacing mistakes | People are collapsing toward the boss and ignoring spacing | It aligns burst with stability and reduces wasted cooldowns |
| Magtheridon's Lair | Only after cubes are stable and assigned | Shortening the fight after the main failure point is controlled | Your cube rotation is not reliable yet | Bloodlust does not fix cube failures, so fix the real issue first |
A Weekly Phase 1 Plan That Builds Fast, Clean Clears
If you want Phase 1 mastery, structure your week so your roster learns through repetition. Start with Karazhan because it gives the most practice time for tanks and healers and provides steady upgrades for many roles. Then run Gruul and Magtheridon in the same night if possible, because it keeps the 25 player roster engaged and turns short raids into a consistent habit. A consistent schedule reduces cancellations and makes recruiting easier, because players know exactly what they are signing up for each week. It also makes loot distribution calmer because attendance patterns become predictable.
Use performance review without turning it into blame. Track wipe causes, identify the one repeated mistake that wastes the most time, and fix that one thing first. In Karazhan, this is often trash pace, missed interrupts, or drink discipline. In Gruul, it is Maulgar control and Shatter spacing. In Magtheridon, it is cube execution and interrupts during the channeler phase. Fix one major failure per week and your clear time drops quickly.
Keep Phase 1 healthy by rotating responsibility without rotating the entire plan. Let different players call spreads or lead specific pulls, but keep the overall strategy consistent so new leaders do not reinvent everything. Encourage players to learn their job in the fight, not argue about theory during raid time. When someone makes a mistake, correct it quickly, restate the rule, and move on. Over a month, this creates a roster that clears cleanly even on average nights, which is what real mastery looks like.
Conclusion
TBC Classic Phase 1 Mastery is about turning Karazhan, Gruul, and Magtheridon into a reliable weekly system. Karazhan rewards pacing, discipline on trash, and role habits that prevent burnout across a long run. Gruul rewards assignments and spacing, especially on Maulgar control and the Shatter discipline that keeps the raid stable as damage ramps up. Magtheridon rewards preparation and coordination, with cube execution and interrupt assignments acting as the true success gate more than gear. Raid wide Bloodlust planning can simplify burst timing and reduce party micromanagement, but it only helps if your fundamentals are already stable. If you focus on clarity, repeatability, and calm leadership, Phase 1 becomes fast farm content that gears your roster and prepares your guild for every later tier.


